
Parking under a shady tree on a hot day feels like a smart move—until you find your car’s perfect finish dotted with sticky, stubborn sap. Hey, we've all been there! The secret to getting tree sap off your car isn't about scrubbing harder; it's about working smarter. Using a dedicated bug and tar remover is the professional's choice because it dissolves the sap's bond without you having to scrub and risk scratching your beautiful paint.
Why That Sticky Sap Is a Problem for Your Paint
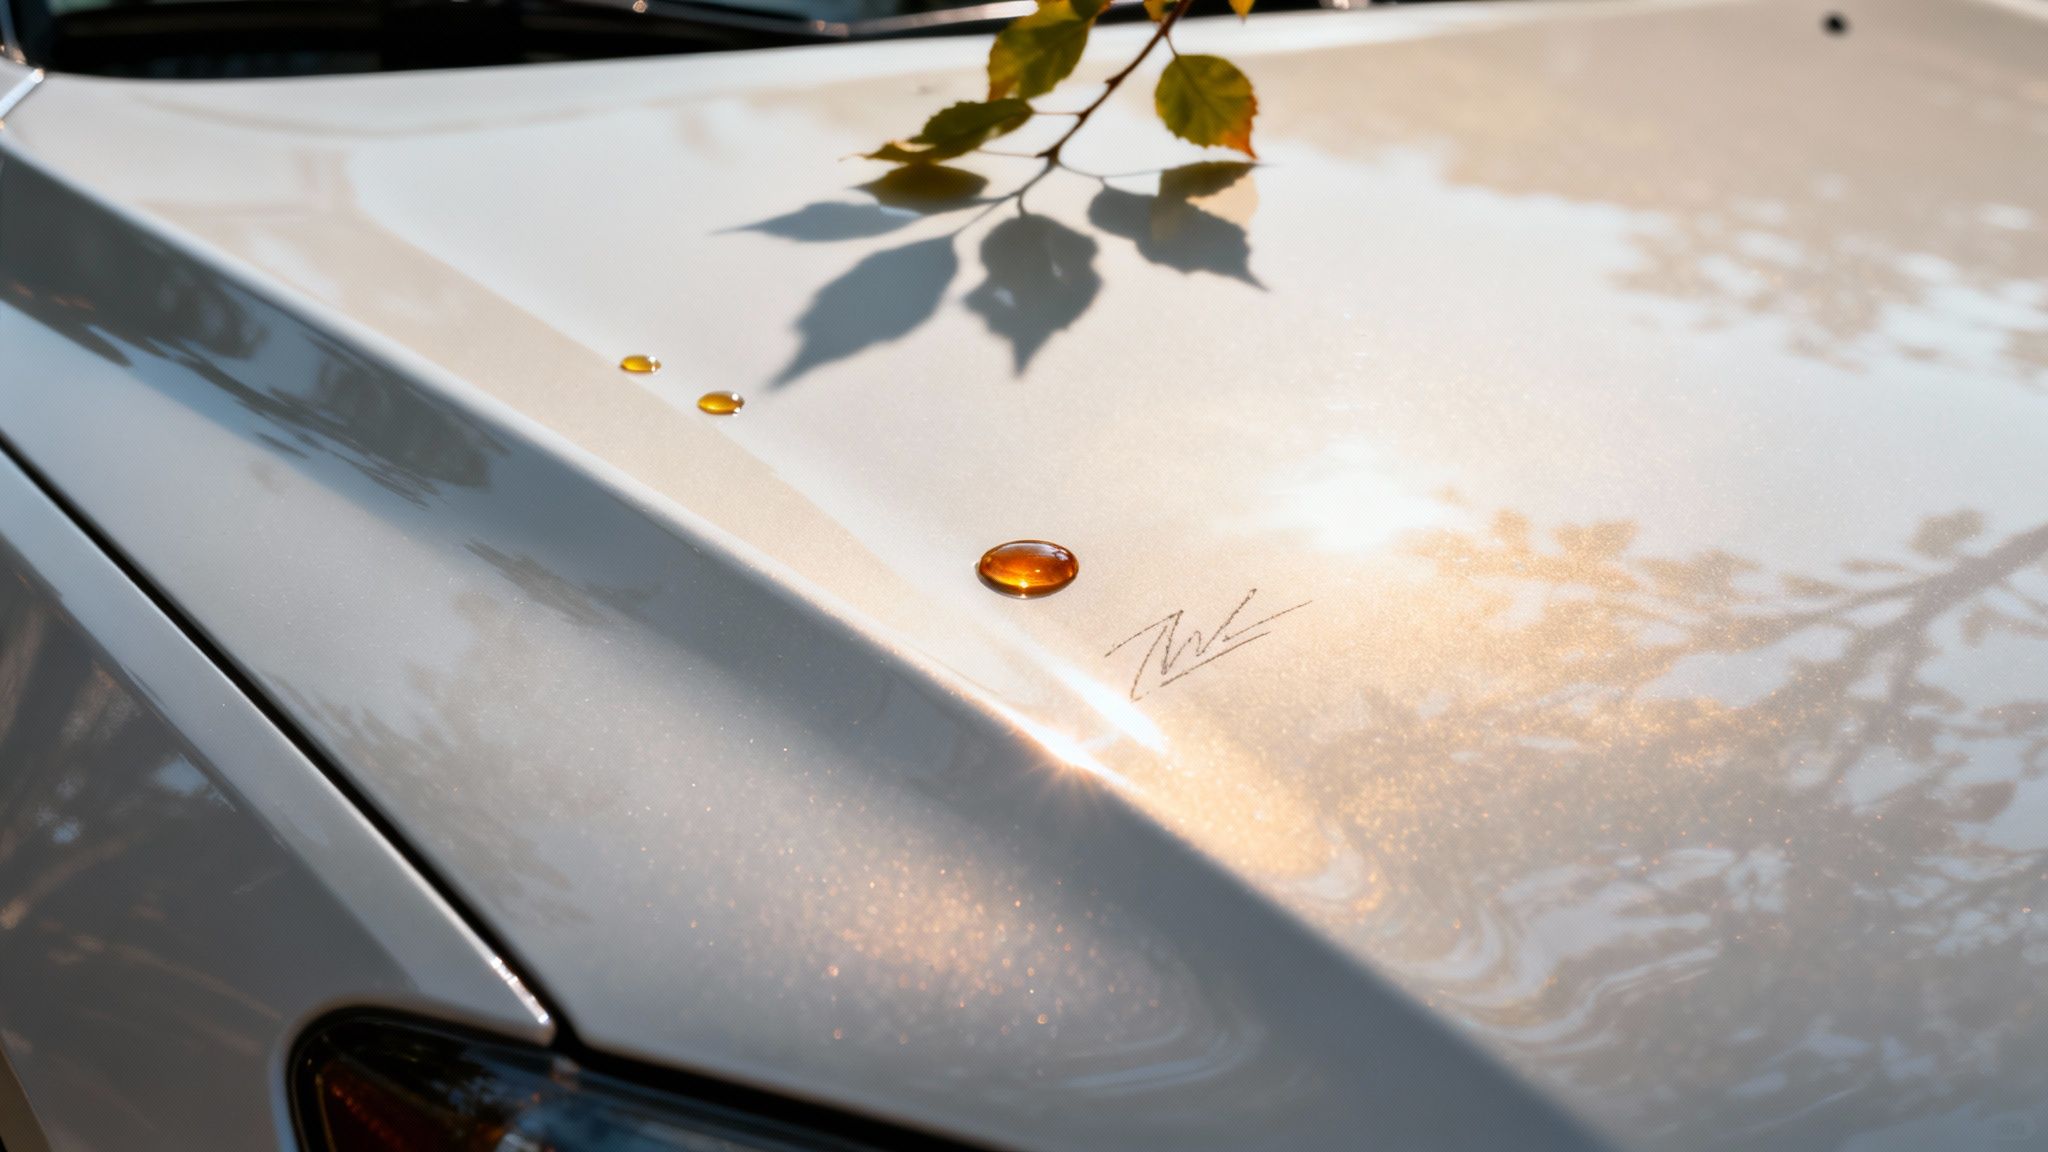
That little drip of sap looks harmless, but it's a genuine threat to your vehicle’s paint. Tree sap is a sugary, slightly acidic goo that starts a surprisingly destructive process the moment it lands on your car.
When the sun beats down, especially during those warm Central Pennsylvania summers, it bakes the sap right onto the surface. This hardens it and creates a chemical bond with your car's clear coat. What was just a sticky spot can turn into a serious headache much faster than you’d think.
The Real Damage Sap Can Do
Once that sap has bonded to the paint, it starts to eat away at the protective clear coat. This is where the real problems begin, and they can seriously hurt your car's appearance and value.
- Etching: Sap’s acidic nature can create tiny pits and craters in the clear coat. This is called etching, and it leaves the finish looking dull. It's often impossible to fix without professional paint correction.
- Discoloration: Over time, the sap can leave behind a yellowish or brownish stain, which is especially obvious on lighter-colored cars.
- Permanent Bonding: The longer sap sits, the harder it gets. Petrified sap can become almost as tough as the clear coat itself, making it incredibly difficult—and risky—to remove.
When faced with this sticky mess, many people grab whatever they have on hand. Unfortunately, this is exactly how a small problem turns into a costly disaster. In fact, avoiding improper techniques can prevent up to 80% of sap-related paint damage. Studies from detailing experts show that DIY mistakes, like using the wrong chemicals or just letting the sap bake in the sun, are a major reason for expensive repaints. You can explore the findings from detailing experts to see more on this.
Remember the golden rule: Dissolve the sap, don't fight it. Aggressive scrubbing or scraping almost always scratches the paint, turning a simple cleanup into a repair job.
Understanding how sap interacts with your car’s paint is the first step in proper decontamination, which is a cornerstone of professional detailing. It shows why it's so important to act quickly and, more importantly, to use the right method.
If you're dealing with a tough sap situation or just want to guarantee a perfect, damage-free result, calling in a pro is your best bet. You can see how we tackle these challenges by checking out the real-world results in our Google Business Profile reviews. Don't let a few drips of sap become an expensive mistake—let us handle it safely for you.
The Pro-Approved Toolkit for Safe Sap Removal
When you spot that sticky, amber-colored glob on your car, your first instinct might be to reach for whatever cleaner you have under the kitchen sink. But take it from us professionals: that's a gamble you don't want to take with your car's finish. The real secret to removing tree sap isn't about brute force or hard scrubbing; it’s about working smarter with the right stuff. The goal is to dissolve the sap, making it let go of your paint without a fight.
Before you even touch the sap, you need to prep the area. Give the spot a gentle wash with a good, pH-neutral car soap and a clean microfiber mitt. This simple step clears away any loose dirt and grit that could turn into sandpaper when you start working on the sap, saving you from a world of fine scratches. Think of it as clearing the battlefield for a safe, precise mission.
Building Your Professional-Grade Kit
With the area clean and dry, it's time to gather your supplies. You don't need a huge arsenal, but what you use absolutely matters. Using products specifically made for automotive paint is non-negotiable if you want a perfect, damage-free result.
Here’s what a professional detailer would grab:
- Dedicated Bug & Tar Remover: This is your MVP. These are specially formulated solvents designed to break down stubborn organic gunk like sap and bugs without damaging your car’s clear coat.
- Plush Microfiber Towels: Have at least two on hand. One is for applying the product and wiping away the gooey mess, and a second, fresh one is for the final buff. Microfiber is key because its ultra-soft fibers trap the residue, lifting it away from the surface safely.
- Patience and a Shaded Spot: Seriously, don't skip this. Working in direct sun or on a hot panel makes cleaners evaporate in seconds, rendering them useless. Always find a cool, shady spot to work.
A professional's approach is all about being methodical. We never rush. The only way to guarantee the paint underneath stays flawless is to let the chemical do the heavy lifting—softening and dissolving the sap. Aggressive rubbing is the enemy of a perfect finish.
If you're looking to dive deeper into taking care of your car's exterior, our collection of articles on DIY car care is packed with more in-depth advice.
Why Professional Products Matter
So, why are we so against using a home remedy? It all comes down to chemistry. Household cleaners, rubbing alcohol, and other DIY solutions are often way too harsh for modern car paint. They can easily soften, dull, or even strip the protective clear coat, leaving you with a permanent blemish that’s much costlier to fix than the original sap spot.
A professional-grade product, on the other hand, is engineered for one job. It's powerful enough to dissolve the sap but gentle enough to leave your paint unharmed. By starting with these industry-approved tools, you’re setting yourself up for a successful, scratch-free removal every time. Of course, if gathering supplies and playing chemist on your weekend sounds like a chore, our mobile detailing team is always ready to bring the entire professional toolkit right to your driveway.
A Practical Guide to Removing Stubborn Sap
Alright, you've got your supplies. Now for the fun part: actually getting that stubborn sap off your car. The real secret pros know isn't about scrubbing harder; it's about being patient and letting the right product do the heavy lifting. This is how you dissolve those sticky spots without damaging your paint.
First thing’s first: you can't work on a dirty, hot surface. Before you even think about tackling the sap, the car needs to be clean, completely dry, and cool to the touch. This prep work is non-negotiable.
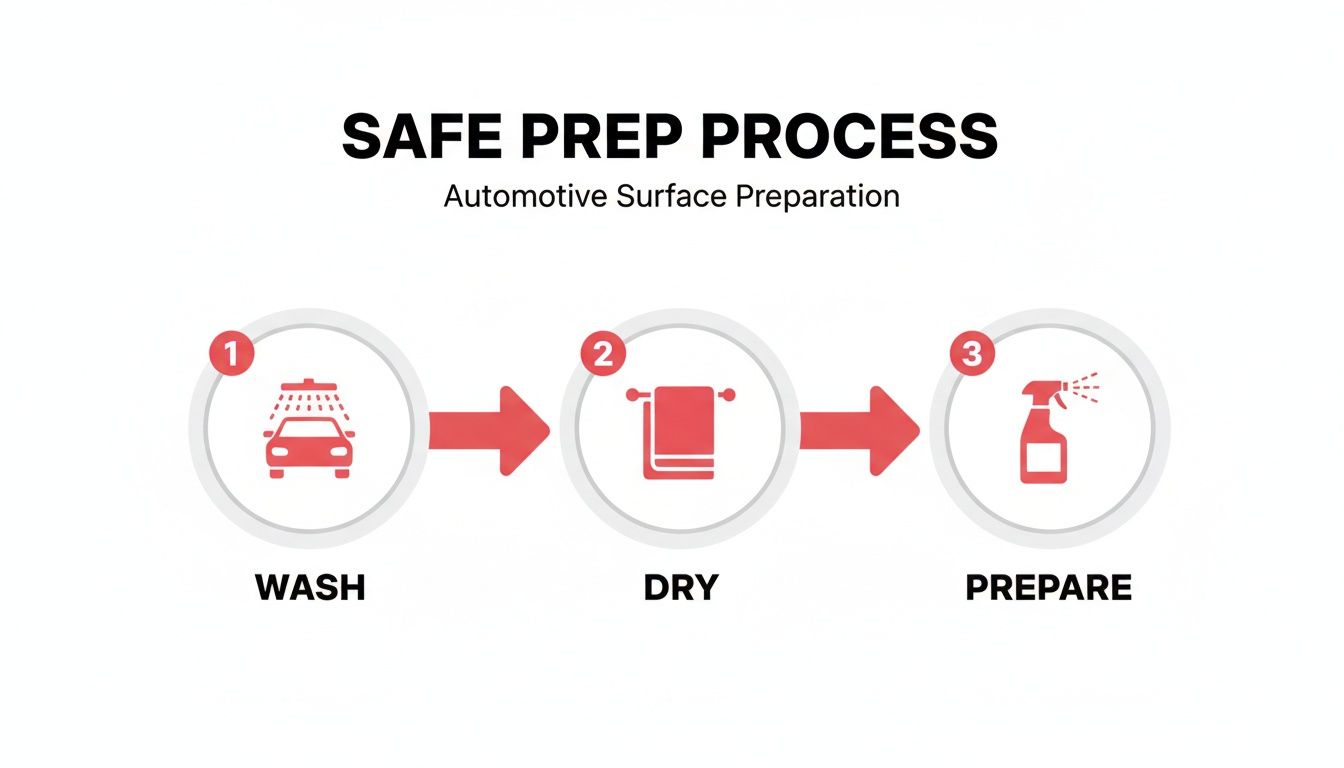
Following these simple steps ensures you're only dealing with the sap itself, not grinding leftover road grit into your clear coat. That’s the key to a scratch-free finish.
Applying a Professional Bug and Tar Remover
With your car properly prepped, it's time to grab that bug and tar remover. This is where a little bit of precision goes a long way.
Go ahead and spray a small amount of the remover directly onto the sap droplet. No need to soak the whole panel. Now, just let it sit. This is the most crucial part of the whole process. You need to let the product dwell for the time listed on the bottle, which is typically 30 to 60 seconds. This gives the solvents a chance to work their magic, breaking down the sap's hardened, sugary structure from the inside out.
Once it's had a moment to work, take a clean, plush microfiber towel and gently wipe the spot. Use a single, light pass. The softened sap should lift right off. If a little bit remains, don't push harder or start scrubbing—that’s how you create swirls and scratches. Just re-apply a little more product and let it dwell again.
This "less is more" mindset is what separates a pro detailer from an amateur. In fact, a quality bug and tar remover has a 95% success rate on sap that’s been on a car for up to two weeks, but only when it’s allowed to dwell properly. These products are strong enough to strip any wax or sealant, so protecting the paint afterward is a must. You can get more great insights on product effectiveness and aftercare from the team at America's Service Station Alpharetta.
Pro Tip: Always fold your microfiber towel into quarters. This little trick gives you eight clean surfaces to work with. Once a section is dirty, just flip to a new one. It keeps you from accidentally smearing dissolved sap back onto the paint.
Taking Decontamination to the Next Level
After the sap is gone, you're not quite done. You need to neutralize the spot where you just worked. Give the area a light spritz with some water or a quick detailer spray and wipe it down with a fresh, clean microfiber. This step removes any chemical residue that you don't want sitting on your paint.
Now, if you want a truly perfect, slick finish—especially if you were dealing with a lot of sap spots or a fine mist of it—it's time for a clay bar. An automotive clay bar is a special resin compound that works by gently grabbing and pulling out tiny, embedded contaminants from the microscopic pores of your car’s paint.
To do it right, spray a clay lubricant over a small section of paint and then glide the bar back and forth over the surface with very light pressure. At first, you'll feel it grabbing and catching. As it pulls the contaminants out, it will start to glide smoothly. This process, which we call "claying," is what leaves the surface feeling as smooth as glass.
While claying is incredibly effective, it does require a delicate touch to avoid marring the finish. If your car has widespread sap contamination, or if you just want that flawless, showroom feel without the risk, this is a great time to call in the pros. Our team has the right tools and the experience to decontaminate your vehicle's paint safely and efficiently. Just take a look at the perfect finishes we deliver for our clients on our Google Business Profile.
Here's a quick look at the professional-grade products we use and when they're the best tool for the job.
Professional Sap Removal Methods at a Glance
Choosing the right tool is just as important as the technique. Using a harsh method on a fresh spot would be overkill, while just a clay bar won't do much against a fossilized blob of sap. If you're looking at your car and feeling unsure about the best approach, we are always happy to help.
Restoring Your Car's Shine and Protection
Alright, you did it! That ugly, sticky tree sap is gone. It's tempting to stand back, admire your work, and call it a day, but we're not quite finished yet. Think of this next step as the one that separates a quick fix from a job done right.
Here's the thing: those bug and tar removers that worked so well on the sap also stripped away your car's protective layer of wax or sealant. Right now, that spot is clean but completely naked, exposed to whatever the world throws at it. Skipping this final step is like leaving your house in a Pennsylvania winter without a coat—you're just asking for trouble.
Why Protection Isn't Optional
Applying a fresh layer of protection goes way beyond just making your car look shiny again (though that's a nice perk). It's an essential part of maintaining your car's paint for the long haul.
A good wax or paint sealant acts as a sacrificial barrier for your car's clear coat. This invisible shield is your paint's first line of defense against all sorts of nasty stuff:
- UV Rays: It blocks the sun's harsh rays that cause paint to fade and look chalky over time.
- Contaminants: It creates a super-slick surface, making it much harder for future tree sap, bird droppings, and road tar to get a grip.
- Moisture: It makes water bead up and roll right off, which helps prevent rust and those annoying water spots.
Basically, protecting the paint makes your next cleanup a whole lot easier. New gunk will sit on top of the wax, not etch its way into your clear coat.
Restoring this protective barrier isn’t just about finishing the job. You’re actively defending your car against the next problem. It’s the single most important thing you can do after cleaning any kind of contamination off your paint.
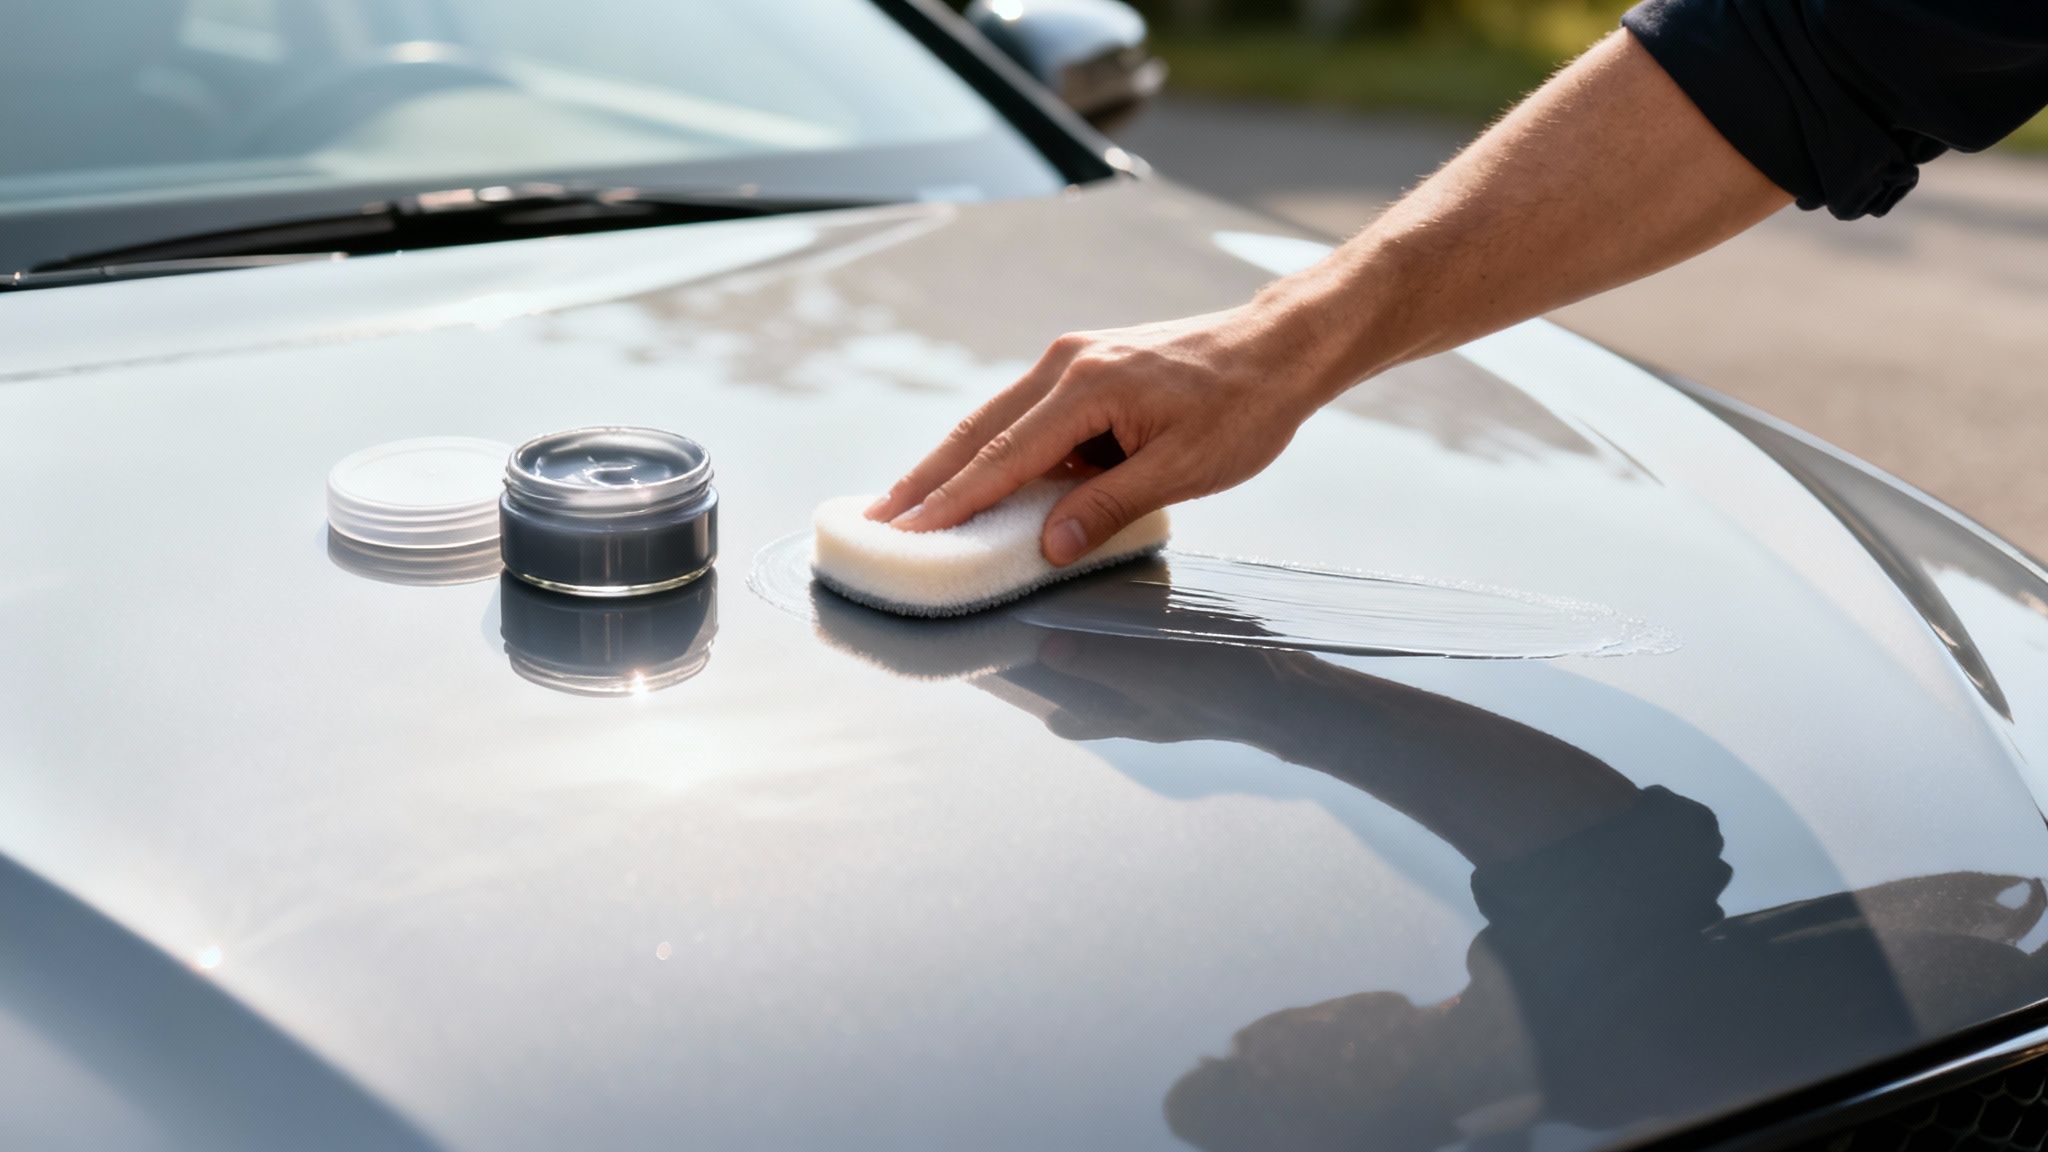
Applying Your Protectant Like a Pro
Whether you're a fan of classic carnauba wax for its deep, warm glow or prefer a modern paint sealant for its toughness and longevity, proper application is everything. You'll get the best results by working on a clean, cool, and completely dry surface. If you need some tips, our guide on the best way to dry a car after washing will get you perfectly prepped.
Using a clean foam applicator pad, apply a thin, even coat of your chosen product. Work in small, overlapping sections—don't try to do the whole hood at once. Let it dry to a haze (check the bottle for the recommended time), then gently buff it away with a clean, plush microfiber towel to reveal that brilliant shine.
This last step is what locks in your hard work and keeps your car looking its best. If you'd rather have an expert handle it, our mobile detailing service includes applying professional-grade sealants. We can take care of the sap removal and restore your car's protection all in one visit, giving you a flawless finish that lasts. Get in touch, and we'll get your car's shine and defense back to 100%.
When to Skip the DIY and Call a Professional
Knowing how to get tree sap off your car also means knowing when to put the supplies down and pick up the phone. It's one thing to tackle a few fresh, gooey spots, but it's another thing entirely when you're facing a stubborn, baked-on mess.
There are certain red flags that tell you a DIY attempt might do more harm than good. Your car's paint is surprisingly delicate, and trying to muscle off petrified sap can easily lead to deep scratches or even clear coat failure. The goal is to solve the sap problem, not create a much bigger, more expensive one.
Signs It's Time to Call Us
If you run into any of these situations, your best bet is to call in a pro. Our team has seen it all and has the specialized gear and know-how to handle these tough cases without damaging your paint.
- Petrified Sap: Has that sap been baking on your car for weeks, or even months? If it’s hard as a rock, don't even think about scraping or aggressive rubbing. You're almost guaranteed to scratch the paint. We use specific solvents and techniques to safely break down even the most fossilized sap without hurting the finish.
- Visible Etching: Take a close look at the paint right around the sap spot. Do you see a faint ring or a slight crater in the clear coat? That's called etching, and it means the acidic sap has already started to eat into the paint. Just removing the sap won't fix this—it requires professional paint correction to level the surface and restore the gloss.
- Custom or Delicate Paintwork: If you have a car with a matte finish, a custom paint job, or even older single-stage paint, you have to be extra careful. These surfaces are incredibly sensitive to chemicals and abrasion. Don't gamble with a unique or fragile finish; it's just not worth the risk.
I can't tell you how many times we've had to fix a DIY job gone wrong. One of the biggest mistakes people make is underestimating just how bonded old sap can get. A client once tried to pry off a quarter-sized blob of pine sap that sat on their hood all summer. They ended up leaving deep gouges that required extensive machine polishing. A simple service call would have cost a fraction of the repair.
Don't Risk Your Paint
Your car is a major investment, and its paint is the first line of defense against the elements. When you’re staring down a tough sap situation, the smartest and safest move is to let an experienced detailer take the wheel. We have the right tools, the right products, and most importantly, the right touch to get the job done without a scratch.
Want to see the kind of challenging jobs we handle and the pristine results we deliver? Check out the reviews from our happy clients on our Google Business Profile. We bring our expertise right to your driveway for a perfect, risk-free result every single time.
Answering Your Top Tree Sap Questions
Over the years, we've heard just about every question you can imagine when it comes to this sticky mess. Let's tackle a few of the most common ones we hear from our amazing clients.
Is It Okay to Use Hand Sanitizer or Rubbing Alcohol?
This is a big one, and we get why people ask. It seems logical—alcohol cuts through sticky stuff, right? But from a professional standpoint, we strongly advise against it.
Household products like hand sanitizer and rubbing alcohol can be too aggressive for your car's clear coat. They can strip your wax and sealant in seconds, and in some cases, can even soften and dull the paint itself, leaving a hazy, damaged spot that's a magnet for future problems.
Your best and safest bet is to always use a dedicated bug and tar remover. These are specifically formulated to break down sap without harming your car's finish. It's the industry-approved method for a reason!
How Quickly Does Sap Actually Damage Car Paint?
Time is not your friend here. In the summer heat, fresh sap can start to harden and bond with your clear coat in just a couple of days.
The longer it sits and bakes in the sun, the more it etches into the paint. What starts as a simple cleanup job can quickly turn into a permanent blemish that requires a detailer to polish out. Act fast! If you can't get to it right away, give us a call! You can find our location and contact information easily on our Google Business Profile.
A quick note on car washes: while a good wash might take care of sap that literally just dripped onto your car, it won't touch anything that's had a chance to dry. Think of the wash as the prep step—it clears away the surface dirt so you can get to the real work of dissolving the sap itself.
What if My Car is Covered in Tons of Tiny Specks?
Ah, the classic "sap mist" that happens when you park under the wrong tree for too long. If your car feels like fine-grit sandpaper, you've got a bigger job on your hands.
This is where a clay bar treatment becomes your best friend. After a thorough wash, a clay bar will gently glide over the paint and shear off all those tiny, bonded specks without scratching. It's incredibly effective.
Honestly, doing an entire vehicle with a clay bar takes a lot of time and a bit of technique to get right. If your car is peppered with sap, this is the perfect time to call in a pro. We can save you a whole afternoon of tedious work and ensure you get that glass-smooth finish back.
Knowing how to handle tree sap is half the battle. If you're looking at a mess that feels overwhelming or you just want it done right without the risk, that's what we're here for.
Don't let tree sap get the best of your car's paint. For a professional, safe, and ridiculously convenient solution, trust the experts at The Mobile Buff. We bring the detailing shop right to you, ensuring a flawless finish every time. Ready to see the difference?
