
Ah, winter. Along with the snow and holidays, it brings every car owner's least favorite decoration: those ghostly white salt stains that appear on your carpets and just refuse to leave. If you're tired of seeing them, you've come to the right place. Successfully removing salt stains from car carpet isn't about scrubbing harder—it's about using the right professional techniques to dissolve and extract stubborn salt crystals from deep within the carpet fibers.
As professional detailers, we want to give you a look into how we tackle this common winter problem. The secret lies in using industry-approved methods to fully pull that salty residue out for good.
Why Are Salt Stains So Tenacious?
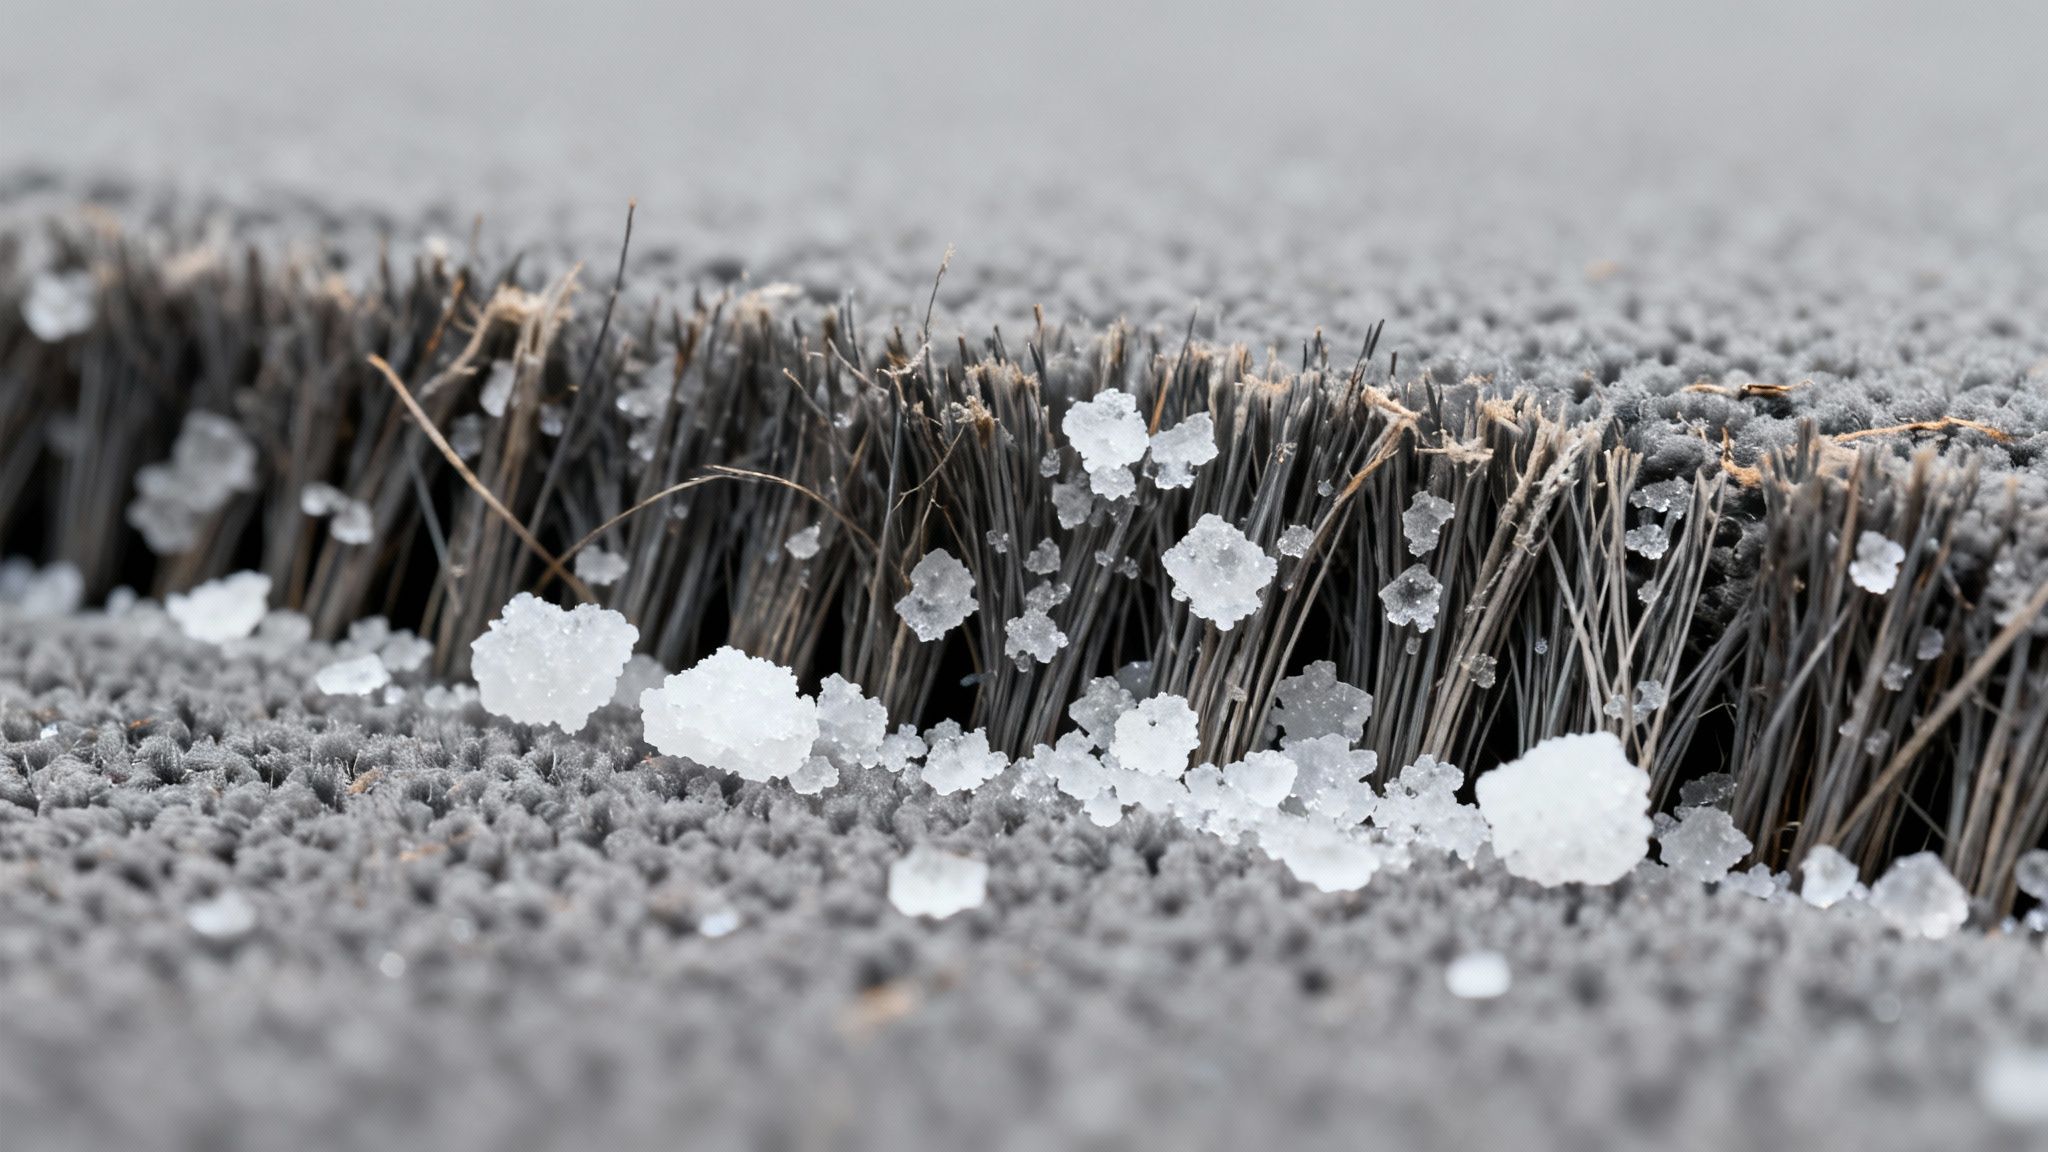
Ever scrub a salt stain until it disappears, only to have it reappear the next day like a bad dream? You're not alone, and there's a good reason for it. The rock salt spread on roads isn't just plain old table salt. It’s a harsh cocktail of sodium chloride, various minerals, and other deicing chemicals.
When that slushy, salty mess from your boots gets into your car, it sinks far below the surface. The water eventually evaporates, but it leaves behind a web of mineral deposits that crystallize and lock onto the carpet fibers. That's what creates that stiff, crusty white residue.
It's More Than Just an Ugly Stain
Letting those salt stains hang around does more than just make your car’s interior look grubby. That chemical gunk is both abrasive and mildly corrosive. Over the course of a single winter, this buildup can cause some real problems:
- It Wears Down Your Carpet: Those sharp little crystals act like sandpaper, physically breaking down the carpet fibers and making them look frayed and worn out.
- It Can Cause Rust: The salt traps moisture against the floor of your car. That combination of dampness and corrosive chemicals can slowly start to eat away at the metal floor pan, leading to rust.
- It Causes Permanent Damage: If you leave them for too long, the minerals in the road salt can actually bleach the dye in your carpet, leaving behind permanent discoloration.
This isn't a small issue. We're talking about over 20 million tons of salt hitting U.S. roads every year. Research has shown that this stuff can degrade carpet fibers by up to 30% in just one winter, which helps explain why 68% of drivers in snowy regions complain about salt damage inside their cars.
My Two Cents: I've seen it a hundred times—people just scrub the surface and think they're done. The real trick is to dissolve the salt crystals completely, then use a powerful extractor to pull that entire salty solution out of the carpet and the padding underneath. Anything less, and it's just going to come back.
This deep extraction method is what we pros focus on, and it's why our results last. You can dive deeper into our winter car care tips to learn how to protect your ride all season long.
Now that you know what you’re up against, let’s get into the prep work that makes all the difference.
Getting Your Carpet Ready for the Real Work
Before any cleaning solution touches the carpet, proper prep work is essential. Honestly, this is the part most people skip, and it's why they get frustrating results. Think of it like a chef prepping ingredients—it's the foundation for a great outcome. Properly preparing the area is a non-negotiable step in our professional process, and it sets the stage for getting those stubborn salt stains out for good.
This isn't just about tidying up. It's about breaking down the enemy—those crusty salt crystals—and making them vulnerable to a professional cleaning. Rushing this part is a common mistake and usually why those hazy white stains reappear a few days later.
Clear the Floor for a Proper Cleaning
First things first, get everything off the floor. You need a completely clear workspace to see what you're up against.
- Floor Mats: Pull them all out, both rubber and carpeted. We'll deal with those separately.
- Personal Stuff: Get rid of any trash, old coffee cups, gym bags—anything that's in your way.
- Move the Seats: This is a big one. Slide your front seats all the way forward to get the carpet underneath, then slide them all the way back to get the front.
Just clearing the space lets you see every single salt stain and work efficiently. It’s a small step that makes a massive difference.
The Pro Trick for Loosening That Crusty Salt
Here’s a secret we use on every single interior detail. Before you even touch a vacuum, grab a stiff-bristled detailing brush. Get in there and scrub the salt-stained areas hard. Really go at it—up and down, side to side, and in little circles.
This physical scrubbing is crucial. It acts like a tiny jackhammer, breaking up the rock-hard salt deposits that have basically glued themselves to your carpet fibers. Some of these patches are so caked-on that a vacuum, no matter how powerful, just can't lift them on its own. By busting them up first, you make the vacuum's job much more effective.
I can't stress this enough: brushing before you vacuum is the single most important prep step. I’ve seen this simple action remove up to 50% of the visible surface salt before we even introduce any cleaning solutions. It saves time and product, leading to a much better final result.
After you've agitated all the salty spots, it's time for a thorough vacuuming. Use a good, strong vacuum with a crevice tool to hit all the tight spots along the seat tracks, center console, and door sills. Go over the entire carpet several times, moving slowly. This gives the vacuum a real chance to suck up all the loosened salt and dirt you just broke free.
Taking these prep steps seriously is what separates a quick, temporary fix from a true, professional-level clean. If you happen to be in the Central PA area and want to see how the pros handle it from start to finish, you can find our mobile detailing service location on Google and see our work for yourself.
Alright, ready for the main event? Let's dive into the professional method for dissolving and pulling out whatever salt is left.
How We Tackle Salt Stains Like the Pros
Alright, you’ve done the prep work and the carpet is clear of loose debris. Now for the main event: getting rid of those ugly, chalky salt stains for good. While the internet is full of DIY tricks using household items, in the professional detailing world, we rely on methods that are both safe for your vehicle and incredibly effective.
Our secret weapon isn't a kitchen remedy. We use a high-quality, pH-neutral salt stain remover designed specifically for automotive carpets. These professional products are formulated to break down the tough mineral bonds in road salt—things like calcium and magnesium chloride—without the risk of bleaching or damaging your car's interior fabric. That's why we always recommend using a dedicated automotive product instead of a home-brewed solution, which can lead to unpredictable results.
Applying and Working in the Solution
With the right product in hand, technique is everything. We start by applying the solution generously over the stained areas, making sure to saturate the white rings completely. Then, we let it sit for a few minutes. This "dwell time" is where the magic happens; it gives the formula a chance to work its way deep into the fibers and start dissolving the crystallized salt.
Next, it's time for some agitation. Using a soft-bristled brush, we work the solution into the carpet with careful, circular motions. This helps the cleaner penetrate all the way to the base of the fibers, lifting the dissolved salt and grime up to the surface. It's a delicate balance—you want to be thorough enough to lift the stain, but gentle enough to avoid fraying the carpet.
Remember, the initial prep you did—the brushing and vacuuming—is what makes this step so effective. It clears the way for the cleaner to attack the salt directly.
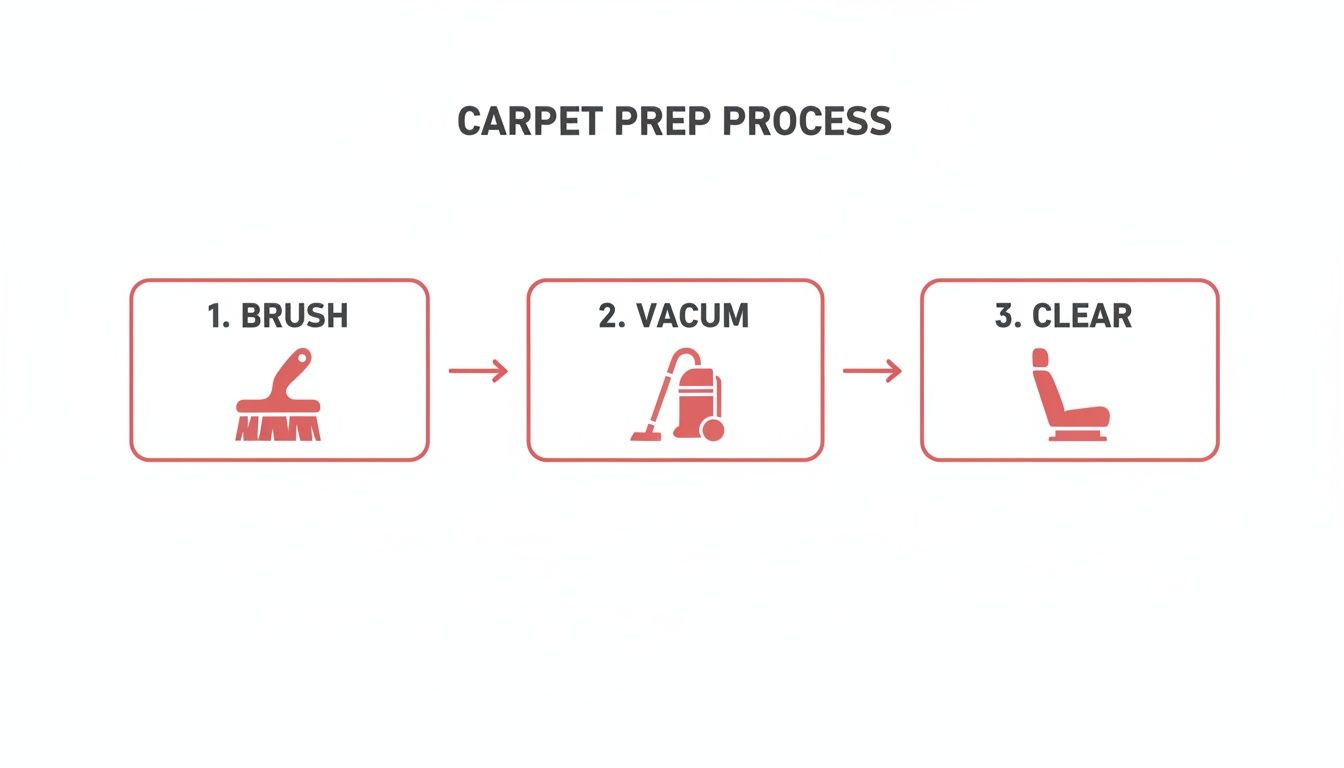
This simple Brush > Vacuum > Clear workflow is an absolute must. Skipping it is like trying to wash a muddy car without rinsing it first—you just end up making a bigger mess.
Extraction: The Most Important Step of All
This is where professionals truly separate themselves from the weekend warrior, and it's the key to getting results that actually last. After the salt is dissolved and agitated, it must be extracted. This isn't optional; it's the entire point of the process.
We use a commercial-grade hot water extractor to do this. The machine forces hot water into the carpet and immediately sucks it back out with a powerful vacuum, pulling all the dissolved salt, dirt, and cleaning solution with it.
Here’s why extraction is so critical: If you just spray a cleaner and scrub, you're not actually removing the salt. You're just creating a salty, dirty slurry that soaks down into the carpet padding. As the carpet dries, that salt mixture wicks right back up to the surface, and a day or two later, your stain is back. This is, without a doubt, the #1 reason at-home salt removal fails.
To truly understand how these steps come together, here's a quick look at the professional workflow.
Professional Stain Removal Technique Breakdown
This systematic approach guarantees that the stain doesn't just disappear temporarily—it's gone for good.
Extraction ensures every last bit of grime is pulled out of your vehicle. It’s the same core technique we use in our professional interior shampoo services to deliver a deep clean that you can see and feel. This single step is what stops those frustrating "ghost stains" from ever coming back.
Once the salt is gone, the final task is to get the carpet completely dry to prevent any musty odors or mildew from taking hold. This methodical, step-by-step process is the only way to truly defeat winter salt stains.
Ensuring a Perfect Dry Finish
It’s a great feeling to see those ugly salt stains finally disappear, but don't close up the car just yet. The job isn’t truly finished until the carpet is completely dry.
Honestly, this step is just as critical as the cleaning itself. Leaving behind a damp carpet is basically rolling out the welcome mat for musty odors, mold, and mildew. You'll just be trading one problem for another.
From a professional standpoint, the drying phase is non-negotiable for a perfect result. Trapped moisture doesn't just smell awful; it can create new water rings and completely undo all your hard work. The key to avoiding this disaster is simple but essential: maximize air circulation.
Promoting Fast and Thorough Drying
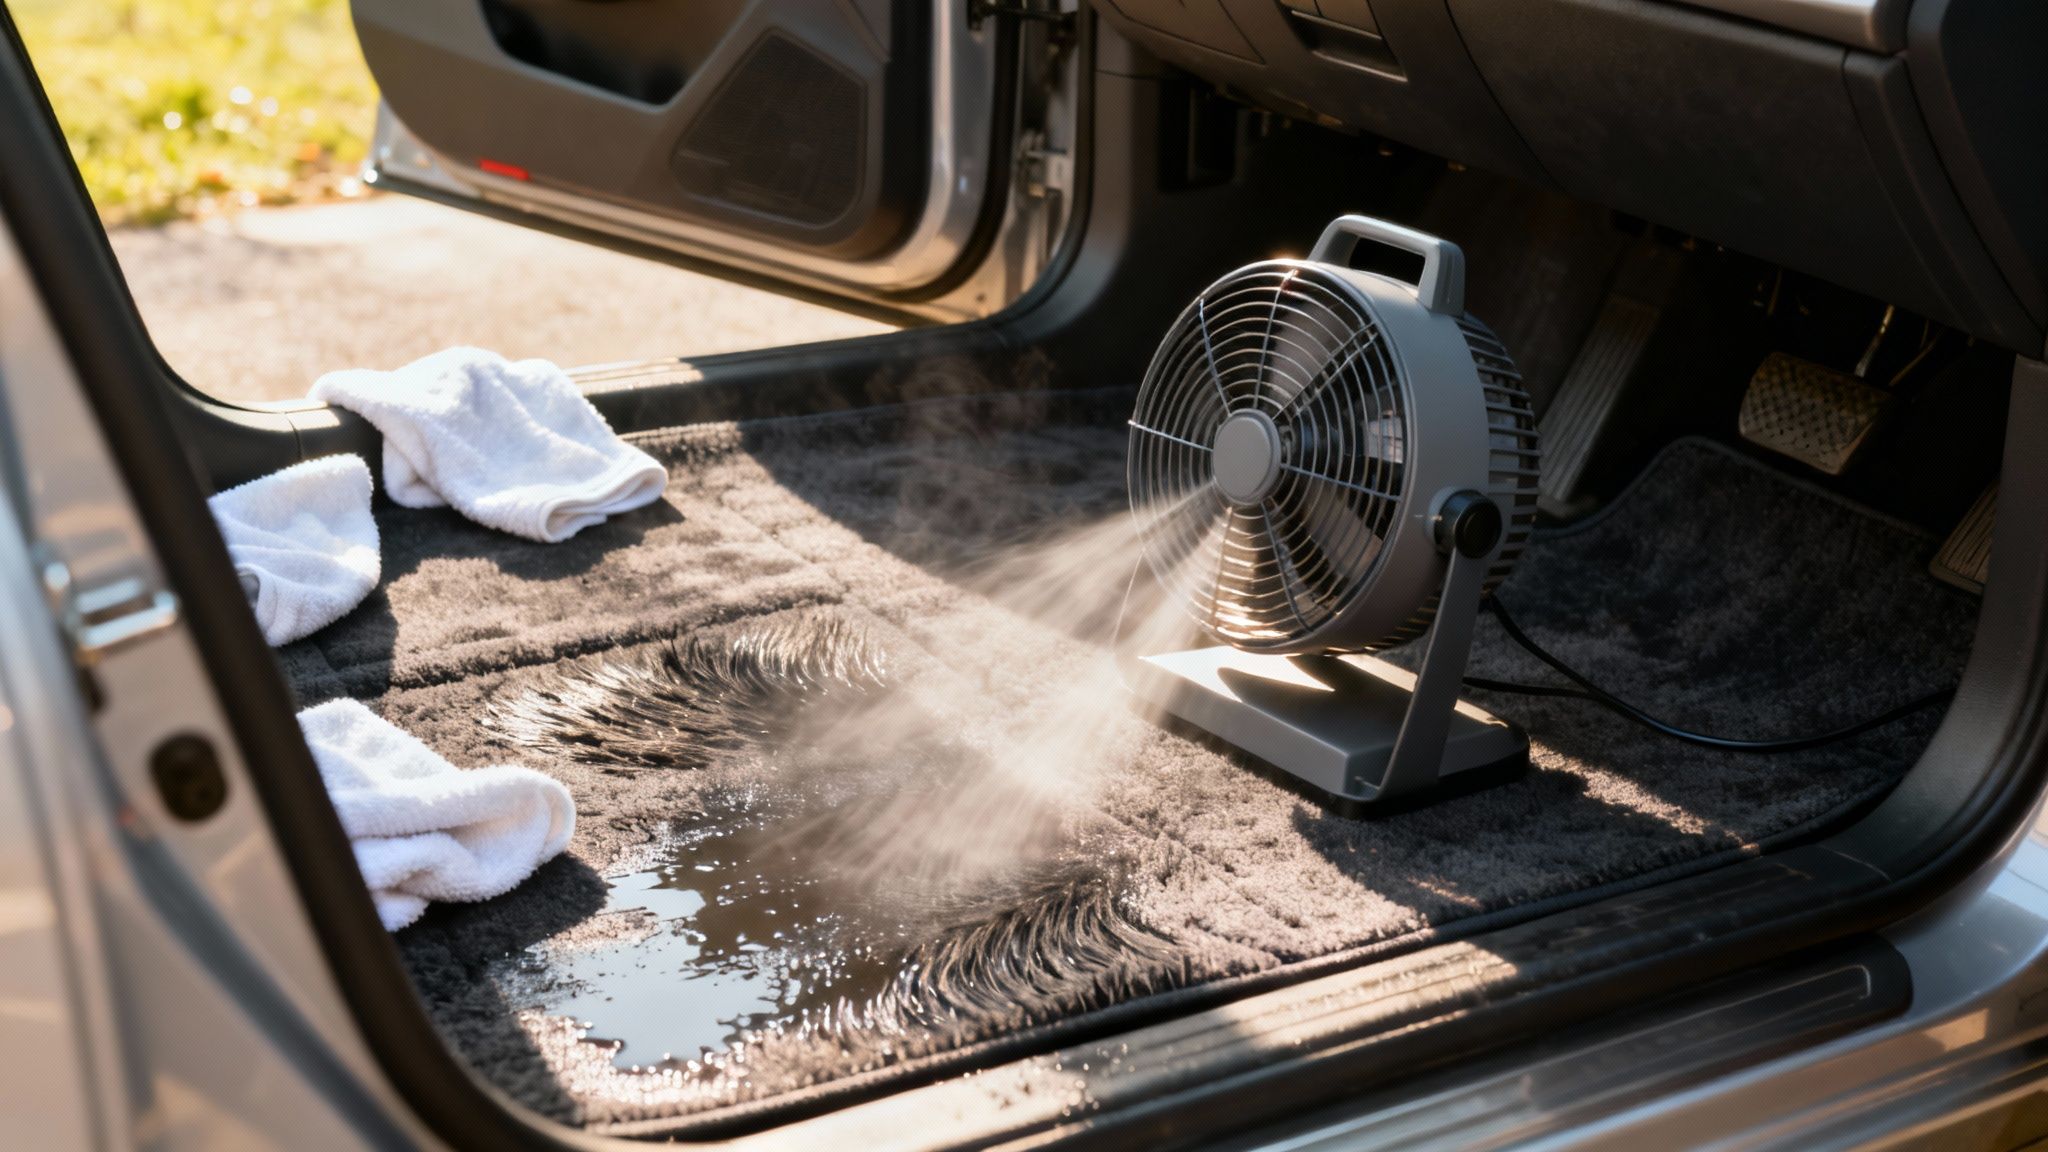
After you’ve extracted all that salty grime, you need to get air moving over the damp surfaces right away. This whisks away the leftover moisture before it has a chance to settle in and cause trouble. Here are a few tried-and-true techniques we use all the time:
- Bring in the Fans: Grab a household fan (or two, if you have them) and aim them directly at the wet spots on the carpet. Crack the doors to give that damp air a clear escape route.
- Use Your Car’s Climate Control: On a nice day, you can turn your car’s heater to full blast with the A/C on. It sounds counterintuitive, but this combo works like a powerful dehumidifier, actively pulling moisture from the carpet fibers.
- Blot, Blot, Blot: Before you even think about air-drying, lay down some clean, dry microfiber towels over the wettest areas. Press down hard with your hands or even stand on them. You’ll be shocked at how much water this pulls out, giving the air-drying process a massive head start.
These tips are great for interior jobs, but for a deeper dive, check out our guide on the best way to dry your car after washing. Many of the same principles apply.
The most important rule of thumb is to never close up your car while the carpets are still damp. A sealed, moist environment is the perfect breeding ground for foul odors and mildew. Always allow the interior to air out completely until it's bone-dry to the touch.
A perfectly clean carpet that also smells fresh is the true sign of a job well done. If you're in the Central PA area and would rather leave it to the pros, we’re here to help. See what our customers are saying about our meticulous work on our Google Business Profile and book your appointment today
You’ve just spent all that time and energy getting those nasty salt stains out of your car's carpet. The last thing you want is to see them creep back in a week later. Honestly, the best way to deal with salt stains is to stop them from happening in the first place. A little defensive strategy for your car's interior will save you a ton of scrubbing and headaches down the road.
Think about it: it's so much easier to prevent the salt from getting in than it is to treat the mess it leaves behind. It all comes down to creating a solid barrier between the winter sludge on your boots and your vehicle's carpet. This is, without a doubt, the most effective trick in the book for keeping your floors looking great all winter.
Ditch the Factory Mats for All-Weather Liners
This is the first piece of advice I give every single person. Those standard-issue carpet mats that came with your car? They're useless in the winter. Do yourself a huge favor and get a set of high-quality, all-weather floor liners. The key is to find a set that’s custom-molded for your car's specific make and model.
The really good ones have two non-negotiable features:
- Deep Grooves: These channels are designed to trap all that melting snow and slush, keeping it contained and away from your carpet.
- Raised Edges: A high lip around the mat acts like a dam, stopping salty water from spilling over the sides when you take a turn.
Essentially, you're putting a custom-fit tray in your footwells. It's a simple idea, but it stops the problem before it even starts. In my experience, using proper mats can cut down on the amount of salt you track in by as much as 75%. That's a massive difference that translates directly into less cleaning for you.
Add a Layer of Fabric Protection
For some extra peace of mind, think about applying a professional-grade fabric protectant. This isn't just some gimmick detailers try to upsell you on; it's a legitimate investment in your car's interior. These products create an invisible, water-repellent shield on the carpet fibers themselves.
When it's applied right, a good fabric protectant forces water and dissolved salt to bead up on the surface instead of soaking in. That means you can just blot it up or vacuum it away before it has a chance to settle in and become a real stain.
Don't underestimate the scale of this problem. Across the U.S. and Canada, roughly 35 million vehicles are driving on salted roads. One study I saw found that 82% of car owners in snowy areas are constantly fighting with these carpet stains. Letting that salty gunk build up can cause 20-30% faster carpet wear, and getting it professionally cleaned can set you back around $300. The trick is to act fast—waiting more than 48 hours lets the salt work its way twice as deep into the fibers. You can dig into some more stats on tackling stubborn salt stains over at mollymaid.com.
Get into a Weekly Routine
Finally, a little consistency makes a huge difference. Try to get into the habit of giving your floors a quick vacuum once a week during the winter, especially after a big snow. It only takes a couple of minutes, but it pulls up all those dry salt crystals before they get ground in, get wet, and become a real problem.
And don't forget the easiest trick of all: just knock your boots together before you hop in the car! It sounds simple, but it dislodges a surprising amount of snow and salt. By combining these easy habits, you can drastically cut down on the amount of winter grime that ever finds its way inside.
Of course, if all this prevention sounds like a chore, or you just want to start the season with a perfectly clean slate, we’re here for you. Our interior detailing services can get your carpets looking brand new and ready to face whatever winter has in store.
When to Call in a Professional Detailer
Look, sometimes you just run into a salt situation that’s a whole different beast. While using professional products is a great start, there are definitely times when you’re facing a problem that’s dug in deep and needs more firepower.
You'll know you're there when the carpet feels stiff and crunchy under your feet. Another dead giveaway is when those ghostly white stains reappear a day or two after you thought you’d conquered them. That’s a classic sign of heavy salt saturation—it means the salt isn't just on the surface but has soaked deep into the carpet padding, far beyond what most DIY methods can reach.
Knowing When You're Outgunned
Trying to fight a serious salt invasion without the right gear can actually backfire. Going overboard with water or the wrong cleaner risks turning a small stain into a giant mess, pushing the salt even deeper. Worse, you could trap moisture in the padding, which is a perfect recipe for mold and mildew. If you're looking for that new-car feel again and want to see what our customers think of our work, you can check out our reviews on our Google Business Profile.
So, when should you throw in the towel and call a pro? Here are a few tell-tale signs:
- The Stains Keep Coming Back: This is the big one. It means the salt is wicking up from the padding as the surface dries. It will keep doing this until it’s professionally extracted.
- The Carpet is Hard and Crusty: If large patches of your carpet feel stiff, the salt has crystallized all the way through the fibers. This makes them brittle and can lead to permanent damage.
- You Smell Something Musty: A lingering damp or musty odor is a red flag. It often means moisture has been trapped in the padding for too long, letting mildew take hold.
- You Just Don't Have the Time or Tools: Let's be honest, a proper deep clean is a lot of work. If you're short on time, energy, or the right equipment, calling in a professional is the easiest way to get it done right.
And that's exactly where we come in. Our mobile detailing service isn't just about showing up at your door; it's about bringing the right professional-grade tools to solve the problem for good. We use commercial hot water extractors that flush out and suck up dissolved salt from both the carpet and the padding underneath—something DIY methods just can't do.
The Professional Difference
We don’t just bring a powerful machine; we use specialized, pH-balanced cleaning agents that break down the most stubborn salt deposits without damaging your car's interior. We have the experience to get your carpets clean safely, saving you hours of frustration and the risk of making things worse.
If you’re ready to get your car’s interior looking and feeling new again without lifting a finger, let us handle it. We take a lot of pride in our work. You can see what our happy customers across Central PA have to say on our Google Business Profile. We bring a better clean right to your home.
For a professional clean that gets rid of salt stains for good, trust the experts at The Mobile Buff. We’ll bring the solution right to your driveway. Book your appointment online today!
