
When it comes to cleaning a car headliner, the golden rule is less is more. The secret isn't scrubbing harder; it's using the right product with a delicate touch. As professionals, we can tell you the best way to clean a car headliner involves a low-moisture, pH-neutral fabric cleaner applied to a microfiber towel—never sprayed directly onto the headliner itself. From there, it’s all about gentle blotting.
Why Cleaning Your Headliner Is So Tricky

That small stain on your car’s ceiling seems simple enough, but your headliner is one of the most fragile surfaces in your entire vehicle. It’s not like a rugged floor mat or even a leather seat. Think of it as a delicate sandwich made of fabric, foam, and a very sensitive adhesive.
This unique construction is exactly why things can go wrong so fast. The fabric you see is bonded to a foam backing, and the glue holding it all together is notoriously weak. Introduce too much moisture or scrub with a little too much enthusiasm, and you’ve got a recipe for disaster.
The biggest risk isn't the stain itself, but the cleaning process. Over-saturating the material or scrubbing too hard will dissolve that fragile adhesive, causing the dreaded headliner sag—an ugly and expensive fix.
Common Culprits Behind a Dirty Headliner
Let's be honest, life happens inside a car. A pristine headliner is a magnet for everyday messes, and knowing what you're dealing with is half the battle.
Most of the grime we see comes from just a few sources:
- Greasy Fingerprints: You’ll almost always find these around the sun visors, grab handles, and sunroof controls.
- Food and Drink Spills: The classic morning coffee splash or a stray soda drip can leave ugly, discolored spots.
- Kid-Related Messes: From smudged chocolate to dirty handprints, children are masters at testing a headliner's limits.
- Smoke Film: In a smoker’s car, a sticky, yellowish film inevitably builds up, trapping odors and staining the fabric.
- Water Stains: A leaky sunroof or a bad window seal is a common cause of those frustrating "tide marks" that are notoriously tough to remove.
The Professional Approach to a Delicate Job
The secret to success is treating this job with the precision it deserves. Aggressive scrubbing or reaching for a bottle of all-purpose household cleaner is a surefire way to ruin your headliner.
Here’s the deal: because the material is so delicate, your choice of cleaner is critical. This is where a pH neutral cleaner becomes essential. It’s formulated to break down dirt and oils without being harsh enough to dissolve the glues holding your headliner together. Understanding this helps you tackle minor spots safely and, just as importantly, tells you when it’s time to call in a pro.
Dealing with a stubborn stain or just want a guaranteed perfect finish without the risk? The expert team at The Mobile Buff is here to help. Check out our professional detailing services in Central PA and book your appointment today.
Getting Your Gear Together: The Pro's Headliner Cleaning Kit
When it comes to cleaning a car headliner, the tools you use are everything. Seriously. Forget everything you've read on forums about using dish soap or aggressive all-purpose cleaners. As professionals, we can tell you those are high-risk gambles that almost always end badly. The best way to clean car headliner fabric starts with having the right, industry-approved gear ready to go.
Putting together a proper kit isn’t about spending a ton of money. It’s about being smart and choosing specific tools that protect that incredibly delicate adhesive holding your headliner in place. You don't need much, but every single item plays a critical role in preventing a saggy, water-stained disaster.
Your Core Cleaning Tools
First things first, grab at least two high-quality, lint-free microfiber towels. You'll use one for applying the cleaner and the other for blotting the area dry. Trust us on this—cheap towels leave tiny fibers all over the place, making your clean headliner look fuzzy and worse than when you started.
Along with your towels, a good soft-bristled interior brush is essential. The whole point of the brush is to gently agitate the cleaning solution and lift the stain out of the fabric fibers without being abrasive. If you use a brush that’s too stiff, you’ll tear or pill the fabric, causing damage that you can't undo.
The Right Cleaner Is Everything
This is the step where most at-home attempts go completely sideways. The only thing you should be spraying on your headliner is a professional-grade, non-foaming, pH-neutral upholstery cleaner. These are formulated specifically to be residue-free and, most importantly, low-moisture.
Why are we pros so picky about this? It's simple. Foaming cleaners and random household products oversaturate the material. That excess moisture soaks right through the fabric and the foam backing, dissolving the sensitive glue and causing the entire headliner to detach from the roof.
Before you even start with the cleaner, you'll need to prep the area by getting rid of any loose dust and debris. A good vacuum is your best friend here. If you’re in the market for one, we've broken down our top picks in our guide to the best vacuum for car detailing.
Choosing the right cleaner is a big decision, and it’s easy to get overwhelmed. Here's a quick look at why we recommend professional products over common DIY substitutes.
Professional vs At-Home Cleaning Solutions
As you can see, what seems like a simple shortcut can create a much bigger, more expensive problem.
Ultimately, this isn't just a shopping list—it’s a game plan for a safe and effective clean that protects your car's interior. If sourcing these specific items sounds like a hassle, or if you're looking at a gnarly stain and would rather have a guaranteed result, our team at The Mobile Buff is always here to help. You can easily find our Central PA mobile detailing service on Google to book an appointment and let us take care of it for you.
A Pro's Guide to Removing Headliner Stains
Alright, you've got your gear ready. Now let’s talk technique. When it comes to cleaning a car headliner, the one rule every pro lives by is less is more. Trust us, you want to be delicate here—the goal is to lift the stain without accidentally creating a bigger, soggier mess.
Before you even think about grabbing a cleaner, give the area a quick, gentle vacuum with a soft brush attachment. This whisks away any loose dust or grit that would otherwise turn into mud the second you add moisture. It’s a small, easy step that makes a huge difference.
The "Spray the Towel, Not the Car" Method
Here’s the single most important secret to cleaning a headliner without ruining it: control your moisture. Never, ever spray a cleaner directly onto the headliner fabric. That’s the fast track to a saggy, water-stained ceiling, and it's a mistake we see all the time.
Instead, lightly mist your pH-neutral upholstery cleaner onto a folded microfiber towel. You're aiming for damp, not dripping wet.
Now, gently blot the stain. Start from the outside and work your way in to keep it from spreading. Once you’ve blotted, grab your soft-bristled interior brush and lightly agitate the spot in small circles. This is what helps the cleaner get into the fibers and break up the grime.
This simple process is what the pros do every day to get great results without causing damage.

The real key is the sequence: cleaner goes on the tool, not the surface. That’s how you stay in complete control.
After a little agitation, switch to a clean, dry part of your towel and blot the area again to soak up the loosened dirt and cleaner. Then, just let it air-dry. Don't rush it with a hairdryer—the heat can weaken the headliner's adhesive and cause it to peel.
Tackling Tough Spots and Mystery Marks
Of course, not all stains play by the same rules. Here’s a quick rundown on how we handle the common culprits:
- Coffee & Soda: These are usually pretty cooperative since they're water-based. The standard blot-and-agitate method works well, but you need to act fast before the sugars have time to set in.
- Grease & Oil: These are tougher and will put up a fight. You'll need a cleaner made specifically for oily messes. Be patient, as you might need to repeat the process, but always let the spot dry completely between attempts.
- Mystery Marks: For those unknown smudges, always start with the gentlest approach. More often than not, they’re just from hands or hair and come out surprisingly easily.
Understanding the risks here is huge. It’s a sobering fact that improper cleaning causes sagging in about 65% of DIY attempts. By simply spraying a professional cleaner on a towel and letting it sit on the stain for 30-60 seconds before gently agitating, you can lift stains in 90% of cases without harming the foam backing.
This careful process shows just how precise you need to be, even for a tiny spot. Think of it as a delicate operation—too much product or pressure can cause damage you can't undo. If a stain looks intimidating, that's your gut telling you to pause.
The cleaner you choose is just as important as your technique. If you're stuck on what product is safe and effective, our guide on the best stain remover for car upholstery breaks down the ones we trust in our own work.
If you’ve tried a gentle cleaning and the stain won't budge, it’s time to stop. Pushing it further is how damage happens. When you're dealing with a stubborn spot or just don't want to take the risk, calling in an expert is always the safest move.
A Pro’s Guide to Cleaning Different Headliner Materials
You wouldn't use a carpet cleaner on a silk shirt, right? The same logic applies to your car's headliner. Using the wrong products or techniques is one of the most common—and costly—mistakes we see people make. The secret to getting it right is knowing what you're working with.
Treating every headliner the same is a gamble that can leave you with matted fibers, discoloration, or worse, a saggy, drooping mess. So let’s break down the common materials and how a pro tackles each one.
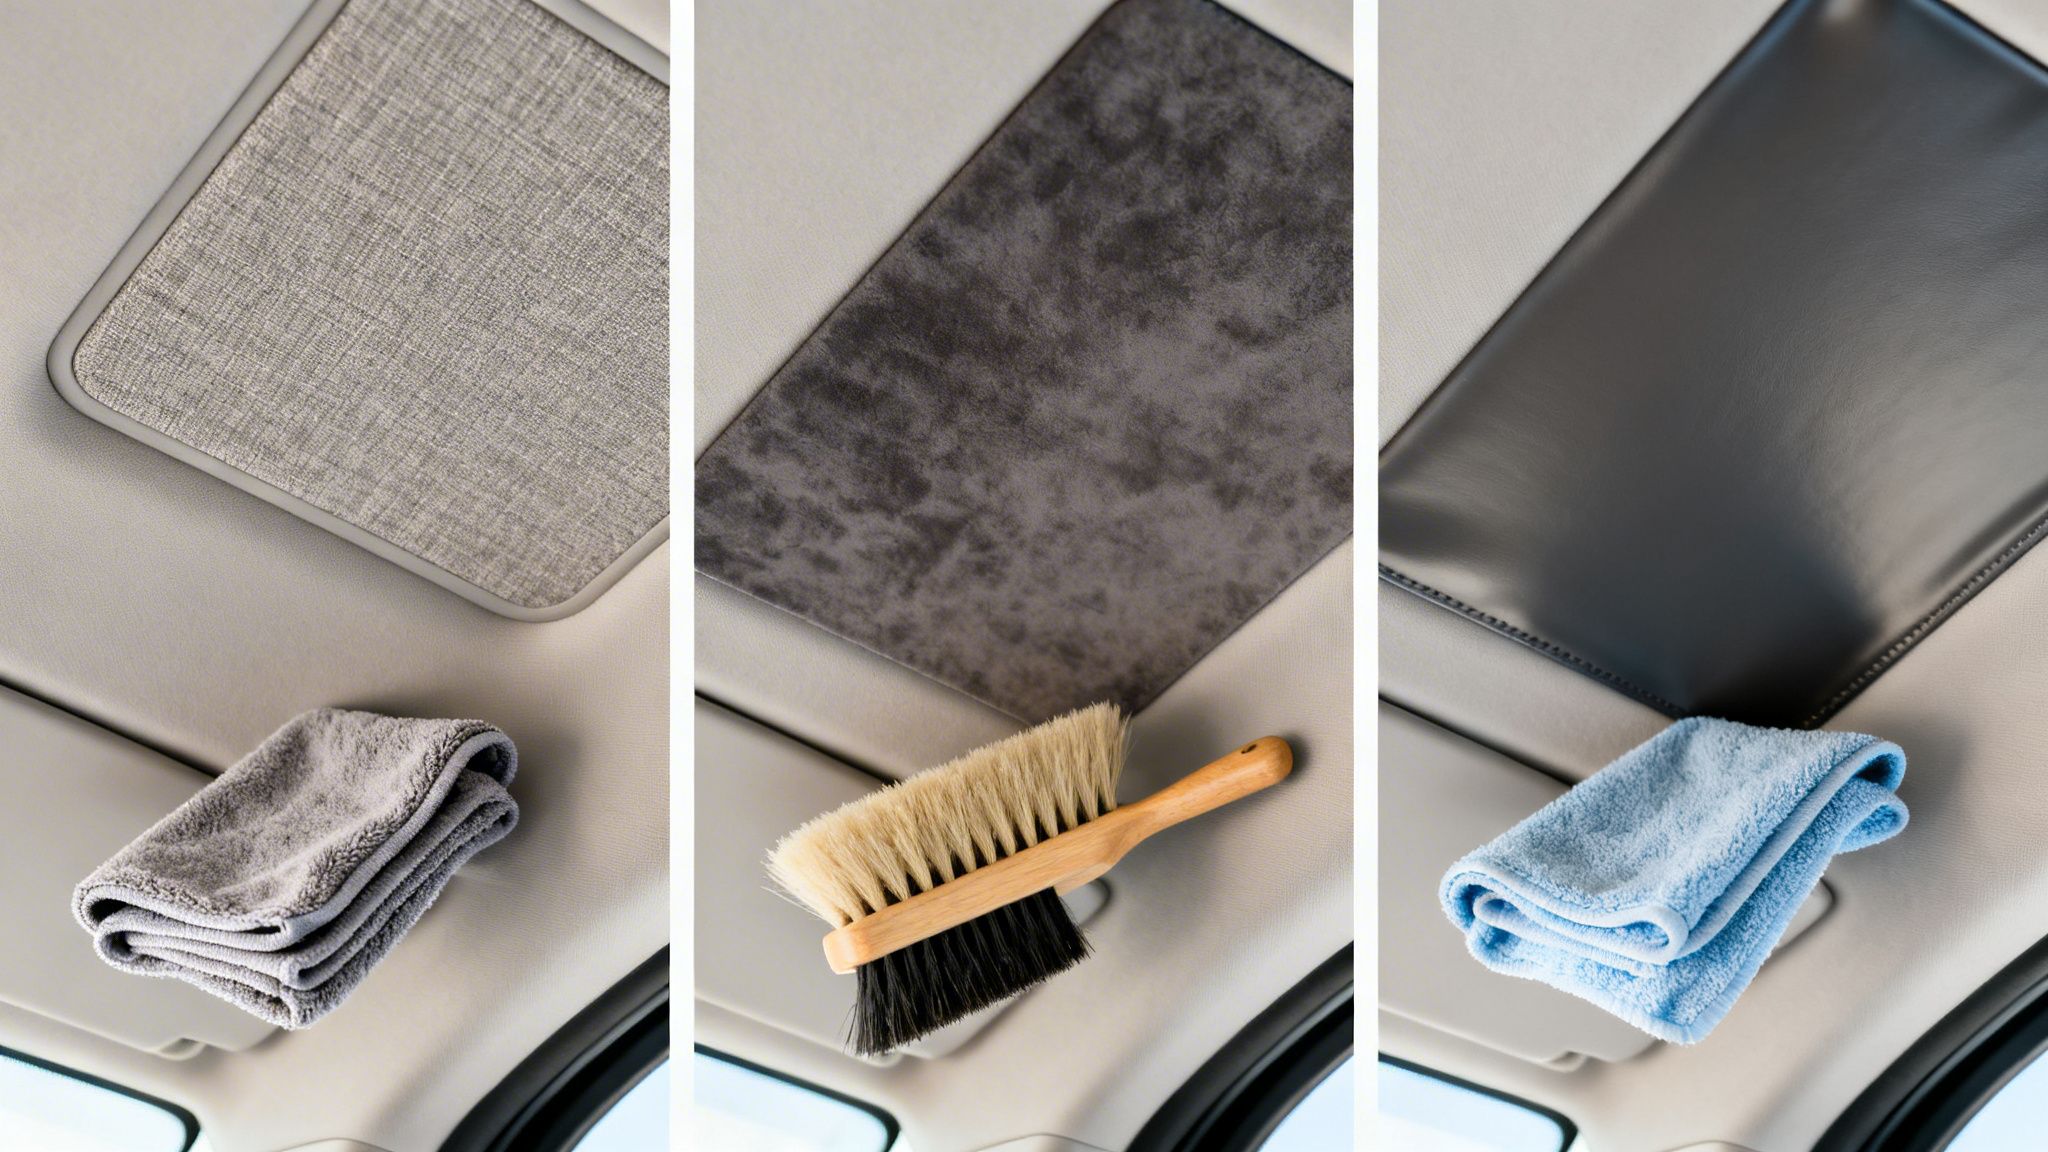
Standard Fabric Headliners
This is what you’ll find in most cars on the road today. For these everyday cloth headliners, the gentle blotting method we talked about earlier is your best friend. The two most important rules are minimal moisture and absolutely no aggressive scrubbing.
Always spray your cleaner onto the microfiber towel, not the headliner itself. From there, it’s just a gentle dabbing motion. This gives you complete control and stops moisture from soaking through to the foam backing, which is what causes that dreaded sagging.
Premium Suede and Alcantara Headliners
If you’re in a luxury or performance car, you might be looking up at a beautiful suede or Alcantara microsuede headliner. These materials feel incredible, but they are extremely picky and hate water. A standard liquid cleaner will almost certainly leave behind ugly water rings and ruin that soft, velvety texture for good.
For these, you have to switch to a "dry" cleaning approach.
- First, grab a dedicated suede cleaning brush and lightly go over the area to lift the delicate fibers.
- Next, use a cleaner made specifically for suede or Alcantara. Apply a tiny amount to a foam applicator or the brush itself.
- Work it in with zero pressure, then use the dry brush again to groom the fibers back into place as it dries.
The big takeaway here: Moisture is the ultimate enemy of suede and Alcantara. A traditional wet clean will cause the fibers to mat together, and once that happens, there's no going back.
Classic Vinyl Headliners
You’ll typically see durable vinyl headliners in work trucks, classic cars, and other utility vehicles. They’re built to last and their non-porous surface is great at resisting stains, but they still need the right kind of care.
A quick wipe-down with a gentle all-purpose interior cleaner and a microfiber towel is usually all it takes. The one thing you have to watch out for is the seams and edges. It's still possible for moisture to creep in and weaken the adhesive holding the vinyl up. While we're focused on headliners, the same principle of careful moisture control applies when you're figuring out how to clean your car seats effectively, as those surfaces can be just as sensitive.
These details show just how specific headliner cleaning needs to be. If you're not sure what material you have or just want a perfect result without the risk, let a professional handle it. You can find The Mobile Buff on our Google Business Profile and book a mobile interior detail right here in Central PA.
Know When to Call a Professional Detailer
While tackling small stains yourself can be satisfying, a smart car owner also knows when to put the tools down. Honestly, sometimes the best way to clean car headliner fabric is to let a professional take over. Pushing a DIY job too far is the fastest way to turn a simple stain into a permanent, expensive headache.
Knowing the red flags that signal a job is too big for a home attempt is key. If your car's ceiling looks less like a headliner and more like a modern art project, it’s probably time to call for backup.
Signs You Need to Call in a Pro
Some situations are almost guaranteed to end in disaster if you try to clean them yourself. If you spot any of these issues, your best bet is to pause and get an expert opinion before you do any more damage.
Here are the clear signs that you need a professional touch:
- Heavy, Widespread Soiling: If the entire headliner is dingy from years of use or has a sticky film from something like cigarette smoke, spot-cleaning just won't cut it. A pro is needed to get a uniform, deep clean without leaving patches.
- Large or Set-In Water Stains: Those nasty "tide marks" from a leaky sunroof or window seal are notoriously tough. They require specialized techniques to lift the stain without spreading it or, even worse, weakening the headliner's glue.
- Any Sign of Sagging or Drooping: If the fabric is already starting to peel away from its foam backing, stop immediately. Adding any moisture will only accelerate the glue's failure and make the sag significantly worse. A drooping headliner isn't a cleaning issue; it's a repair or replacement job.
A sagging headliner is a sign of adhesive failure, not just dirt. Attempting to clean it is like trying to wash a peeling sunburn—it will only make the situation worse and speed up the damage.
The Professional's Secret Weapons
When we show up to tackle a gnarly headliner, we bring a specialized arsenal that goes far beyond a spray bottle and a few towels. For that deeply embedded grime, we often break out a Tornador air tool. This incredible device uses a vortex of air and a fine mist of cleaner to literally blast dirt out of fabric fibers without soaking the material.
And for those stubborn odors from pets, smoke, or mildew? A simple surface clean won't touch them. We rely on commercial-grade treatments like a Bio-Bomb odor eliminator. This is a fogger that permeates the entire interior, neutralizing odor-causing molecules right at their source instead of just covering them up.
The data backs this up. Water stains are a plague, affecting around 52% of used cars, and while DIY solutions exist, our professional methods are far more effective and safer for your car. For our local families in Dauphin County, we've seen our Bio-Bomb treatments successfully knock out pet odors in 98% of cases. Plus, a recent survey showed that vehicles with pristine headliners scored 22 points higher in interior quality, which can lead to a 7% higher trade-in value. You can dig deeper into these headliner cleaning insights on TorqueDetail.com.
If your headliner problem seems bigger than a small spot, don't risk it. We have the right tools and years of experience to restore it safely. To see everything our deep cleaning includes, check out the full rundown of our complete interior detailing service.
Ready to get your headliner professionally restored without the stress? If you're in the Central PA area, The Mobile Buff brings the expertise right to your driveway. See our work and book your appointment to make your car's interior look and feel new again.
Answering Your Headliner Cleaning Questions
It's totally normal to still have a few questions, especially when you're about to work on something as delicate as your car's headliner. Let's tackle some of the common "what ifs" we hear from car owners all the time. Here’s the same honest, professional advice we’d give you if we were standing right there in your garage.
Can I Use a Steam Cleaner on My Car Headliner?
This is a big one, and our advice is simple: please don’t. The combination of high heat and concentrated moisture from a steam cleaner is pretty much the fastest way to melt the adhesive holding your headliner up. The result? Instant, irreversible sagging.
Now, you might see a professional detailer use a steamer, but they’re using very specific equipment with precise controls. Without that gear and the experience to know exactly how much steam is too much, it's a huge gamble. Stick with the best way to clean car headliner fabric: a good upholstery cleaner applied to a microfiber towel, never directly to the surface.
My Headliner Is Sagging. Can Cleaning It Help?
Unfortunately, cleaning won’t fix a sagging headliner. In fact, it will only make it worse.
If your headliner is already drooping, it means the glue has failed. Adding any moisture or even the slight weight of a cleaning product will just accelerate the problem. At this stage, your only real option is to take it to an auto upholstery specialist for repair or replacement.
How Do I Get Cigarette Smoke Smell Out of My Headliner?
You can scrub the surface all day, but that smoke smell will keep coming back. The problem is that tar and nicotine are incredibly sticky, and those particles work their way deep into the fabric and the foam backing. A surface-level clean just can't reach them.
The only way to truly get rid of the odor is with a two-part professional approach. First, a deep cleaning to pull out the residue, followed by a true odor elimination treatment. At The Mobile Buff, we use a commercial-grade Bio-Bomb fogger that actually neutralizes the odor-causing molecules, not just cover them up with a fragrance.
What If a Stain Doesn't Come Out on the First Try?
Don't panic, and don't get aggressive. Stubborn stains, especially from things like ink or grease, might need a second gentle pass. The most important thing is to let the area dry completely first. Going back in while it's still damp is a surefire way to oversaturate the material, which can cause sagging or leave ugly water rings.
If that stain is still there after two light attempts, it’s time to stop. Pushing your luck by scrubbing harder or piling on more chemicals will likely cause permanent damage like discoloration or pilling. A pro has an arsenal of spot-removers that are much stronger but safe for the material. This is one of those times where calling in an expert is the smartest move.
Still have questions, or running into a headliner issue that seems a little too risky? The team at The Mobile Buff is always here to help. We bring the right tools and professional know-how straight to you. Check out our top-rated Central PA mobile detailing service on Google and let us get your car’s interior looking and feeling fresh again.
