
Have you ever washed your car, stepped back to admire your work, only to see a frustrating web of fine scratches in the sunlight? Those are swirl marks, and getting rid of them for good requires a process called paint correction. Using a machine polisher with the right combination of pads and compounds, we can carefully level the very top layer of your car's clear coat. This doesn't just fill in the scratches; it permanently erases them, bringing back that deep, flawless showroom shine. It's a precise job, but when done right, the results are absolutely stunning.
So, What Exactly Are Those Annoying Swirl Marks?
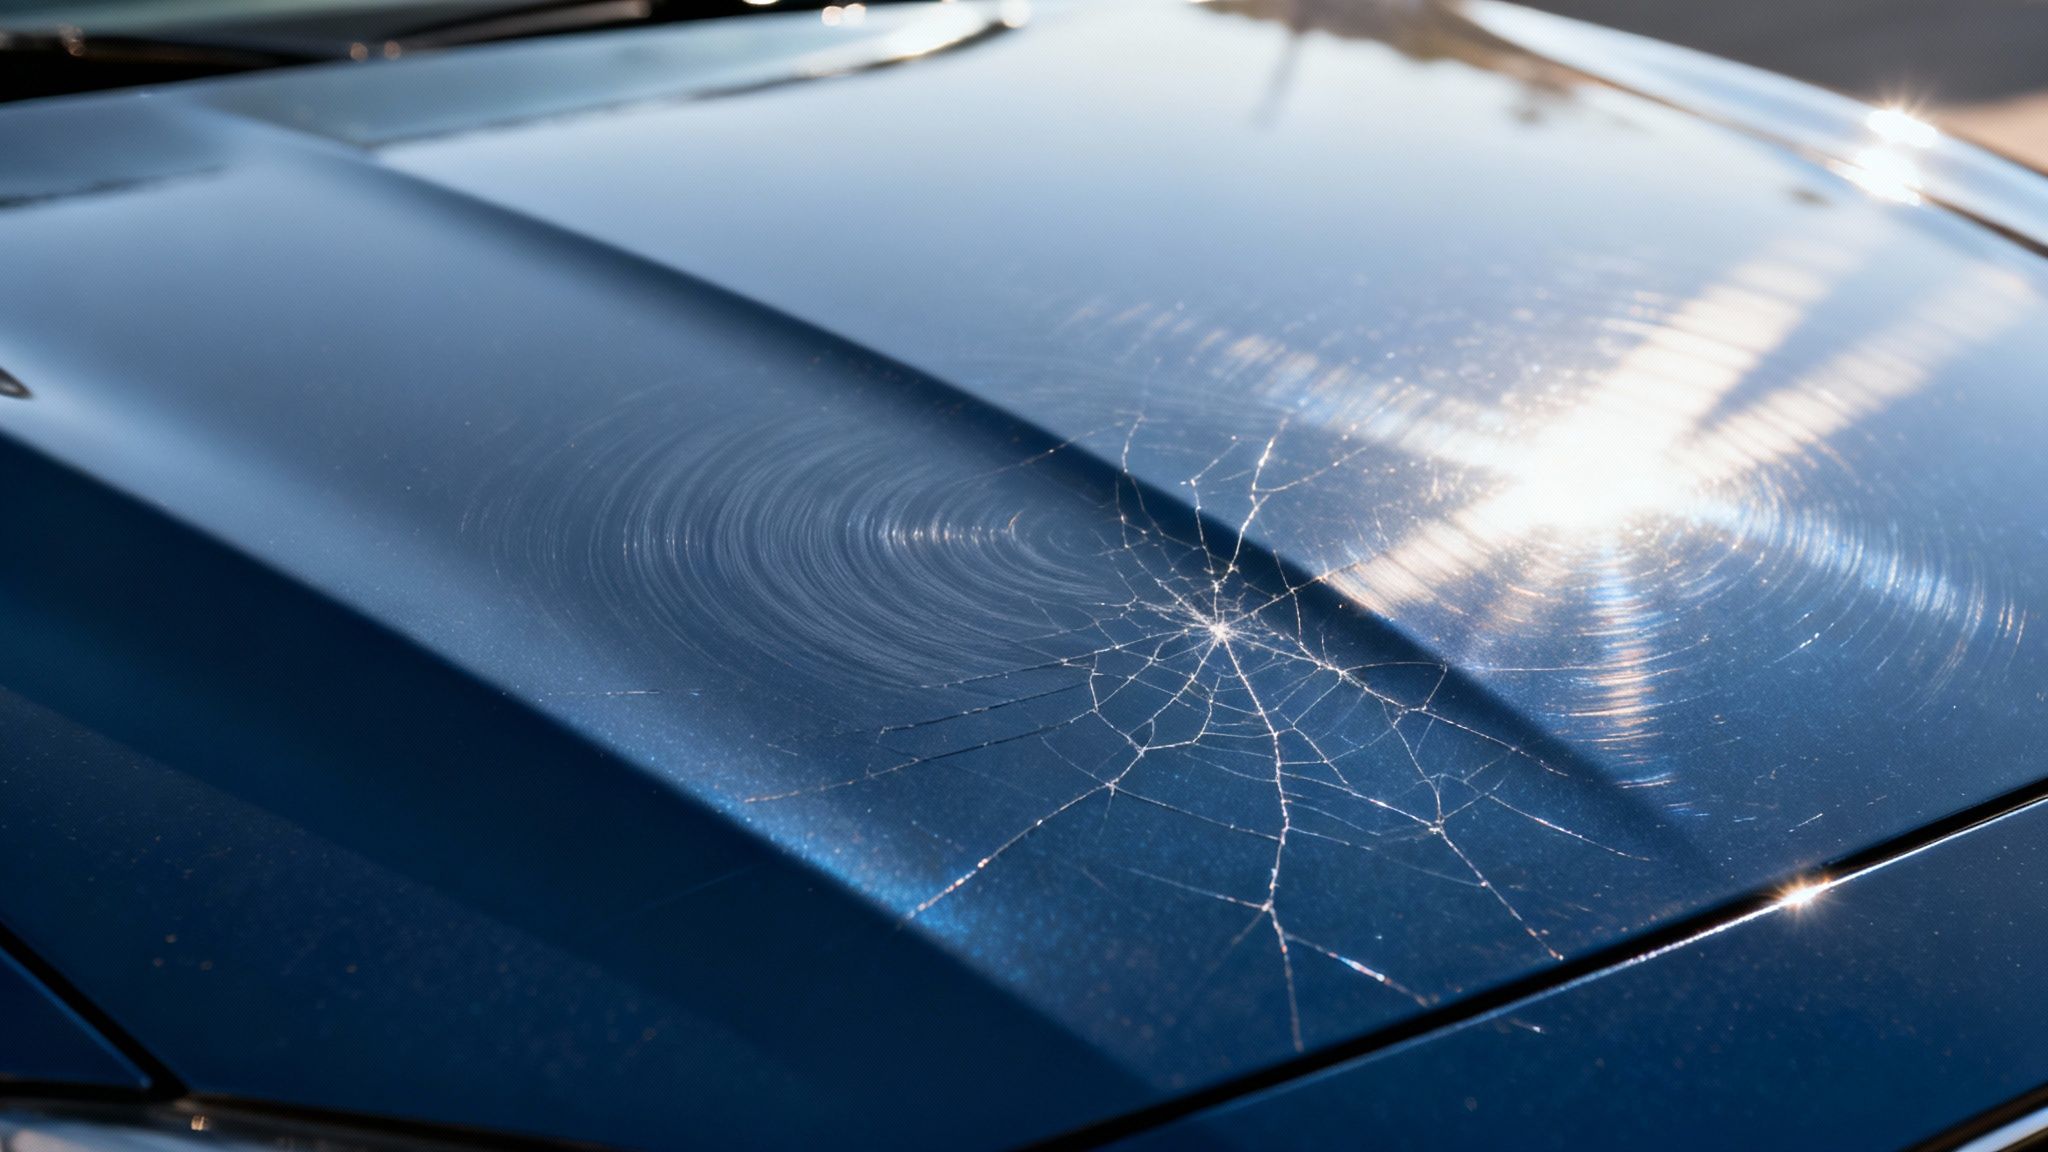
Swirl marks are the number one enemy of a glossy, head-turning finish. They aren't just random scuffs; they're countless microscopic scratches scattered all over your car’s clear coat.
Think of your car's paint as a perfectly smooth, glassy surface. When it's in great shape, light reflects evenly, giving you that deep, wet look we all love. Swirl marks disrupt that smooth surface by creating thousands of tiny, sharp edges. When light hits those edges, it scatters in every direction, which is why your paint looks dull, hazy, and covered in that signature spiderweb pattern in direct sunlight.
Where Do Swirl Marks Actually Come From?
Figuring out what causes these marks is the first step to getting rid of them—and, more importantly, keeping them from coming back. The tough pill to swallow is that they are almost always self-inflicted from improper washing and drying habits.
Here are the biggest offenders we see in the field every single day:
- Automatic Car Washes: Those giant spinning brushes in drive-thru washes? They're usually caked with abrasive dirt and grit from all the cars that went before you. They essentially slap that grime all over your paint, leaving a trail of swirls.
- Improper Hand Washing: Using just one bucket, a gritty old sponge, or a crusty towel is a recipe for disaster. You're just picking up dirt and dragging it right across the paint you're trying to clean.
- Incorrect Drying: Using the wrong towel, like an old bath towel, or even a slightly dirty microfiber can instantly create swirls. A clean, high-quality microfiber drying towel is absolutely essential for doing it safely. We dive deep into this in our guide on the best way to dry a car after washing.
Here's the hard truth: Prevention is everything. You can pay for a perfect paint correction, but if you go right back to improper washing methods, those swirl marks will be back in no time. A safe wash process is non-negotiable for keeping that shine.
For car owners in Central Pennsylvania tired of looking at a dull, scratched-up finish, the good news is that restoring that brand-new shine is completely possible. Let's dig into the professional methods used to bring dull paint back from the dead and get that showroom shine back on your vehicle.
The Pro Detailing Tools for Perfect Paint
Walking into the detailing aisle can be overwhelming. Every bottle promises a miracle, but achieving a perfect, swirl-free finish comes down to a proven system. The secret isn't some magic potion; it's the right combination of machine, pad, and liquid working in harmony to gently level your car's paint.
Professional detailers use a methodical approach, carefully pairing specific tools to tackle different paint problems. The golden rule is always to use the least aggressive method that gets the job done. That way, you get a flawless finish while preserving as much of your car's precious clear coat as possible.
Your Polisher Is the Heart of the Operation
First things first, the undisputed champ for safely erasing swirl marks is the dual-action (DA) polisher. Forget those old-school, high-speed rotary buffers you might see in a body shop. In the wrong hands, those can burn right through your paint in the blink of an eye.
A DA is much safer because its head doesn't just spin in a circle; it also oscillates in a random, orbiting pattern. This unique movement prevents heat from building up and keeps the machine from digging into one spot. It’s this built-in safety net that makes it the go-to tool for seasoned pros. This shift to safer, more effective tools is a huge reason why the demand for professional paint correction has grown.
In fact, the global market for car polishing machines was recently valued at around US$6.0 billion and is expected to hit US$8.7 billion by 2030. That boom is almost entirely thanks to DA polishers that let us fix paint without the high-stakes risk of old rotary machines. You can dig deeper into these trends by checking out industry reports on car polishing equipment.
Matching Pads and Polishes: Where the Real Magic Happens
Once you’ve got the right machine, the next piece of the puzzle is picking the right pad and liquid. Think of it like a master painter choosing the perfect brush and paint for a specific canvas. Each part of the system plays a critical role.
Polishing Pads
These are what actually touch your paint, and they come in different materials and "cuts."
- Foam Pads: The most common you'll see. A firm, dense foam pad is your workhorse for cutting out deeper swirls, while a super soft foam pad is for that final, glossy finishing touch.
- Microfiber Pads: These have a little more bite than foam. They're fantastic for one-step corrections where you need to remove moderate swirls and finish down with a nice gloss in a single go.
- Wool Pads: These are the big guns. Wool is typically the most aggressive option, saved for heavy-duty defect removal on really hard paint. You'll mostly see experienced pros using these, often paired with a rotary polisher.
Compounds and Polishes
These are the liquids that contain microscopic abrasives that do the actual work.
- Compounds: These are the more aggressive liquids, designed to "cut" away moderate to heavy swirls and scratches.
- Polishes: These contain much finer abrasives. They’re used to refine the finish after compounding or to buff out very light swirls, leaving behind that super slick, reflective surface.
Here's a Pro Tip: The magic is in the synergy. On a daily driver that just needs a little pick-me-up, we might pair a medium-cut microfiber pad with a one-step polish. But for a black car covered in ugly swirls, we'd start with a foam cutting pad and a heavy compound, then switch to a soft finishing pad and an ultra-fine polish to make the paint look like a deep, wet mirror.
Understanding this system is how we remove swirl marks from a car safely and effectively—it's a delicate dance of power and finesse. The process can seem complicated, and the cost of quality tools adds up fast. For anyone in Central PA who wants guaranteed, flawless results without the risk or investment, bringing in a pro is the smartest move you can make.
If you're ready to see your car’s paint look better than it did on the showroom floor, see what our happy customers are saying on our Google Business Profile and let us schedule your transformation.
A Pro's Walkthrough To Flawless Swirl Removal
So, how do you actually use these tools to get that flawless, mirror-like finish? Let's pull back the curtain on the professional process. Getting professional-grade results is all about being meticulous. Patience and precision are your best friends here.
The real magic happens when you create a perfectly sterile surface, ensuring the only thing touching your paint is the polishing pad itself. The goal isn't to just fill in or hide the damage—we're permanently erasing it by carefully leveling the clear coat. This whole process is what we call paint correction, and it’s how we bring back that incredible depth and clarity your paint had on day one.
First Things First: Preparation is Everything
Before a polisher ever touches the paint, a huge chunk of time is spent on decontamination. I can't stress this enough: skipping this stage is a rookie mistake that absolutely guarantees failure. If you try polishing paint that still has grime bonded to it, you’re just grinding that grit right back into the finish and creating even more scratches.
To get it right, we follow a strict, multi-step process:
- The Two-Bucket Wash: This is non-negotiable. One bucket is for your soapy water, the other is for clean rinse water. After washing a small section, you dunk your dirty mitt in the rinse bucket before putting it back in the soap. This simple habit keeps you from dragging all the gunk from your rocker panels right back onto the hood.
- Chemical Decontamination: Your paint is covered in tiny iron particles from brake dust and industrial fallout. An iron remover spray chemically dissolves them. You'll often see the paint "bleed" a dramatic purple color as it works its magic, which is how you know it's pulling those contaminants out so they can be safely rinsed away.
- Mechanical Decontamination: The final prep step is using a clay bar or a clay mitt. This tool glides across a lubricated surface and physically pulls out anything left behind, like stubborn tree sap or paint overspray. When you're done, the paint should feel as smooth as glass.
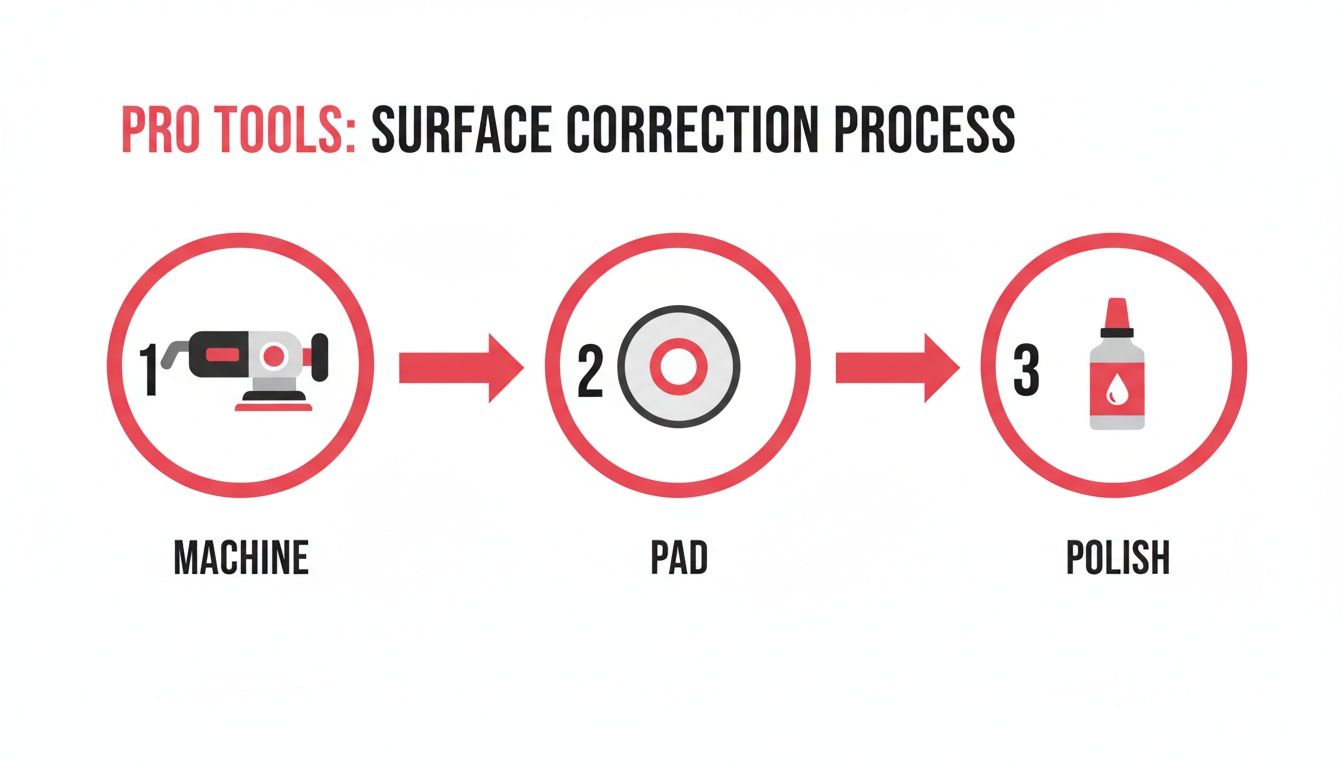
This diagram shows the fundamental trio we use—the machine, the pad, and the polish. They work together as a system to safely refine the paint's surface and restore that brilliant gloss.
Finding The Sweet Spot With A Test Spot
Every car’s paint is different. A Honda might have a super soft clear coat, while a German-engineered car could have paint that’s as hard as nails. Because of this, a professional never just starts polishing the whole car with an aggressive combo. Instead, we always perform a test spot.
We tape off a small, 2x2 foot square on a flat panel like the hood. Here, we start with our least aggressive combination—usually a soft foam finishing pad and a fine polish. We'll make a few passes, wipe the area clean with a microfiber towel, and inspect our results under a good light.
If the swirls are gone, fantastic! We’ve found our winning formula. If they’re still visible, we’ll step it up a notch—maybe to a medium-cut pad—and test again. This methodical approach ensures we use only as much cutting power as necessary, which is crucial for preserving the integrity of your car's clear coat.
Mastering The Polishing Technique
Once we've dialed in the right pad and polish combo, it's time to get to work. Machine polishing is a dance of consistency and control. It's not about speed; it's all about technique.
- Work in Small Sections: We always tackle the car in small, manageable sections, usually no bigger than that 2x2 foot test area. This lets us focus our efforts and ensure the polish is fully worked in before it dries out.
- Arm Speed and Pressure: The key is a slow, deliberate arm speed. We're talking about moving the polisher only an inch or two per second. Gentle, consistent pressure is all you need—let the machine do the heavy lifting. Pushing down too hard generates excessive heat and can leave behind ugly holograms or buffer trails.
- The All-Important Wipe-Down: After polishing each section, you have to remove the residue. A plush, perfectly clean microfiber towel is the only tool for the job. You gently wipe away the spent polish to reveal the corrected paint underneath. If you use a dirty towel here, you can instantly undo all your hard work by scratching the pristine finish you just created.
A professional paint correction isn't a race. It's a layer-by-layer refinement. Rushing the prep work, skipping a test spot, or using a sloppy technique is exactly how DIY attempts go wrong, often leaving the paint in worse shape than when you started.
Different levels of paint damage require different approaches. This table breaks down the common stages of correction to help you understand what your vehicle might need.
Ultimately, knowing how to remove swirls from a car is one thing, but executing it flawlessly is another. It takes a deep understanding of how different paint systems react and the discipline to follow a proven process from start to finish. It’s why so many car owners in Central Pennsylvania trust a professional instead—it removes the risk and guarantees a jaw-dropping result every time.
Locking in That Shine and Protecting Your Paint
You’ve done it. After all that hard work—the washing, the clay bar, the careful polishing—your car's paint looks absolutely perfect. But don't pop the champagne just yet. This next step is the one people often skip, and it's arguably the most important.
That freshly polished surface is completely bare. Think of it as pristine, but also totally vulnerable. Polishing doesn't just create shine; it strips away any old wax or sealant, leaving your clear coat exposed to everything from UV rays and acid rain to bird droppings. Without a tough layer of protection, all your effort could be undone in weeks, and those frustrating swirls will be back before you know it.
Moving Beyond Old-School Wax
For years, the go-to answer was a good ol' tub of carnauba wax. And while it gives a beautiful, warm glow, the truth is that traditional wax just doesn't last. You're lucky if you get a few weeks of protection before it starts breaking down. Thankfully, technology has given us much better, longer-lasting options.
Today's detailing world revolves around two heavy hitters for long-term protection:
- Paint Sealants: These are basically synthetic super-waxes. Instead of just sitting on the surface, these polymer-based liquids are engineered to chemically bond with your paint. The result is a slick, durable shield that can easily last for months, offering fantastic shine and resistance to heat and chemicals.
- Ceramic Coatings: This is the pinnacle of paint protection. A true ceramic coating is a liquid polymer that cures into a hard, glass-like layer over your paint. It's a semi-permanent shell that's incredibly tough against light scratches, harsh chemicals, and UV rays. Plus, its hydrophobic (water-repelling) properties are truly next-level.
Key Takeaway: Both sealants and ceramic coatings create a slick, sacrificial barrier. This makes it much harder for dirt and grime to stick, meaning your car is easier and safer to wash. That alone dramatically cuts down the risk of putting new swirl marks right back into the paint.
The demand for these advanced products has absolutely exploded. The global market for car care products, including these coatings, is a massive industry estimated at US$11.04 billion and still growing. If you're interested in the numbers, you can find more insights into the car care products industry and see why this final step has become so critical.
Why Hydrophobics and UV Resistance Matter
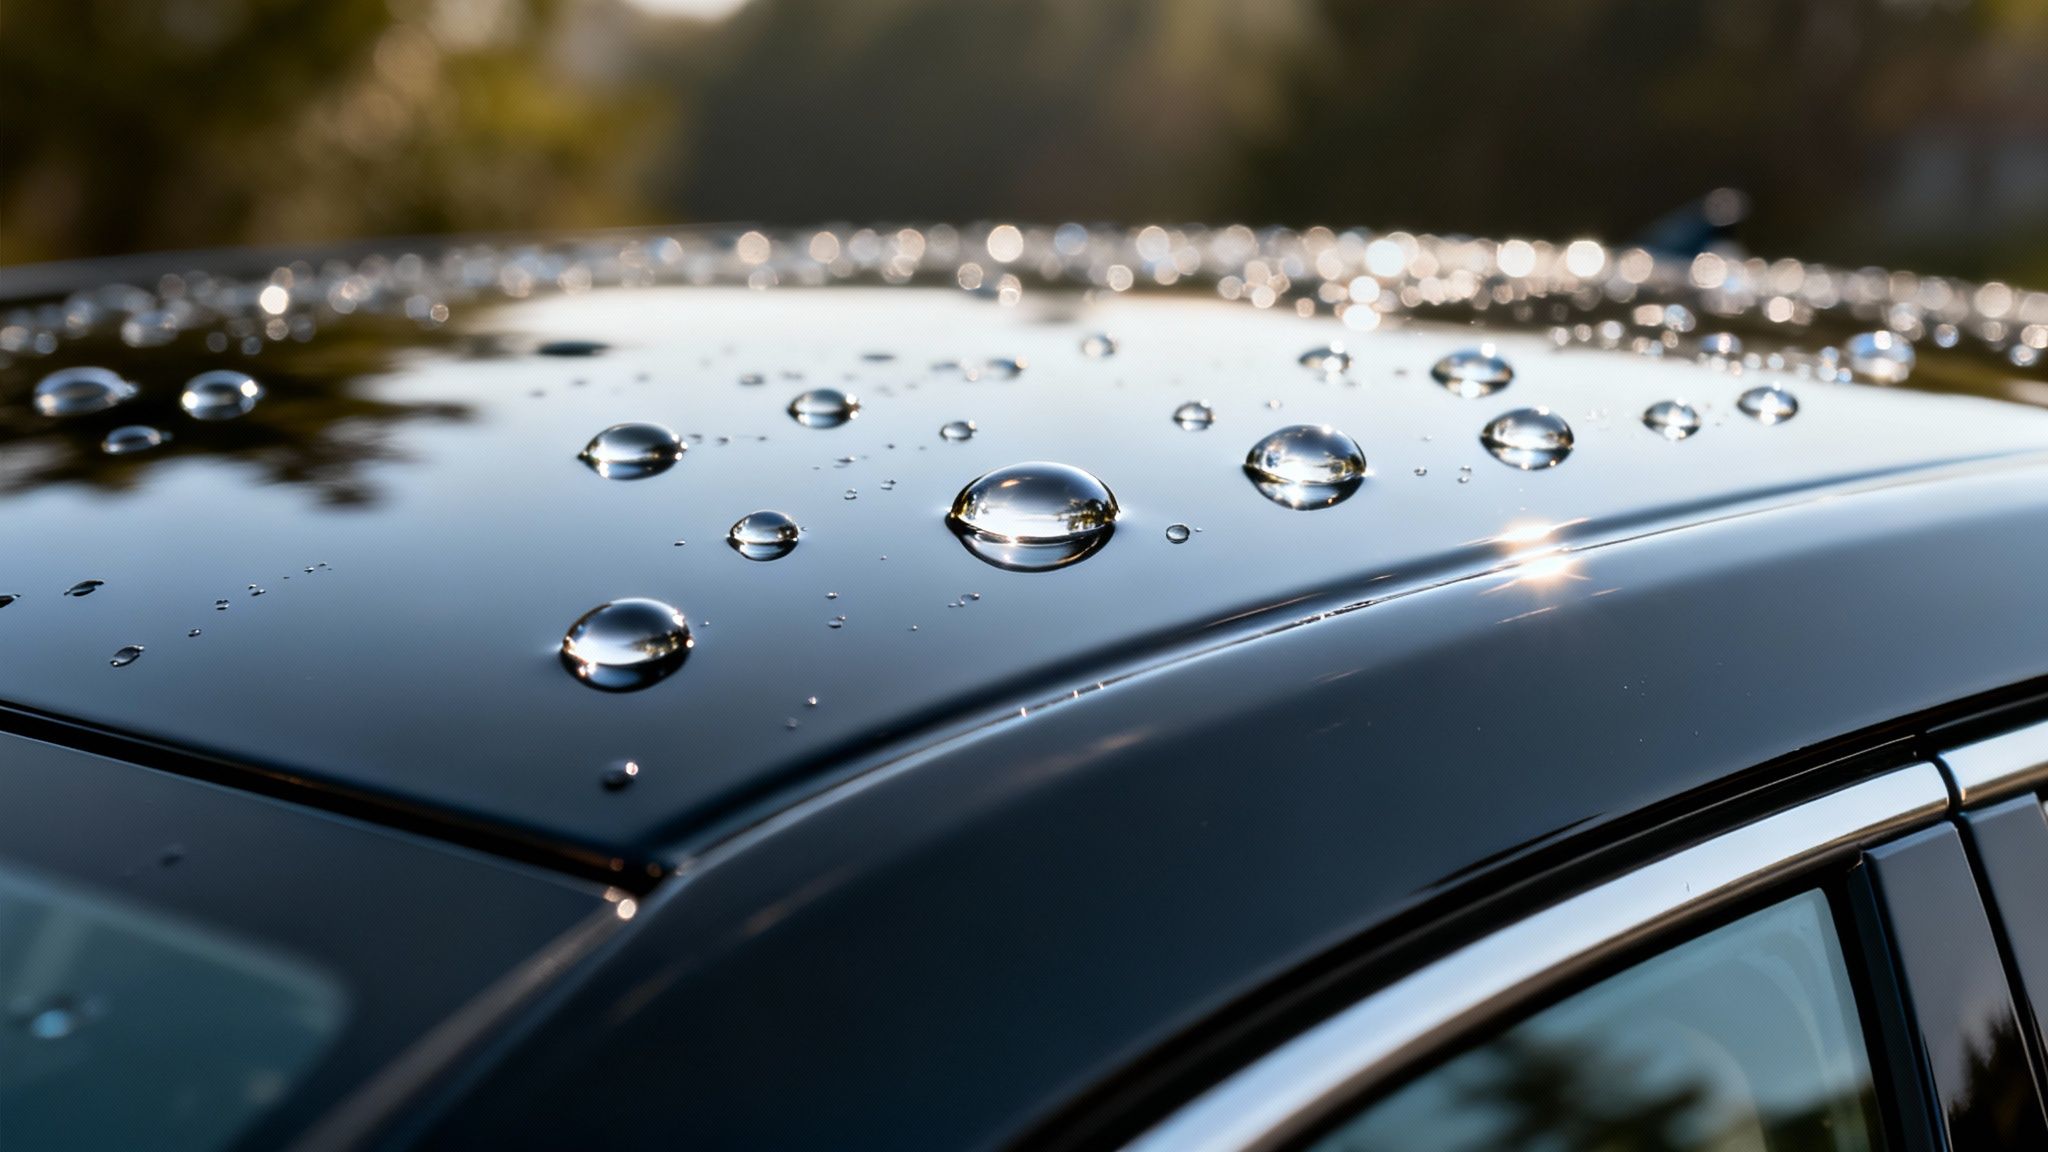
You've seen those videos of water beading up and flying off a car's hood, right? That's the hydrophobic effect, and it’s more than just a neat trick. When water beads that tightly, it actually grabs loose dirt and rolls right off the car, creating a "self-cleaning" effect that keeps your vehicle looking better for longer between washes.
Just as crucial is protection from the sun. UV rays are relentless, and over time they will oxidize your paint, causing it to fade and look chalky. A quality sealant or ceramic coating is like applying high-SPF sunscreen to your car. To really understand the damage the sun can do, check out our guide on how to protect car paint from sun damage. It’s essential for preserving that deep, rich color you worked so hard to bring back.
Protecting your paint is the non-negotiable final chapter in removing swirl marks. For our friends here in Central PA who want that professional-grade durability without the headache, The Mobile Buff is here to help. See what your neighbors are saying about our work on our Google Business Profile, and then give us a call. Let's lock in that shine for the long haul.
Why a Professional Detailer Is the Smart Choice
After walking through all the professional steps—from decontamination to test spots and machine polishing—it becomes pretty clear that real paint correction is a delicate art. Getting rid of swirl marks isn't as simple as grabbing a bottle of polish and a rag. It’s a genuine science that requires patience, a steady hand, and a deep understanding of how different paints react to heat and friction.
Honestly, trying to tackle professional-grade paint correction yourself is a huge gamble. The initial investment in proper equipment alone can be staggering. A good dual-action polisher, a full set of quality pads, and a lineup of professional compounds and polishes can easily set you back hundreds of dollars. And even with the best gear, the learning curve is incredibly steep and unforgiving.
The Real Risks of Going It Alone
One little slip-up with a polisher can cause permanent damage. Pushing too hard, moving the machine erratically, or picking the wrong pad and polish combo can lead to issues that look far worse than the swirls you started with.
Some of the most common DIY disasters we correct include:
- Buffer Trails or Holograms: These are ugly, hazy, rainbow-like patterns that show up in direct sunlight. They're a dead giveaway of poor machine technique.
- Burning Through the Clear Coat: This is the absolute worst-case scenario. Too much heat or aggressive polishing in one spot can literally melt away your car's protective clear coat. Fixing this almost always means an expensive trip to a body shop.
- An Uneven, Patchy Finish: Getting a perfectly consistent, mirror-like finish across an entire car is tough without years of practice. It's incredibly common for DIYers to end up with some panels looking amazing while others are still swirled or hazy.
The Professional Advantage: A skilled detailer is more than just a person with a polisher—they're a paint specialist. We've spent thousands of hours honing our craft on every kind of vehicle imaginable. We know exactly how to read your paint's condition and build a custom plan to deliver flawless results without any risk.
It's About Time, Money, and Peace of Mind
Beyond the risk of damaging your car, you have to consider the time commitment. A proper one-step paint correction can easily take up a full day. A more involved two-step correction? You can kiss your entire weekend goodbye.
This is where calling a professional detailer isn't just a luxury, it's the smartest move you can make. You’re not just paying someone to polish your car; you're investing in:
- Guaranteed, Flawless Results: We have the experience and tools to achieve that deep, wet, mirror-like shine you're after.
- Protecting Your Car's Value: For anyone with a high-end car, a leased vehicle, or plans to sell in the future, a professional paint correction is a no-brainer. It boosts curb appeal and protects its resale value.
- The Ultimate Convenience: With a mobile service like The Mobile Buff, you don’t have to go anywhere. We bring our entire professional setup right to your driveway anywhere in Central Pennsylvania, saving you time and hassle.
And we're not the only ones who think so. The global market for car detailing services, currently valued at over US$37 billion, is expected to jump to nearly US$57 billion by 2032. A huge piece of that pie is exterior detailing and paint correction, which shows that millions of car owners would rather trust an expert than risk a DIY disaster. You can dive into more details on the car detailing market's growth to see just how fast this industry is expanding.
For car owners who value their time and demand a perfect finish, bringing in a pro is the clear winner. Don’t just take our word for it—see what your neighbors in Harrisburg, Mechanicsburg, and across Central PA are saying about our work on our Google Business Profile.
Got Questions About Swirl Mark Removal?
If you're still curious or have a few lingering questions, you've come to the right place. Let's tackle some of the most common things we hear from car owners just like you, with some straight-to-the-point, professional answers.
Can't I Just Use a Store-Bought Wax to Hide the Swirls?
That's a common thought, and many off-the-shelf waxes and "glazes" contain fillers designed to temporarily mask minor imperfections. They might make your paint look a bit better for a week or two, but it’s just a band-aid.
Once you wash the car a few times, those fillers wash away, and the swirls are right back where they started. True paint correction isn't about hiding anything. We're permanently removing a microscopic layer of the clear coat to level the surface and erase those defects for good. The result is a deep, true gloss that a filler product can never replicate.
Is Paint Correction Actually Safe for My Car's Paint?
Absolutely, as long as it's done by a trained professional with the right equipment. A huge part of our method involves meticulously measuring paint depth before we begin polishing. We always start with the least aggressive combination of pads and compounds that will get the job done. This professional approach ensures we preserve as much of your car's precious clear coat as possible while still achieving amazing results.
What's the Ballpark Cost for Professional Swirl Removal?
The price tag really depends on a few key things: the size of your vehicle, its color (darker colors show every little flaw), how severe the swirls are, and what level of perfection you're aiming for.
A one-step polish, which is fantastic for boosting gloss and clearing up light swirls, will naturally be more affordable than an intensive multi-stage correction required to rescue a more neglected finish. Here at The Mobile Buff, we give personalized quotes to all our clients across Central Pennsylvania. This way, the service is perfectly matched to your car’s actual needs and your expectations.
The only real way to know what your car needs is to have an expert look at it. We can pinpoint the right level of correction to restore that showroom shine without any unnecessary work.
How Can I Stop Swirls From Coming Back?
This is the big one! Once your paint is perfect, keeping it that way is all about prevention. Adopting safe washing habits is the single most important thing you can do.
Learning the two-bucket wash method and using high-quality microfiber wash mitts will slash the chances of you re-introducing scratches. And please, stay away from those automatic car washes with the giant spinning brushes—they're the number one enemy of a swirl-free finish. For the ultimate line of defense, we strongly recommend a professional ceramic coating after we've corrected the paint. It adds a hard, durable layer of protection that makes the surface incredibly resistant to new swirls and so much easier to keep clean.
Ready to see your car’s paint look even better than it did on the showroom floor? The team at The Mobile Buff brings our expert mobile detailing services right to your home or office. We take the hassle out of getting incredible, professional results.
