
You wash the car, step back, and it looks clean until the sun hits it. Then the swirls show up. Maybe there's water spotting on the hood, a dull patch on the trunk, or that gray haze dark paint loves to advertise. That's usually when people start searching for paint correction wax and assume there's one product that fixes everything.
There isn't.
What you're really looking at is a two-part job. First, the defects have to be corrected. Then the finish has to be protected. That distinction matters because a glossy wax can make paint look better for a little while, but it won't remove swirl marks, light scratches, or oxidation. Fixing those takes machine polishing, patience, lighting, pad selection, and a method that protects the clear coat instead of chewing through it.
Busy owners usually don't want a chemistry lesson. They want to know what works, what doesn't, and whether this is something worth paying a pro to handle. That's exactly how this should be approached.
What Does Paint Correction Wax Actually Mean
The phrase paint correction wax sounds like a single service or a miracle bottle. In practice, it combines two separate things.
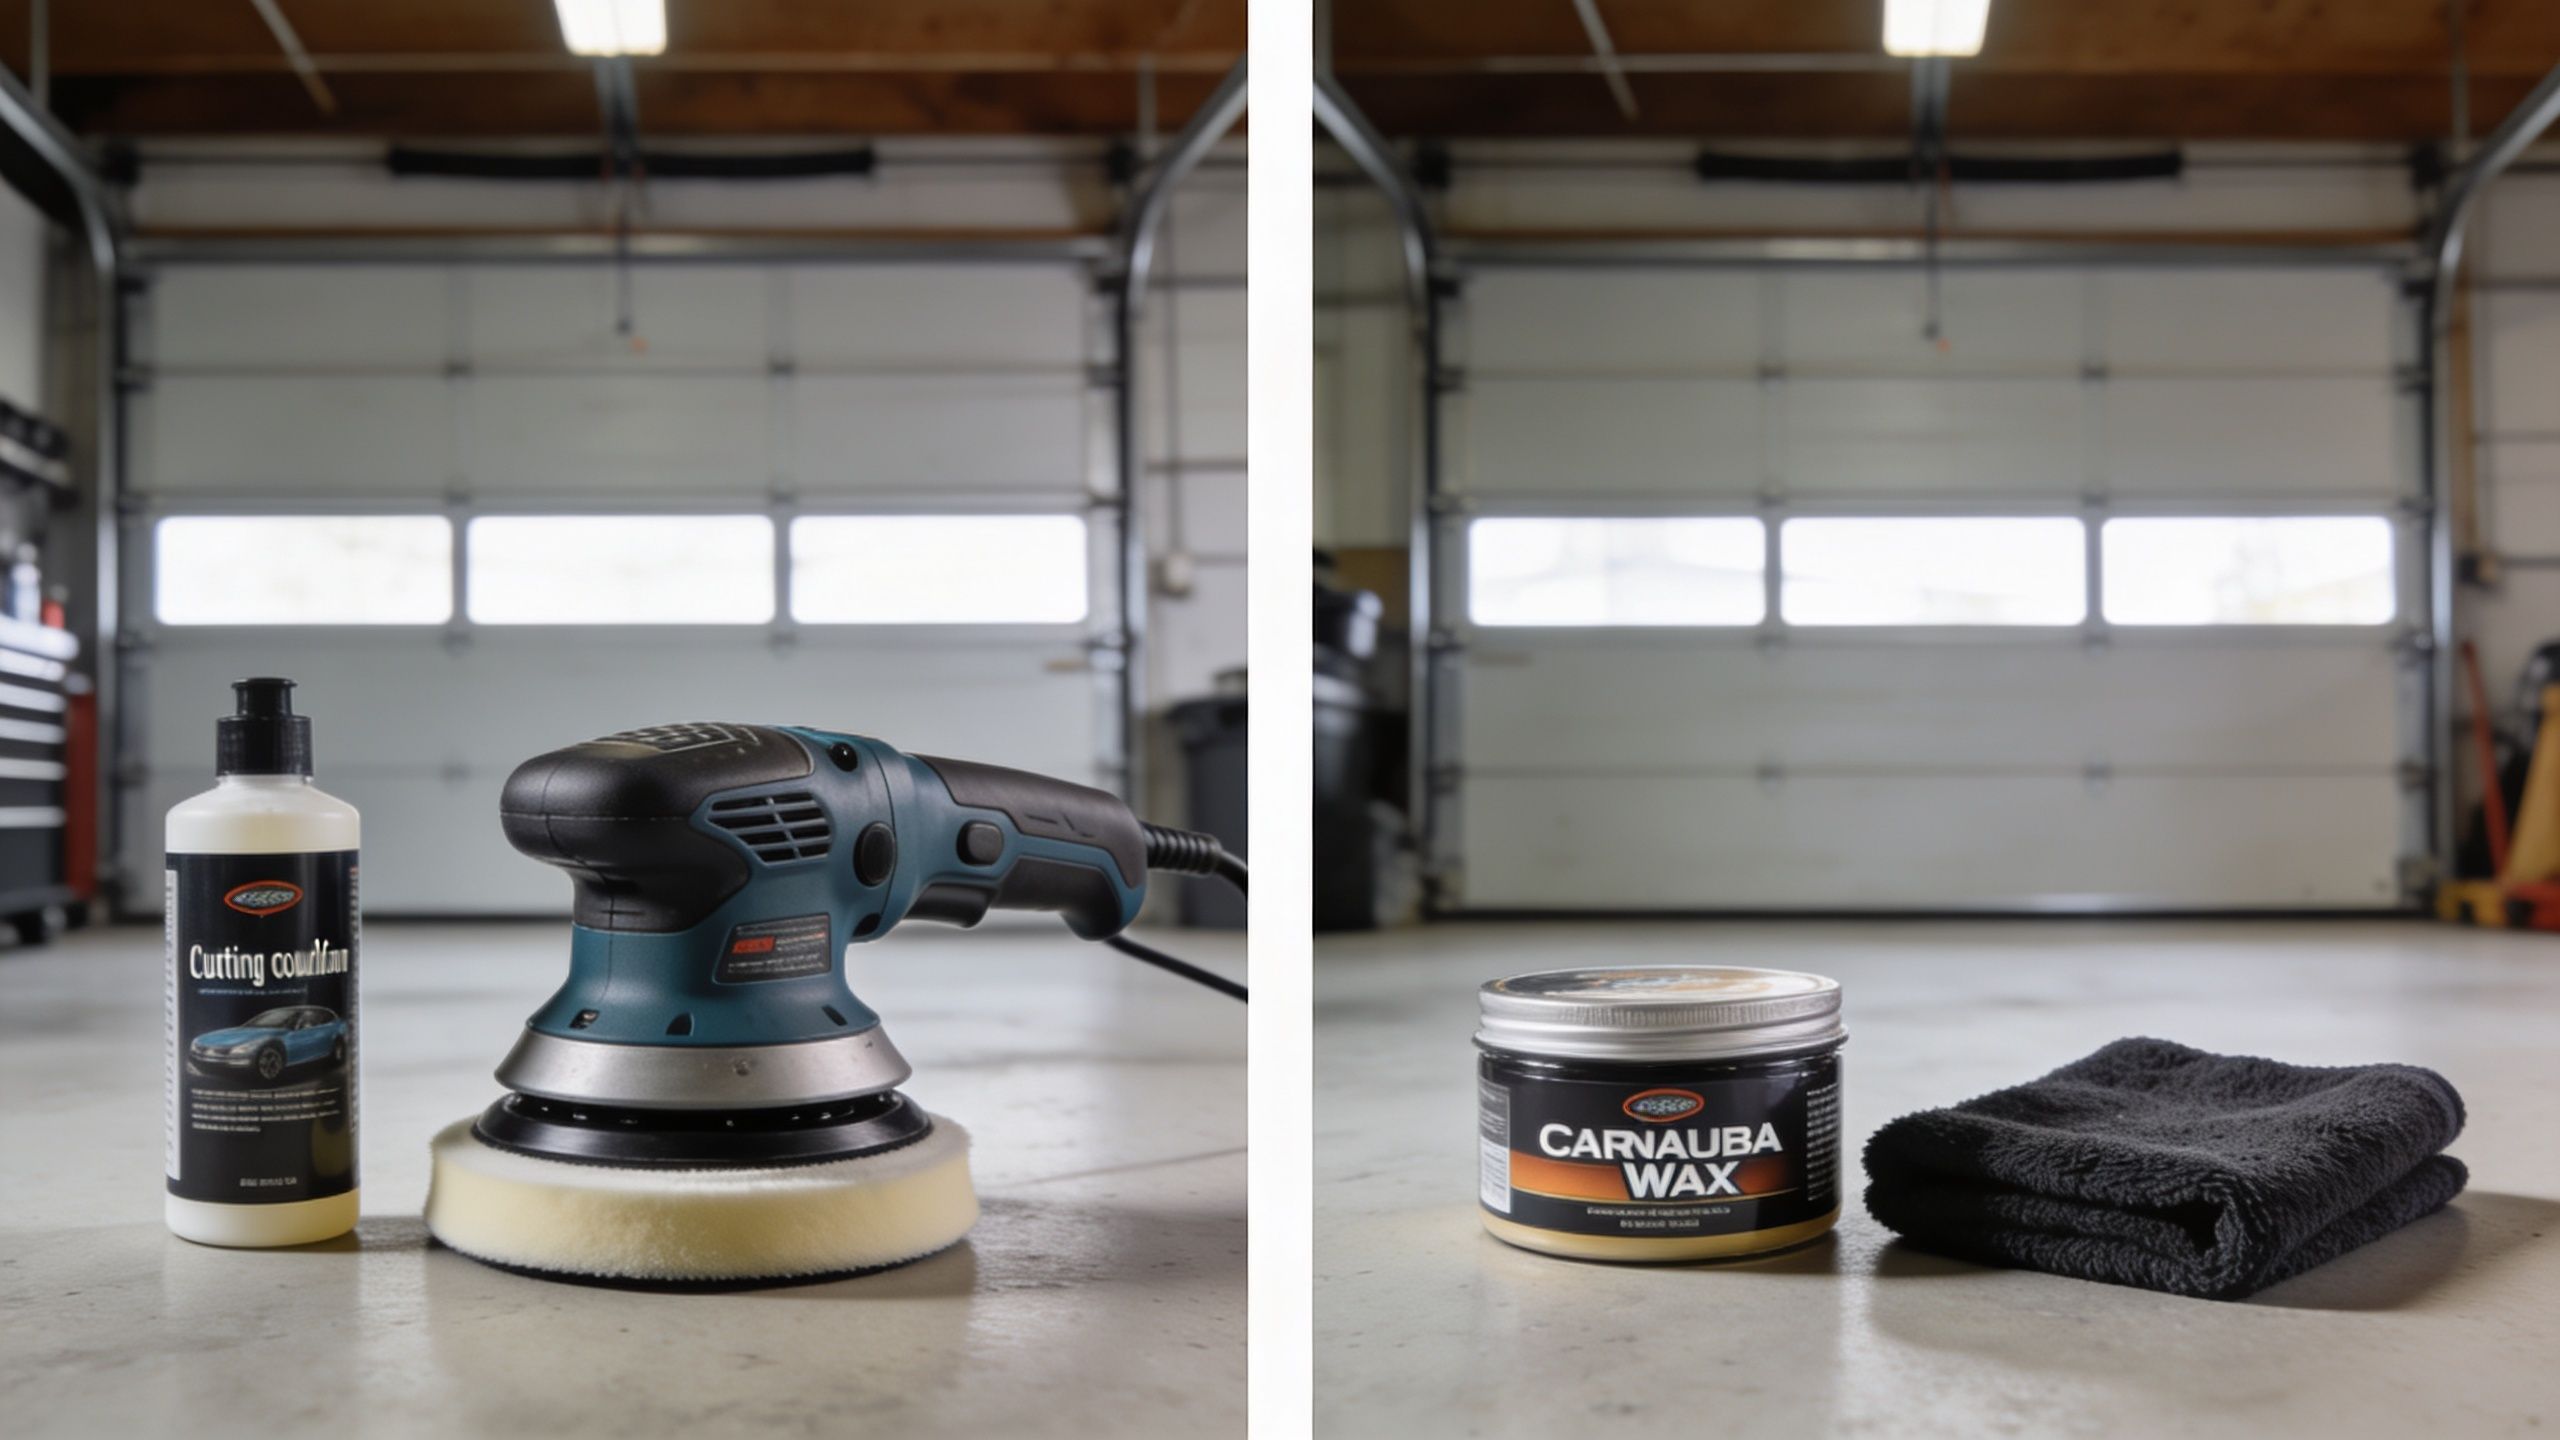
Paint correction removes defects from the paint with machine polishing. Wax goes on after correction as a protective layer. That order matters. As noted in this paint correction and wax explanation, paint correction is about removing defects with machine polishing, while waxing is a short-term protective step applied after correction. Many owners think “paint correction wax” is one service, but correction must come first to fix swirls or scratches. Wax alone only adds temporary gloss.
Correction fixes the problem
When sunlight exposes spiderweb swirls, the issue is usually in the clear coat. The paint surface has been marred by wash-induced scratching, improper drying, automatic car washes, or old contamination. A machine polisher, matched with the right pad and polish, levels those defects carefully.
That's why correction is a skilled process, not just “buffing it out.” The wrong combination can remove too little and waste time, or remove too much and create new damage.
Wax protects the result
Wax belongs at the end. It adds gloss, slickness, and short-term protection. It can make a freshly corrected vehicle look richer and easier to maintain, but it does not repair damaged paint.
Practical rule: If a product claims to make scratches disappear without true polishing, it's usually hiding them, not removing them.
That difference is where a lot of DIY disappointment starts. A car gets washed, a wax goes on, it looks darker and shinier, and then after a few washes the same swirls show back up. The defects never left. They were just less visible for a while.
Why the wording matters
If you understand the phrase correctly, you make better decisions:
- Choose correction for defects if the paint has swirls, haze, oxidation, or etching.
- Choose wax for protection if the paint already looks good and you want gloss and easier upkeep.
- Choose both in sequence if you want the finish improved first and then preserved.
That is the true meaning behind paint correction wax. It's not one shortcut. It's repair first, protection second.
When Your Paint Needs More Than Just a Wash
A normal wash removes loose dirt. It doesn't solve bonded contamination, wash marring, or deeper visual defects. That's where a lot of owners get stuck. The car is clean, but it still doesn't look right.
The surface usually tells you what it needs. If the paint feels rough after washing, contamination is still attached. If the paint looks dull but smooth, light polishing may be enough. If you can see swirls, water spots, oxidation, or more obvious defects, you're likely beyond basic maintenance.
Three common levels of paint care
- Decontamination helps when the paint feels gritty even after a proper wash. Clay bar treatment and chemical decontamination remove bonded material that regular soap leaves behind.
- Polishing helps when the finish has light haze or mild wash marks and needs refinement, not heavy cutting.
- Full correction is for more obvious defects such as heavier swirls, deeper water spotting, oxidation, and paint that has lost clarity.
Professionals don't treat every vehicle the same because the finish doesn't wear the same way on every car. A daily driven black SUV with tunnel-wash damage needs a different approach than a garage-kept sedan with only mild swirls on the hood and trunk.
Why stages matter
A staged service protects the paint by matching the process to the defect level. In a breakdown from Detailed Image, a vehicle starting at 40 to 50% paint perfection improved to about 70% with a 1-stage polish, 90 to 95% with a 2-stage correction, and 95%+ with a 3-stage process in this paint correction levels guide.
That's useful because it shows why not every car needs the most aggressive option. Sometimes a one-stage polish is the smart call. Sometimes it isn't enough.
The goal isn't to polish as much as possible. The goal is to remove the defects that matter while preserving as much healthy clear coat as possible.
If your paint looks worse after every wash, or you only notice the damage in direct light, that's a strong sign the issue isn't dirt. It's the finish itself.
The Professional Paint Correction Process Step-By-Step
Good correction work starts long before the machine touches the paint. The polishing stage gets the attention, but the prep work is what makes the result safe, repeatable, and clean.
A professional workflow includes inspection, washing, chemical and mechanical decontamination, paint-thickness measurement, trim masking, a test spot, and then the least aggressive pad-and-polish combination that gets the job done, as outlined in this full paint correction process.
Inspection comes first
Before polishing, the paint has to be read correctly. Different light angles reveal different defects. Swirls that disappear in shade show up under inspection lighting. Water spotting, sanding marks, haze, and prior polishing trails can all hide until the lighting changes.
A rushed DIY job usually starts going sideways at this stage. If you can't clearly see the defects, you can't make good polishing decisions.
Wash and decontamination prevent extra damage
Polishing dirty paint is a bad idea. Any leftover grit can get trapped between the pad and the paint, creating fresh marring while you're trying to remove old defects.
That's why the process starts with a thorough wash and decontamination. Chemical decon helps break down embedded contamination. Mechanical decon, often with clay, removes bonded debris from the surface. The point isn't just cleanliness. It's creating a controlled polishing surface.
Paint measurement and trim masking reduce risk
Paint correction removes measurable material. That's why professionals check paint thickness and treat edges, body lines, and repainted panels carefully. Some areas shouldn't be hit the same way as broad, flat sections.
Masking trim matters for a different reason. Rubber and textured plastics can stain or catch compound residue. Taping them off keeps the finish cleaner and prevents avoidable cleanup.
The test spot saves the paint
The test spot is one of the most important parts of the entire service. Instead of guessing, a technician tries the least aggressive setup on a small section first. That might mean a polishing pad with a fine or medium polish. If that doesn't remove enough, the process steps up from there.
Shop mindset: Start mild, inspect the result, then increase cut only if the paint demands it.
That approach is slower at the beginning and faster by the end. It prevents unnecessary clear coat removal and keeps the finish more uniform across the vehicle.
If you want a plain-language comparison of light polishing versus more involved correction, this breakdown of paint correction vs polish is a useful reference.
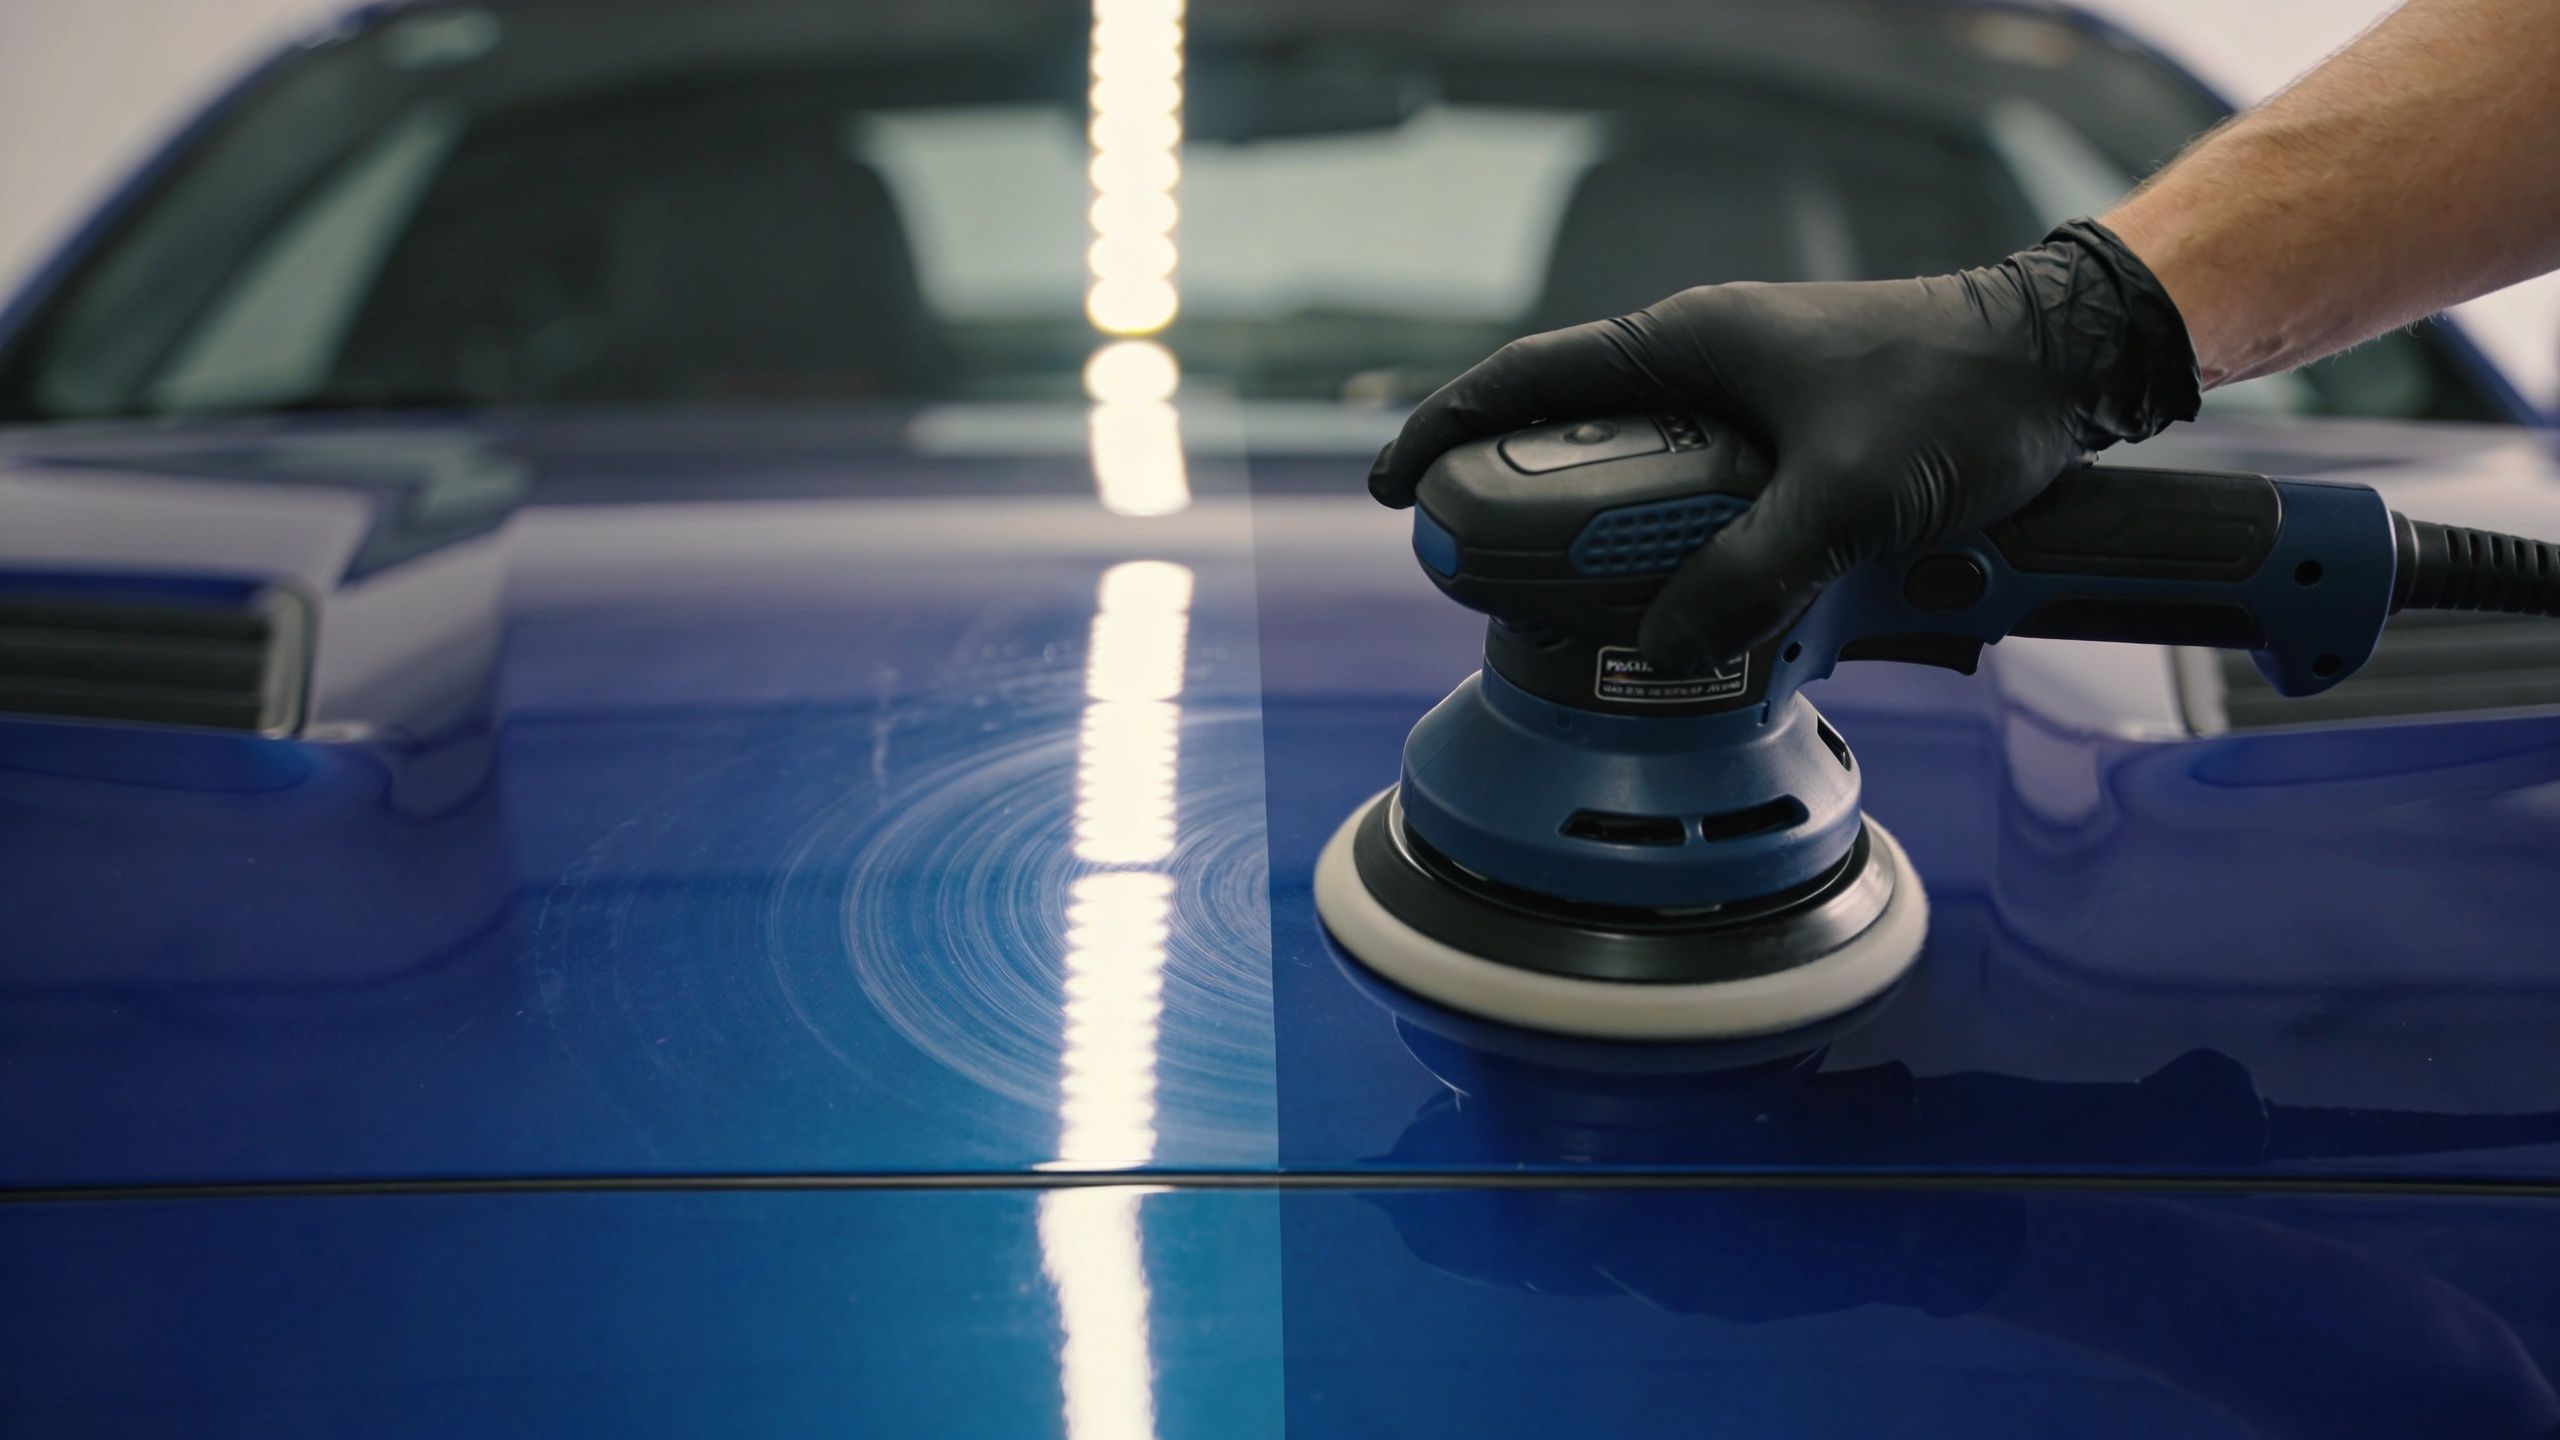
Compounding and polishing do different jobs
Compounding is the heavier correction phase. It targets more obvious defects and levels the surface more aggressively. Polishing refines the finish afterward, improving clarity, gloss, and reducing any haze left from the cutting step.
On some vehicles, one polishing step is enough. On others, the paint needs multiple stages to get where the owner wants it. The right answer depends on the paint condition, the paint type, and the result you're trying to achieve.
A quick visual helps show how controlled machine work looks in practice.
Final inspection is where quality shows
After polishing, the finish gets checked again under proper lighting. This step matters because some products can temporarily hide defects. A clean inspection tells you what was corrected and what still needs attention.
That's the difference between a car that looks amazing for pickup photos and one that still looks right when the owner sees it the next morning in direct sun.
Common DIY Mistakes That Can Ruin Your Paint
A lot of people start a weekend correction project thinking the hard part is buying a machine and a bottle of polish. It isn't. The hard part is knowing how much cut is safe, when to stop, and how to tell real correction from temporary fill.
Paint correction commonly takes 6 to 20 hours depending on severity, and aggressive methods like rotary polishing or wet sanding can cause irreversible damage, including burning through the clear coat, according to this paint correction timing and risk overview. That's why controlled removal matters more than maximum aggression.
The big mistakes professionals keep seeing
Starting too aggressive
Owners often jump straight to a compound and a cutting pad because the defects are easy to see. That can leave haze, reduce clarity, and remove more clear coat than necessary.Using rotary tools without experience
Rotary polishers cut fast. They also build heat fast. In skilled hands they have a place. In untrained hands they create edge burn, holograms, and uneven finish quality.Skipping decontamination
If the paint still has bonded contamination, the pad drags that material across the surface. The result can be fresh marring and a finish that looks worse after polishing than before.Mistaking fillers for correction Some products make defects look better temporarily. That's not the same as leveling the paint. Once the fillers wash away, the swirls come back.
What damage looks like in real life
The mistakes usually show up in one of four ways:
| Problem | What you notice |
|---|---|
| Holograms | Wavy machine trails in direct sun |
| Haze | Paint looks cloudy instead of sharp |
| Burn-through | Clear coat failure or exposed lower layers |
| Patchy finish | Some panels look sharp, others look dull |
If a polishing setup is removing defects quickly but leaving the finish worse, that isn't efficiency. It's overcorrection.
The other trap is time. People assume this is a quick enhancement job, then end up halfway through a vehicle, tired, with loaded pads, uneven results, and no clean stopping point. That's when poor decisions happen.
DIY can work in careful hands. It also gets expensive fast when the paint needs rescue afterward.
DIY Correction vs Hiring A Professional Detailer
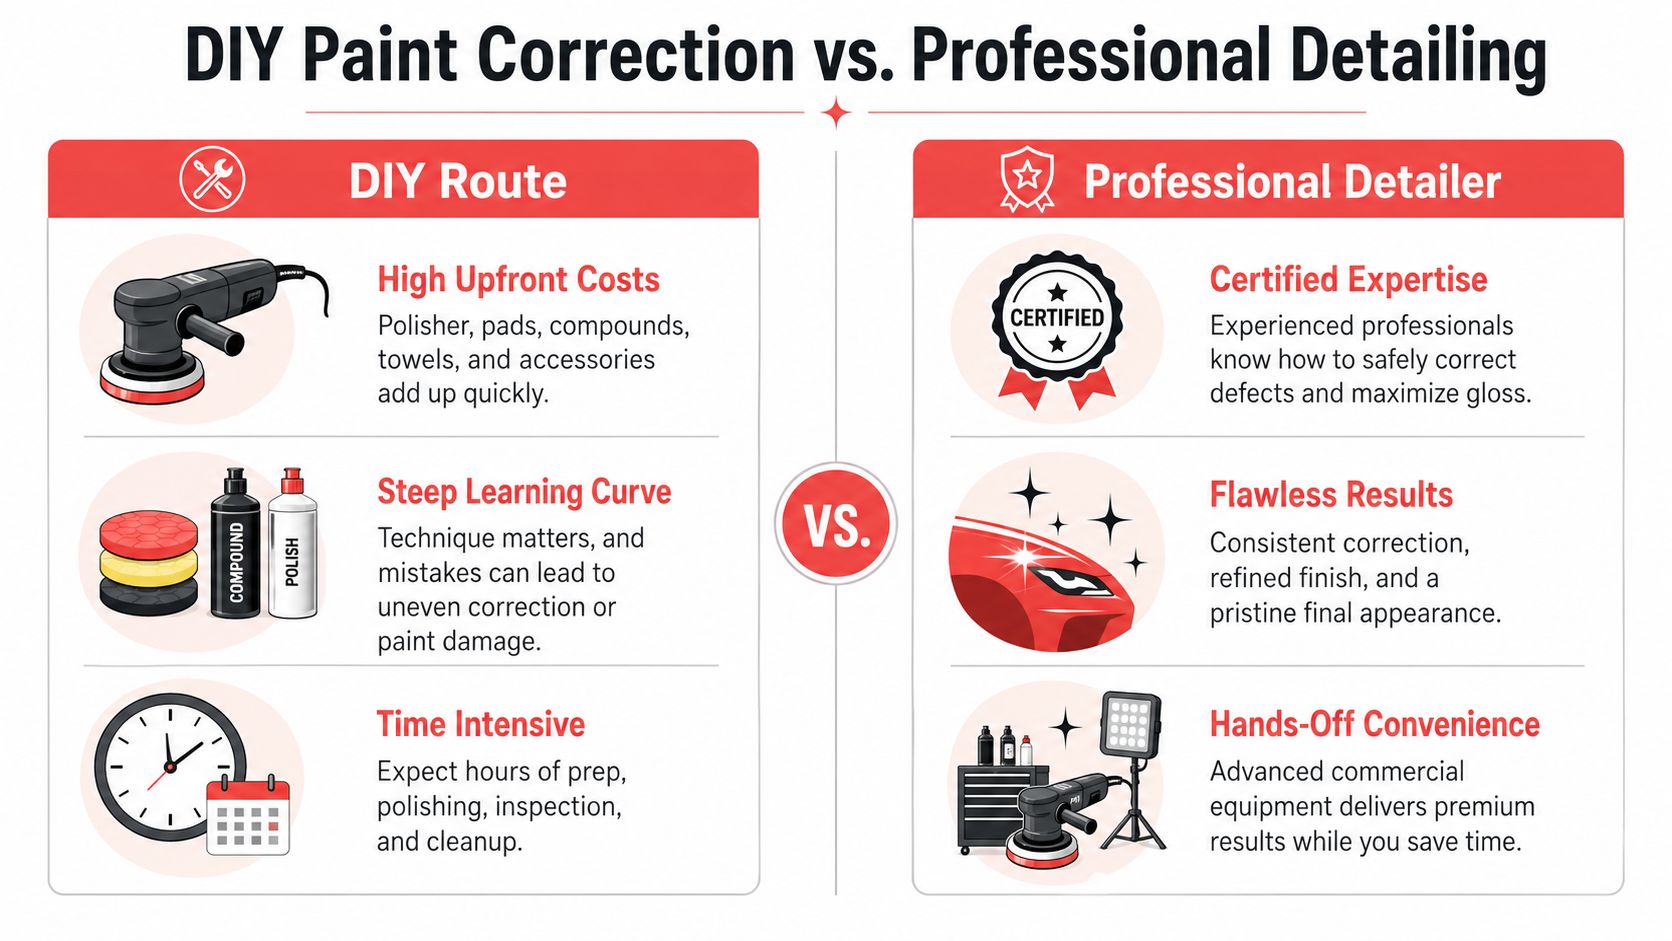
The sticker price of professional correction can make DIY look appealing at first glance. Then the true equation shows up. You need the machine, pads, polish system, prep chemicals, towels, lighting, and enough time to learn what each step is supposed to look like.
According to AutoTrader, a 1-step paint correction often starts around $400 and takes about 8 hours, while a 2-step correction can be $600+ and take 10 or more hours in this paint correction cost and time guide. The same guide notes that a vehicle's clear coat is only about as thick as a sheet of paper, which is why skilled correction work costs what it does.
What you're really choosing
You're not just choosing between spending money and saving money. You're choosing between two very different kinds of risk.
One route asks you to invest your time, learn on your own vehicle, and accept uncertain results. The other asks you to pay for a finished result and avoid the learning-curve mistakes.
If you want a deeper look at service pricing factors, this page on paint correction cost breaks down what affects the final scope.
DIY vs Professional Paint Correction
| Factor | DIY Approach | Professional Service (The Mobile Buff) |
|---|---|---|
| Time commitment | You supply the full day, or more, and handle every step | The work is performed for you on-site |
| Tools required | You need a machine polisher, pads, compounds, polishes, towels, and prep supplies | Professional-grade tools and materials are already part of the service |
| Learning curve | You learn by trial, error, and inspection | Technique is based on established correction workflow |
| Risk to clear coat | Higher if you misread the paint or over-polish | Lower because the process is designed around least-aggressive correction |
| Result consistency | Depends on your experience and lighting | More controlled and repeatable |
| Convenience | You give up a weekend and still need cleanup | Mobile service fits around your schedule |
Who DIY makes sense for
DIY makes the most sense for someone who wants to learn the craft, accepts the risk, and is comfortable spending serious time practicing technique. It's less attractive for a busy owner who just wants the swirls gone without gambling on the finish.
The professional option isn't only about shine. It's about avoiding the cost of doing the job twice.
For many Central PA drivers, that's the deciding factor.
Protecting Your Perfected Paint The Right Way
Once correction is finished, the paint looks better because defects have been removed. It's also exposed. That fresh finish needs protection or the improvement won't hold up the way it should.
The “wax” side of paint correction wax finally belongs here. Not before polishing. After.
Your main protection choices
- Carnauba wax gives warm gloss and a classic freshly detailed look. It suits owners who enjoy regular hands-on maintenance and don't mind reapplying protection more often.
- Synthetic sealant is the practical middle ground. It's a good fit for daily drivers that need easier upkeep and more staying power than traditional wax.
- Ceramic coating is the long-term option for owners who want durable protection and less maintenance hassle.
A lot of owners choose based on shine alone. A better way is to choose based on habits. If you love regular driveway detailing, wax can be satisfying. If your vehicle lives outside, goes through school pickup lines, and gets washed whenever you can squeeze it in, a longer-lasting protectant usually makes more sense.
Matching protection to real life
If you're comparing options after correction, this guide on what paint sealant does for cars is a useful place to start because sealants often hit the best balance for busy drivers.
For owners researching coatings and long-term care in harsher climates, this article on how to maximize vehicle protection in Manitoba gives helpful context on why environment and maintenance habits affect what protection makes sense.
Correction creates the finish. Protection keeps that finish from slipping backward right away.
Wax still has a place. It just shouldn't be confused with correction itself. If the paint is already in strong condition, wax can be a nice finishing choice. If the paint is scratched and swirled, wax is the last step, not the fix.
Get a Flawless Finish Without the Hassle
If your paint looks clean in the shade but tired in the sun, it's probably time for proper correction and protection. Before you book, you can see what local customers say on our Google Business Profile reviews from Central PA drivers.
If you want the gloss without giving up your weekend, book a mobile detailing appointment with The Mobile Buff. We handle the inspection, correction, and protection at your location so you get a cleaner, sharper finish without the trial and error.
