
Hey there! If you're on the hunt for the best headlight restoration products, you'll quickly learn one thing: for a result that truly lasts, nothing beats the professional approach. While some DIY kits can offer a temporary fix, they often fall short of delivering that durable, crystal-clear finish that keeps you safe on the road.
A simple polish might offer a quick touch-up for minor haze, but to truly combat that deep, stubborn yellowing and oxidation, a professional-grade restoration is the only way to go.
Why Your Headlights Look Yellow and How to Fix It
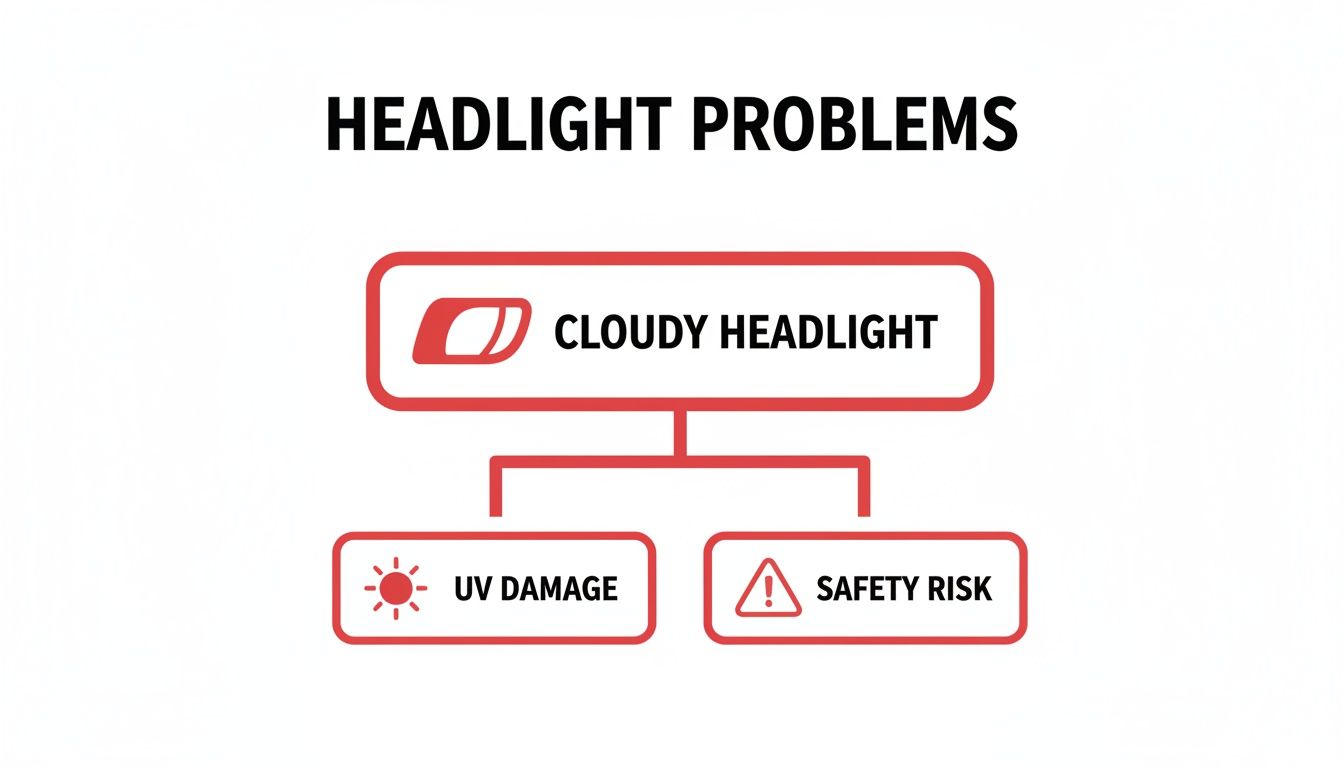
Ever glanced at your car and noticed the headlights look cloudy, yellow, or just... sad? It’s not just a cosmetic issue that ages your vehicle—it's a genuine safety risk. That haze is actually the factory-applied protective clear coat breaking down, mostly from the sun's relentless UV rays.
Think of it as a permanent sunburn on your headlights. Over time, this UV damage, called oxidation, eats away at the polycarbonate plastic. This doesn't just look bad; it scatters and dims the light from your bulbs, dramatically cutting down your nighttime visibility. Suddenly, spotting pedestrians, road signs, or obstacles becomes much harder.
The good news? You don’t have to put up with dim, dangerous headlights. Professional headlight restoration is all about sanding off that damaged, oxidized layer to get back to the crystal-clear plastic underneath. The final, crucial step is applying a new, durable protective sealant to keep them looking great. This process brings back the original clarity and brightness, restoring both the look and the critical function of your lights.
The Rise of Headlight Restoration
Not too long ago, the only fix for foggy headlights was a complete and costly replacement. We're talking anywhere from $300 to $1,000 per pair. Ouch.
Thankfully, drivers today have much better, more affordable options. The market for professional restoration services has grown as people have moved toward smarter, more cost-effective solutions. Did you know that UV damage can turn headlight lenses yellow in just 3-5 years? This can slash your nighttime visibility by a shocking 80%. It’s easy to see why getting them professionally restored has become so popular.
This guide will walk you through everything you need to know to get that crystal-clear view back. We’ll break down the different types of products out there, from basic polishes to professional-grade kits, so you can understand what goes into a true restoration. For a deeper look at the science of why this happens, check out our article on what causes foggy headlights.
Whether you’re a hands-on DIYer or you’re thinking about calling in a pro, understanding the problem is the first step toward a brighter, safer drive.
The Different Types of Headlight Restoration Products
If you've ever walked down the car care aisle, you know it can be a little overwhelming. There's a whole wall of sprays, wipes, and complex-looking kits all promising to make your headlights look brand new. So, which one is right for you?
As professionals, we believe in matching the right process to the problem. What works for a little bit of light haze won't even make a dent in heavy, yellowed oxidation. It’s a lot like skincare—sometimes a simple moisturizer is all you need, but other times, you need a deep exfoliating treatment to see real results.
As you can see, this isn't just about looks. That cloudy, yellowed layer is sun-damaged plastic, and it’s seriously cutting down the light that gets to the road, which is a major safety risk at night.
Sanding Kits (The Heavy Hitters)
For headlights suffering from moderate to severe yellowing and oxidation, multi-step kits are the most common DIY solution. They aren't a quick fix; they involve a real process of sanding away the damaged, oxidized top layer of plastic.
The process involves starting with a coarser grit sandpaper and gradually working your way to a super-fine grit, which polishes the surface back to clarity. The final, and most critical, step is applying a high-quality UV sealant. If this step is skipped or a low-quality sealant is used, all that hard work will be undone in a few short months as the sun immediately starts attacking the raw plastic again.
- Best For: Moderate to severe yellowing, thick haze, and even light surface pitting.
- Pros: Can produce the most dramatic and long-lasting results you can get from a DIY kit.
- Cons: It's a workout. This takes time, patience, and a lot of elbow grease. If you're not careful, you can easily create an uneven finish or damage the paint around your headlights.
Polishing Compounds & Wipes (The Quick Touch-Up)
Are your headlights just starting to look a little dull? Maybe there’s a very light film of haze you can see in the sun? A simple polishing compound might seem like an easy fix.
These products are packed with fine abrasives that gently buff away the very first signs of oxidation without needing any aggressive sanding. Think of it as a quick polish. It's fast and easy, but it’s a surface-level fix that won’t do much for deeper yellowing. Since they rarely include a durable UV protectant, the results are pretty temporary—expect them to last a few weeks to maybe a couple of months.
If you want to learn more about keeping your lights clear, we have some great articles in our guides on headlight maintenance.
All-in-One & Single-Step Kits (The Convenient Option)
These kits are all about making the process as simple as possible. They usually bundle a cleaning solution, an applicator, and a sealant all into one package. Some are as easy as a two-sided wipe: one side cleans, the other seals.
While they are incredibly convenient, their effectiveness is limited. They really only work on the mildest cases of cloudiness and offer a temporary shine more than a true restoration.
The real secret to lasting clarity isn't just in the cleaning—it's in the protection that comes after. The quality of the UV sealant is what separates a six-month fix from a multi-year solution. This is where professional-grade materials truly make all the difference.
Comparing DIY Headlight Restoration Products
To make it easier to choose, here's a quick breakdown of how these DIY options stack up against each other.
Ultimately, the most important part of any kit is the UV Sealant. This is the new clear coat that has to stand up to the sun every single day. Cheaper kits often use sealants that break down quickly. That's why professional services like ours at The Mobile Buff use commercial-grade ceramic coatings that chemically bond to the surface, offering years of real, durable protection.
How the Pros Tackle a Restoration
So, what does a professional restoration look like? While we can't give away all our trade secrets, we can pull back the curtain and show you the industry-approved method that ensures a flawless, long-lasting finish every single time. It's all about precision, patience, and using the right tools for the job.
Getting pro-level results is all about paying attention to the details every step of the way.
The Critical Preparation Phase
Before any sanding begins, we prep the area meticulously. This is where a professional lays the groundwork for a perfect result. Rushing here is like trying to paint a dirty wall—you're just locking in the mess and setting yourself up for failure.
First, we give the headlight lens a thorough cleaning. We need to get rid of every bit of surface dirt, road grime, and bug guts. Any tiny piece of grit left behind can get ground right into the plastic during sanding, creating deep scratches that are a nightmare to remove later.
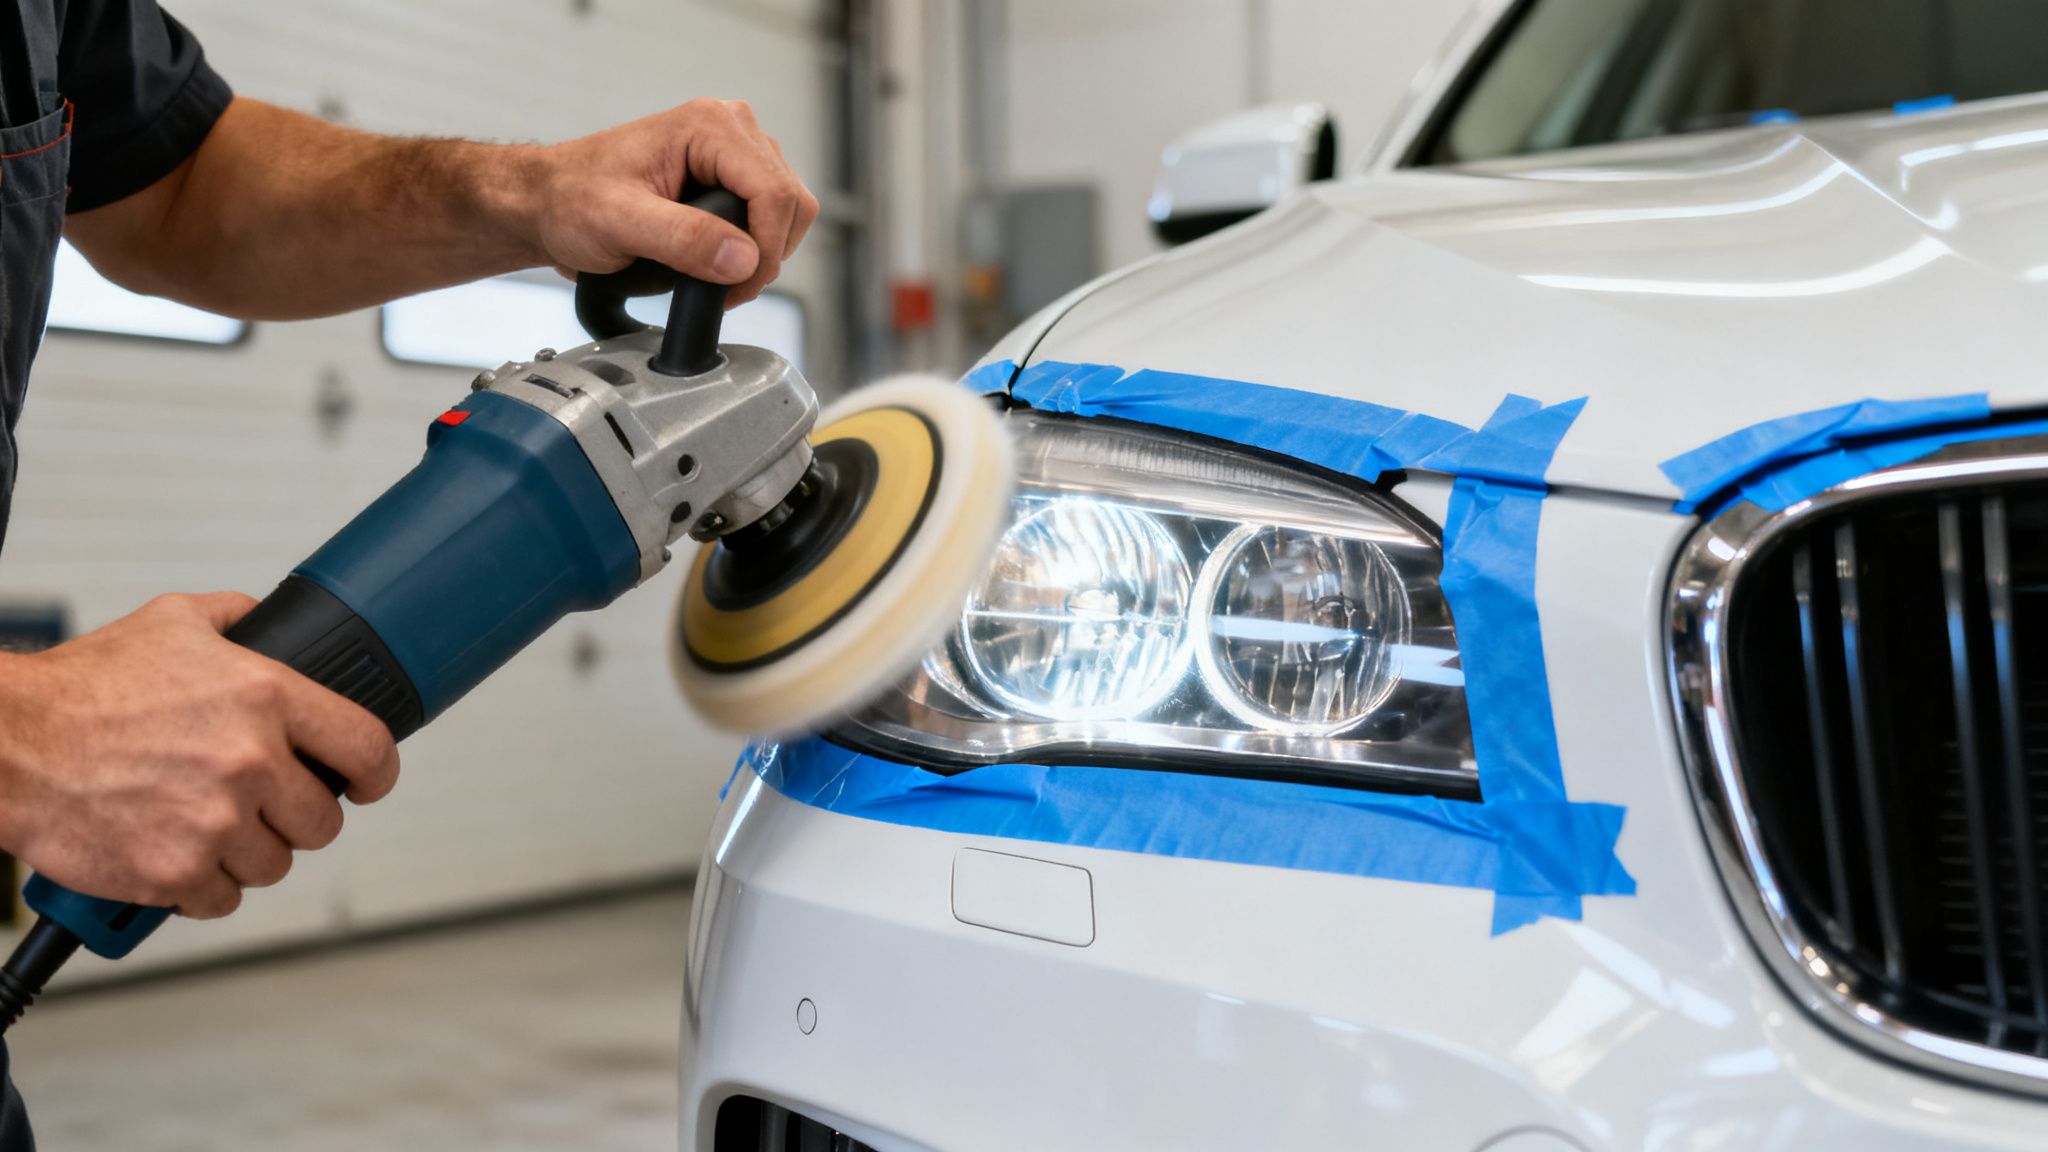
Next up is the most important prep step of all: masking. We use high-quality automotive painter's tape to carefully mask off all the paint around the headlight—the bumper, fender, and hood. This isn't just a friendly suggestion; it's a non-negotiable rule. Sandpaper and polishing compounds can easily burn right through your car’s clear coat, causing permanent damage that’s way more expensive to fix than a foggy headlight.
The Art of Wet Sanding
With the area prepped and taped, it's time for the real work: wet sanding. This is where we physically shave off that damaged, oxidized layer of plastic. The trick is to work our way up, starting with a coarser grit sandpaper and moving progressively to a much finer one, often using power tools for a perfectly even finish.
- Start with Coarse Grit: We begin with the appropriate grit sandpaper (often around 800 or 1000 grit) for the level of damage. We keep both the lens and the sandpaper constantly lubricated. This is key—it prevents the sandpaper from clogging and, more importantly, keeps the plastic from getting too hot and melting or gouging.
- Move to Finer Grits: After sanding the entire lens evenly, we wipe it clean and switch to the next finest grit (maybe 1500 or 2000 grit). We use a cross-hatching pattern to ensure we've completely removed the deeper scratches from the previous grit.
- Finish with Ultra-Fine Grit: We repeat this process until we get to the finest grit, often 3000 grit or even higher. At this point, the lens has a smooth, uniform, hazy look. This is exactly what we want! We’ve just created the perfect canvas for the final polish.
A common DIY mistake is getting impatient and not spending enough time with each grit. A pro makes absolutely sure the sanding marks from the last step are completely gone before moving on. Patience here is what creates that flawless, even clarity in the end.
Polishing and Sealing for a Lasting Shine
Once the sanding is done and the lens is wiped clean and dry, it's time to bring back the sparkle. Using a machine polisher, we apply a professional-grade compound to the lens. We work the polish into the lens until the haze vanishes and brilliant clarity pops. This step buffs out the super-fine sanding marks, revealing a crystal-clear finish.
Finally, we're at the one step that makes or breaks the entire job: applying the UV sealant. Think of this as a brand-new, liquid clear coat for your headlight. A proper application is absolutely critical for long-lasting results. We apply the sealant in a smooth, even coat, ensuring complete coverage from edge to edge.
This new protective layer is what’s going to shield the raw plastic from the sun’s brutal UV rays. Without a quality sealant, freshly restored headlights will start to yellow again in as little as six months. It’s the main reason so many DIY projects just don't hold up. The professional-grade ceramic coatings we use here at The Mobile Buff offer years of protection, not just a few seasons.
If this all sounds like a job you'd rather leave to an expert, that's what we're here for. For anyone in the Harrisburg area who wants a perfect, long-lasting finish without the guesswork, our team is here to help. You can see what our customers are saying and check out our work on our Google Business Profile.
Ready for guaranteed crystal-clear headlights? Book your professional restoration with The Mobile Buff today.
Common DIY Restoration Mistakes to Avoid
Jumping into a DIY headlight restoration project can be really satisfying, but the road to a factory-fresh finish is lined with potential bumps. As pros, we’ve seen it all—the good, the bad, and the truly frustrating. Knowing what not to do is just as important as knowing the right steps.
One of the most common blunders we see is improper sanding. If you apply uneven pressure or rush through the different sandpaper grits, you'll end up with ugly swirl marks, pigtails, or deep scratches that are way worse than the original haze. A perfect finish demands patience and a steady, methodical hand, making sure each grit smooths out the marks left by the one before it.
The Most Critical DIY Failure
If there’s one mistake that sinks more DIY jobs than any other, it’s this: skipping or skimping on the UV sealant. Once you’ve sanded and polished that lens, you’ve essentially stripped it down to raw, unprotected polycarbonate plastic. Without a tough protective layer, the sun’s UV rays will immediately start attacking the surface all over again.
This is the exact reason so many DIY restorations fail. Applying a weak sealant—or even worse, no sealant at all—is like leaving freshly painted walls out in the rain. All your hard work will wash away in just a few months.
Another frequent oversight is not cleaning the lens thoroughly before applying that final coat. Any leftover polishing compound, dust, or even oils from your fingers will stop the sealant from bonding correctly. This leads to a blotchy, uneven finish that not only looks terrible but also leaves weak spots for yellowing to creep back in.
Why So Many DIY Projects Don't Last
It’s not just about your technique; the products you use make a massive difference. The statistics are pretty telling: a whopping 70% of DIY restoration jobs fail, with the headlights yellowing again in less than a year. The main culprit? Consumer-grade kits often come with sealants that just aren't built to last. A professional-grade coating can handle over 50,000 hours of UV exposure, while many kit sealants give up after just 10,000 hours. If you're curious about the industry, you can explore the headlight market trends and data.
Here are a few other common missteps to watch out for:
- Forgetting to Mask Properly: Sandpaper and polishing compounds can easily burn right through your car’s paint. Not taping off the area around the headlight is a recipe for permanent paint damage.
- Working in Direct Sunlight: Trying to apply a sealant in the heat or direct sun can make it dry way too fast, leaving you with streaks and an uneven finish.
- Using Household "Remedies": You’ve probably seen the videos suggesting toothpaste or bug spray. We strongly advise against these methods. They are temporary polishes that offer zero UV protection and can sometimes even damage the plastic. A professional, industry-approved method is always the safest and most effective choice.
These are the little details that separate a quick, temporary fix from a true, long-term solution. If you're in the Harrisburg area and want to sidestep these risks entirely, our team at The Mobile Buff is ready to deliver a perfect, guaranteed result. Check out our reviews and see the professional difference on our Google Business Profile.
Ready for a flawless, long-lasting restoration without the hassle? Book your appointment with The Mobile Buff today and drive with confidence.
The Professional Advantage with The Mobile Buff
While a DIY approach can seem tempting, there’s a world of difference between a weekend project and a true professional restoration. Think of it like cutting your own lawn versus hiring a professional landscaper—you can get the job done, but they have the specialized equipment and know-how to create a perfectly manicured, flawless result. That’s the level of precision we bring right to your driveway.
Even the best headlight restoration products available to consumers can't match the results of professional technique and commercial-grade materials. Our technicians at The Mobile Buff aren’t just following instructions on a box; we’ve refined a multi-step process over years of hands-on experience.
This isn't about a quick polish. It's a complete resurfacing treatment designed to bring back maximum clarity and make it last.
Beyond the DIY Kit: A Deeper Restoration
The heart of our professional service is a meticulous wet-sanding process. We use a whole series of progressively finer grits to carefully strip away every last bit of oxidation, yellowing, and surface damage. Unlike sanding by hand, we use specialized machine polishers that create a perfectly uniform and crystal-clear surface, which helps us avoid the swirl marks or uneven spots that can so easily happen with a DIY attempt.
It's this machine polishing stage that truly brings back the lens's optical clarity, getting it as close as possible to a factory-fresh finish. Honestly, that level of perfection is incredibly difficult to achieve by hand.
Our goal isn’t just to make your headlights look better for a little while. We aim to fully restore their performance and protect them for years to come, making your investment a lasting improvement in safety and aesthetics.
The Power of Professional-Grade Sealants
If there's one massive advantage we offer, it's the quality of our protective coatings. The sealants you find in most consumer kits are made to be easy to apply, but they just aren't built for long-term durability. The professional-grade ceramic coatings or UV sealants we use are in a completely different league.
These advanced coatings cure into a hard, chemical-resistant barrier that provides far superior protection against the sun's harsh rays. Here’s a simple breakdown of what that means for you:
- DIY Kits: You’ll typically get a sealant that lasts maybe 6-12 months before the sun's UV rays start the yellowing process all over again.
- The Mobile Buff: Our professional ceramic coatings are engineered to last for years, ensuring your headlights stay crystal-clear through season after season of sun and rain.
That extended protection is a smart investment. The professional headlight restoration market has grown into a $500 million industry for a reason. With 1 in 5 vehicles over five years old driving around with hazy lenses that can reduce light output by 50-70%, a durable fix is a serious safety issue. Professional services like ours restore 98% clarity and will always outperform the budget options. You can read more about the growth of these professional services if you're curious.
We Bring the Expertise to You
So, why spend your Saturday hunched over your car, wrestling with sandpaper and breathing in chemical fumes? We bring our mobile detailing shop directly to you, whether you're in Harrisburg, Mechanicsburg, or anywhere in the surrounding Central PA area. You get a guaranteed, professional result without the hassle, the mess, or the risk of accidentally damaging your car. You can see the quality of our work and check out what your neighbors are saying on our Google Business Profile.
Don't settle for a temporary fix that you’ll just have to redo next year. For a lasting solution that genuinely improves your car's safety and appearance, it’s best to trust the experts.
Ready for headlights that look and perform like new? Explore our professional headlight restoration service and book your appointment with The Mobile Buff today.
Choosing Your Path: DIY vs. Professional Restoration
So, you've seen what's out there for headlight restoration, from the weekend warrior sanding kits to the heavy-duty gear the pros use. Now comes the big question: which route is best for your car, your schedule, and what you want the final result to look like? As detailing professionals, we believe the choice boils down to a simple balance: a temporary fix versus a long-term solution.
Are you looking for a quick touch-up that makes things noticeably better for a little while? Or are you aiming for that flawless, factory-fresh clarity that protects your car’s safety and value for the long haul? Both paths can get you clearer headlights, but the journey—and the destination—are very different. The right answer is the one that prioritizes safety and lasting quality.
A Simple Checklist to Help You Decide
To make this easy, just ask yourself a few honest questions. Your answers will point you in the right direction and make the choice feel obvious.
Run through these points:
- How bad is the damage? For very light, wispy haze, a DIY kit might seem adequate. But for that deep, ugly yellowing, heavy oxidation, or a clear coat that’s peeling off in flakes, you really need the powerful tools and pro-grade materials a specialist brings to the table for a safe and effective result.
- Do you have the time and space? A proper DIY restoration isn't a 20-minute job. You need to set aside a few hours for focused work, preferably in a shady spot with good airflow. If your weekend is already jammed, the "we come to you" convenience of a mobile service is a game-changer.
- Are you confident in your skills? Getting that smooth, swirl-free finish with sandpaper takes a steady hand and a good bit of patience. Are you prepared for the elbow grease and the risk of accidentally scuffing your paint if your hand slips?
- How long do you want it to last? This is the big one. A DIY job might look good for a year if you’re lucky. A professional restoration using a tough, commercial-grade ceramic coating is a true investment that pays you back with years of perfect clarity and protection.
The decision really comes down to what you value most. If you want a guaranteed, perfect, and long-lasting result without giving up your weekend, a professional service is the clear winner.
For drivers here in Central Pennsylvania who want a flawless outcome without the guesswork, the choice is simple. The Mobile Buff brings the expertise, the right tools, and the best materials on the market right to your driveway. You can see the kind of results we deliver for yourself on our Google Business Profile.
Ready to skip the hassle and invest in a restoration that actually lasts? Book your appointment with The Mobile Buff today and enjoy crystal-clear headlights with zero effort on your part.
Your Headlight Restoration Questions, Answered
Over the years, we've heard just about every question you can imagine when it comes to headlight restoration. It's a common problem, and with all the different products out there, it’s understandable to have questions. Let's clear things up with some straight answers to the questions we get most often.
How Long Does Professional Restoration Last Compared to a DIY Kit?
This is probably the most important question to ask, and the answer really gets to the heart of the matter. A typical DIY kit might get you anywhere from 6 to 18 months of clarity, but that's a big "if." Your results are completely at the mercy of the little bottle of UV sealant that comes in the box, and frankly, most of them just can't hang with constant sun exposure.
A professional job, on the other hand, is a whole different ballgame. We use commercial-grade ceramic coatings—the kind built to withstand years of brutal UV rays and road abuse. That’s why our restorations last so much longer, making it a smarter investment in your car's safety and curb appeal.
Is It Safe to Use a Drill Sanding Attachment on My Headlights?
While some advanced DIY kits include drill attachments, using one requires a surgeon's steady hand and a ton of finesse. One wrong move—too much pressure, the wrong angle, or lingering in one spot for a split second too long—and you can permanently burn, gouge, or scratch the plastic. It’s also shockingly easy for the drill to skip off and wreck your car's paint.
Our technicians use specialized tools and have honed their techniques over countless restorations to ensure a perfect, uniform finish every time, with zero risk to your vehicle. For this reason, we recommend leaving any power tool work to trained professionals.
Did you know? The National Highway Traffic Safety Administration (NHTSA) has found that yellowed, cloudy headlights can slash your light output by a staggering 80%. Getting them crystal clear again is one of the most critical safety upgrades you can make for driving after dark.
Will Restoring My Headlights Really Improve Night Driving Visibility?
Without a doubt. Think of that cloudy, yellow layer on your headlights as a dirty filter. It blocks and scatters the light, drastically dimming what actually makes it onto the road. Restoring them isn't just about looks; it's a massive safety boost.
Once we polish them back to their original clarity, your beams will shine farther and wider, just like they were designed to. You'll see road signs, pedestrians, and potential hazards much sooner, giving you precious extra seconds to react. When it comes to night driving, that can make all the difference.
Ready to skip the DIY headache and get a perfect result that lasts? The Mobile Buff brings professional expertise right to your home in Harrisburg and beyond, ensuring your headlights are not just clean, but safe.
