


You walk out to your car, catch the light just right, and there it is. A fresh scratch on the door, bumper, or near the handle. Your stomach drops, and your first move is usually the same as everyone else's. You grab your phone and search for a DIY car scratch remover that promises a fast fix.
That instinct makes sense. Sometimes a scratch really is minor enough to improve at home. Sometimes it isn't, and that's where people get into trouble. I've seen plenty of owners turn one ugly mark into a bigger, duller, thinner patch of paint because they kept rubbing long after they should've stopped.
This is the honest version of the DIY conversation. Not the hype. Not the toothpaste tricks. Not the miracle-pen nonsense. Just what's worth trying, what isn't, and how to tell the difference before you make the paint worse.
That First Frustrating Scratch and What to Do Next
A lot of scratches don't show up when they happen. You notice them later in the driveway, at the gas station, or while loading groceries. Black paint makes them look dramatic. Silver paint hides them until the sun hits. Either way, the reaction is the same. You want it gone now.
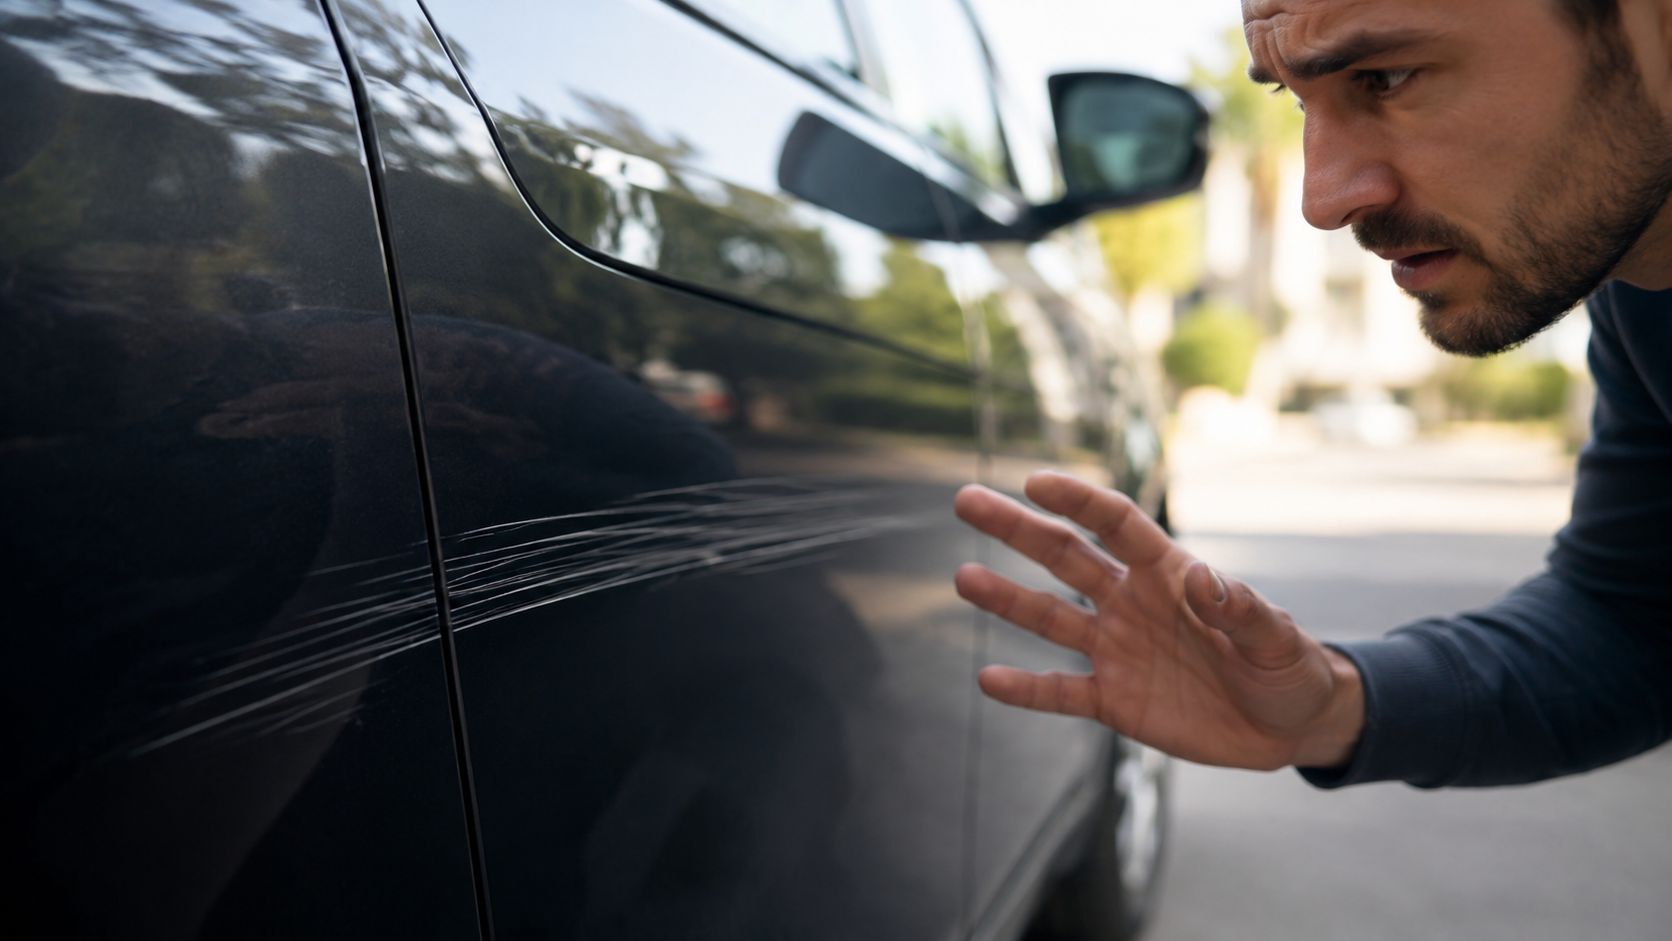
The first mistake people make is assuming every scratch is a scratch. Some marks are paint transfer, plastic rub, or a surface scuff sitting on top of the clear coat. If that's what you're dealing with, start by learning the difference between a real scratch and surface marring. This guide on how to remove car paint scuffs is useful because it helps you identify when the mark may be sitting on the surface instead of cutting into the paint.
Don't treat every mark like it needs heavy correction
A true pro move is slowing down before you touch the paint. Wash the area. Dry it. Look at it in good light. Then decide. That discipline matters more than the product name on the bottle.
Most bad DIY results don't come from the first pass. They come from the fifth pass, when the owner keeps chasing perfection on damage that was never safely fixable by hand.
If your goal is a smarter decision, not a desperate one, you're already demonstrating foresight.
First Diagnose Your Scratch Like a Pro
Before you buy anything, understand what you're looking at. Modern paint isn't one simple layer. You're working with a stack, and each layer changes what's possible.
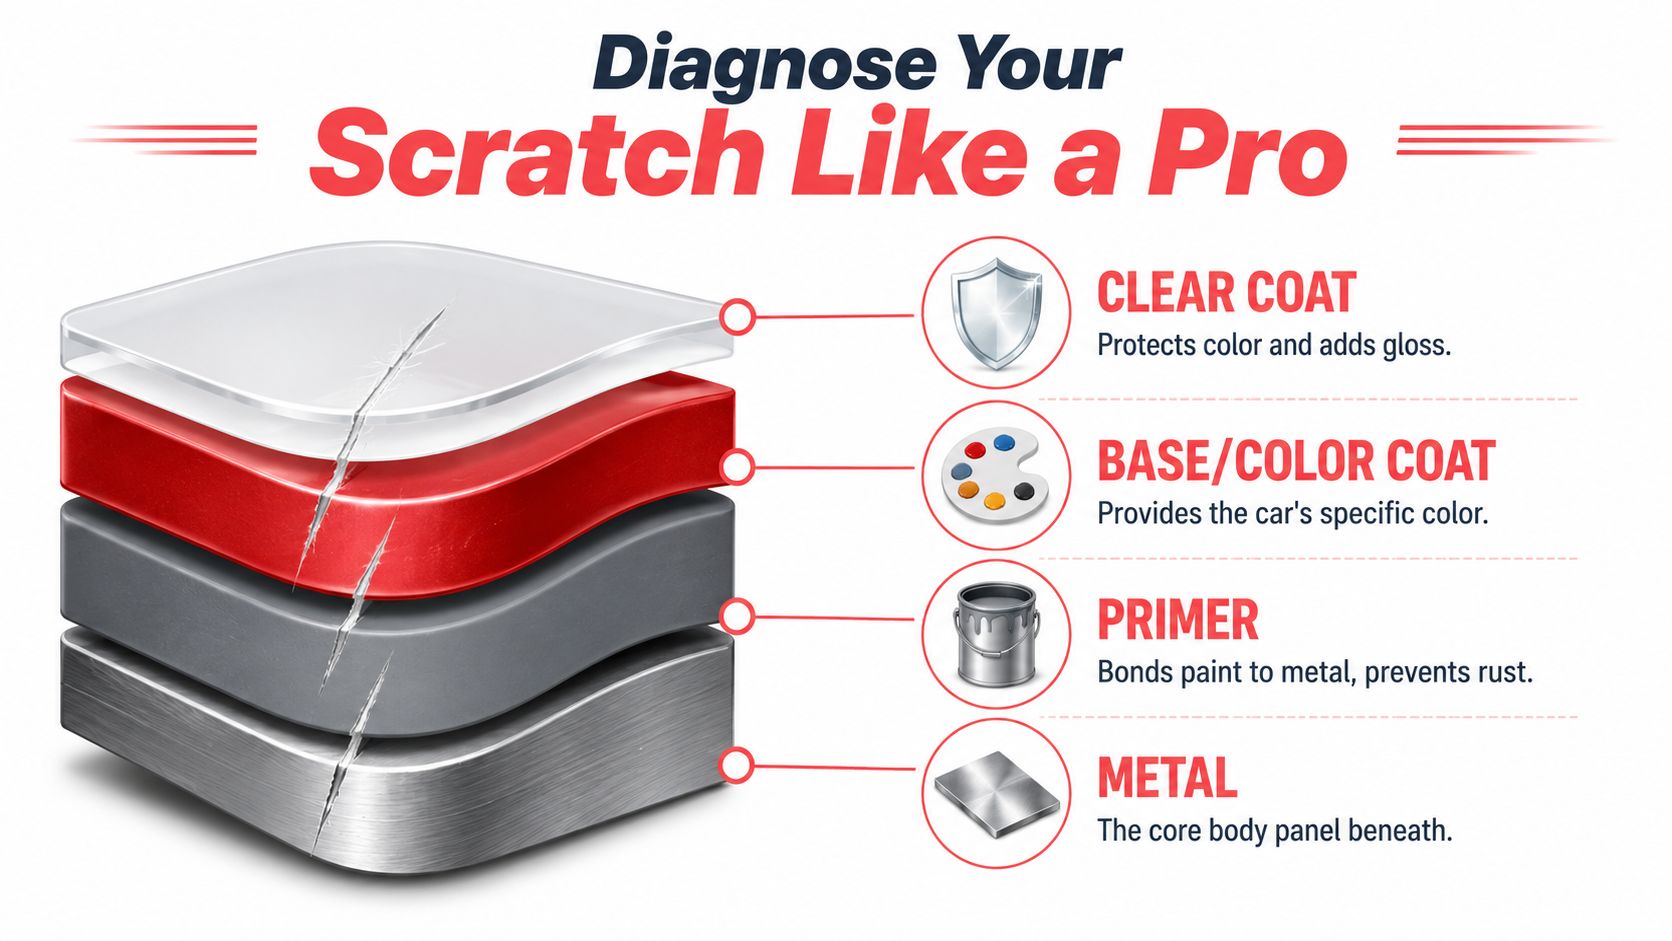
The paint layers that matter
- Clear coat protects the color and gives the paint its gloss.
- Base or color coat is the visible paint color.
- Primer helps the paint bond and adds protection.
- Metal is the body panel underneath.
When a scratch is only in the clear coat, you may be able to level the surrounding area carefully and reduce or remove the mark. Once the scratch cuts deeper, you're no longer polishing away a defect. You're looking at missing material.
A practical visual can help before you inspect your own vehicle:
Use the fingernail test
This is the simplest diagnostic tool most owners can use. Lightly drag a clean fingernail across the scratch.
A 2026 industry discussion highlighted a real problem. There's a lack of data-driven guidance on when DIY scratch removal causes irreversible clear coat thinning, despite the industry standard “fingernail test” confirming that liquid removers cannot fix scratches deeper than the clear coat in this professional DIY vs repair analysis.
Here's the plain-English rule.
Practical rule: If your fingernail catches, stop thinking “polish” and start thinking “repair.”
Scratch Diagnosis Cheat Sheet
| Scratch Type | What It Looks Like | Fingernail Test | Recommended Action |
|---|---|---|---|
| Surface scuff | Looks like transfer, haze, or a mark sitting on top of the paint | Usually glides over it | Clean first, then light correction if needed. DIY-friendly |
| Clear coat scratch | Fine line visible in light, but no different color showing underneath | May barely catch or not catch at all | Careful compound and polish. DIY-friendly |
| Deep paint scratch | White, gray, or dark line with obvious depth | Nail catches clearly | Professional repair needed. Find a reputable local pro through this service listing |
| Primer or metal exposure | You can see a different layer or exposed substrate | Catches hard | Professional repair needed immediately |
What owners usually miss
The risky part isn't just using the wrong product. It's misdiagnosing the damage. Plenty of people keep polishing because the scratch looks a little better after each pass. What they're doing is thinning the surrounding clear coat while the deep part of the scratch stays put.
If you want a deeper look at what detailing can and can't correct, this article on does car detailing remove scratches is worth reading before you touch the panel.
The Professional DIY Method for Surface Scratches
If your scratch passed the test and it's clearly limited to the surface or clear coat, then yes, a DIY car scratch remover can be worth trying. But use a proper method. Don't improvise with bathroom products or random garage chemicals.
Use real paint-correction tools
You need controlled abrasives and clean materials. That means:
- Rubbing compound from a reputable brand like 3M, Meguiar's, or Turtle Wax
- Microfiber applicator pads that are clean and paint-safe
- Quality microfiber towels for wipe-off
- Finishing polish or paint sealant to refine gloss and protect the corrected area
Skip toothpaste, baking soda, and other home remedies. They aren't industry-approved, and they don't give you predictable cut or finish. They can leave haze, micro-marring, and uneven gloss.
A controlled DIY approach can make sense financially. Car and Driver's testing notes that while professional repair can cost hundreds of dollars, a DIY approach using a 3M kit or similar compound allows owners to address “lighter minor scratches” for a fraction of the price, though larger scratches may only see a decrease in appearance rather than total elimination.
Clean, correct, refine, protect
Start with a proper wash and complete dry. If there's dirt left on the panel, you're not polishing paint. You're grinding contamination into it.
Work in a small section. Use a little product. Moderate hand pressure is enough. You're trying to level the defect gently, not muscle it into submission. Wipe and inspect often.
Then refine the area. A compound cuts. It doesn't usually leave the best finish by itself. Follow with a finishing polish or protection product so the corrected spot doesn't look dull compared with the rest of the panel.
If the scratch improves quickly, you're probably in the right territory. If it doesn't change much after careful attempts, stop. That's your answer.
What good DIY looks like
A good home result usually means the scratch is less visible, the gloss is restored, and the area blends well in normal light. That's a win. Chasing total invisibility is where people cross the line from “smart DIY” into “expensive correction later.”
If you want another realistic walkthrough from the detailing side, this expert guide on vehicle scratch removal does a nice job of reinforcing the difference between light correction and full repair.
Common DIY Mistakes That Cause More Damage
Most failed scratch repair jobs follow the same pattern. The owner starts with a small defect, gets impatient, and keeps going after the paint has already told them to stop.
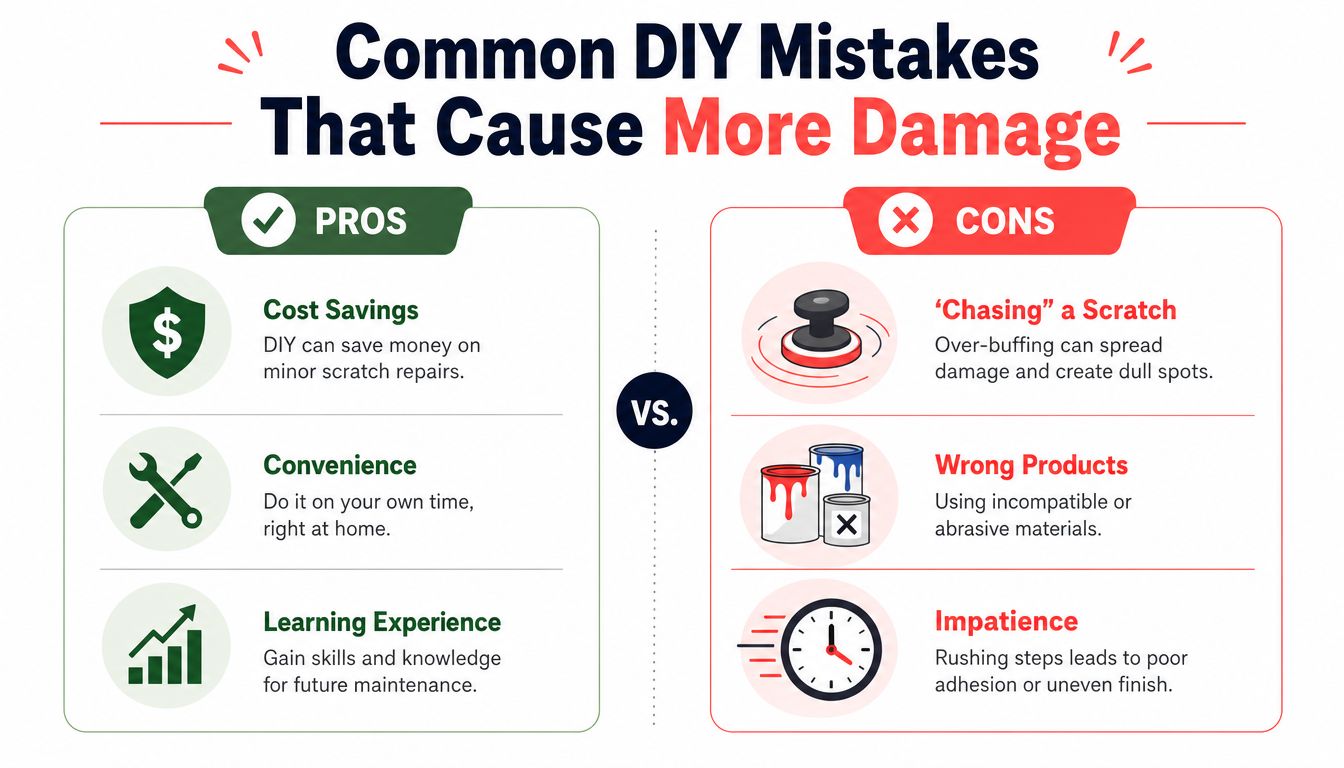
A collision repair source puts it bluntly. McCarthy Collision Centers explains that DIY car scratch removers are statistically effective only for shallow defects confined to the clear coat, as they lack the abrasive power to repair deep scratches that penetrate to the primer or metal. They are designed for “improvement” rather than total removal.
The mistakes I see all the time
Chasing a deep scratch
The mark doesn't disappear, so the owner rubs harder and longer. Now the panel has a thin, dull patch around the original damage.Using the wrong product
A heavy compound on a light scuff is overkill. An underpowered polish on a deep scratch just wastes time and encourages overworking the area.Working with dirty towels
This one is brutal. A towel with grit in it can leave swirl marks and fresh scratches in seconds.Trying to fix paint in direct sun
Hot panels make product flash too fast and wipe poorly. You end up fighting the paint and the compound at the same time.
The hack culture problem
A lot of online advice is built around “cheap and easy,” not “safe and repeatable.” That's why so many people reach for toothpaste, mystery sponges, or bargain repair pens.
Those shortcuts aren't professional methods. They're gambles. Metallic and pearl finishes are especially unforgiving because any dull spot, haze, or mismatch stands out fast.
A scratch that still looks bad is frustrating. A scratch plus swirl marks plus clear coat damage is worse.
Knowing When to Put the Rag Down and Call a Pro
There's a clean line between a reasonable DIY correction and a repair that needs proper equipment. Most owners get into trouble because they ignore that line after they've already started.
The stop-now checklist
Put the rag down if any of these apply:
- Your fingernail catches clearly
- You see gray, white, or exposed material beneath the paint
- The mark improves only slightly, even after careful work
- The scratch runs across a prominent area where blending matters
- The finish is metallic or pearl and the corrected spot now looks uneven
When that happens, machine polishing by guesswork isn't the answer. A trained detailer or paint correction specialist can inspect the finish, measure paint thickness, and determine whether correction is safe or whether the panel needs touch-up or refinishing instead.
Professional paint correction is worth understanding before you decide. This article on is paint correction worth it explains why the right process matters when appearance and paint safety both count.
What a pro can do that a kit can't
A real correction process isn't just “more buffing.” It's measured, controlled work using the right pad, the right machine, and the right level of cut for that exact panel and defect. Pros can refine the finish properly and avoid the uneven, overworked look that so many DIY attempts create.
That's the difference between making a scratch less offensive and restoring the panel without guessing.
Get a Flawless Finish Without the Guesswork
If you made it this far, you're already doing more than most car owners. You're trying to protect your paint instead of attacking it blindly. That's the right mindset.
For light clear coat defects, careful DIY can help. For anything deeper, or for anyone who doesn't want to gamble with their paint, professional service is the smarter move. Convenience matters too. If you're in Central Pennsylvania, mobile detailing and paint-care help can save you the hassle of losing half a day at a shop.
Long term, prevention is always cheaper than correction. If you want to reduce future paint damage, a car paint shield with self-repair is worth looking into, especially for high-impact areas. And if you're thinking beyond scratches alone, this guide on what is ceramic coating is a solid next read.
For drivers around Harrisburg, Mechanicsburg, and Carlisle, the biggest value is simple. You get experienced eyes on the paint, honest recommendations, and work done where you are. No guesswork. No risky shortcuts. No buying a shelf full of products you may never use again.
If your scratch is too deep for a safe DIY fix, or you'd rather have a pro handle it right the first time, contact The Mobile Buff. They bring professional detailing directly to your driveway in Central Pennsylvania, and they'll help you get your finish looking right without the trial and error.

