


You've got the hood up, the engine bay is dusty and greasy, and there's probably a half-empty bottle of all-purpose cleaner sitting nearby. The temptation is obvious: spray everything, rinse it off, and enjoy the clean look. That approach is also how a simple cosmetic job turns into a no-start condition, a warning light, or expensive comeback work.
A good engine bay cleaning kit matters, but the kit is only one part of the decision. Before choosing a degreaser or brush, you need to decide whether your vehicle's condition and drivetrain make cleaning reasonable. The safest professional workflow starts with a risk check, then uses controlled chemistry, soft agitation, low-pressure rinsing, and thorough drying.
Assessing Your Vehicle Before Cleaning
Engine bay cleaning can improve visibility and appearance, but it is not automatically a maintenance upgrade. For many vehicles, the service is mainly cosmetic and helps inspection. Water and cleaning chemicals still add risk when the bay already contains vulnerable parts, so the vehicle's condition should determine whether you proceed.
Vehicle age and condition change the decision. Older cars may have aging seals, brittle wiring insulation, cracked plastic, or missing protective covers. Higher mileage does not prove that cleaning is unsafe, but it gives you more reason to inspect closely before introducing moisture. Newer vehicles may have better shielding, while tighter electronic packaging leaves less room for careless spraying.
The drivetrain also sets limits. Hybrid vehicles need special caution around inverters and high-voltage areas. Their engine compartments should not be treated like conventional gasoline layouts, especially when you cannot identify which components are safe to wet.
Skip the cleaning entirely if you find exposed wiring, cracked coil packs, missing covers, or an active misfire. Hybrids require special caution around inverters and high-voltage areas. Detailed Image's engine bay detailing guide identifies these conditions as reasons to avoid cleaning.
Read the bay before you clean it
A dirty bay can reveal useful clues. Heavy oil residue may point to a leak, while caked road salt and debris can hide hose damage or loose clamps. Cleaning can make inspection easier, but it should never cover up an unresolved mechanical problem.
Pause if you notice:
- Exposed or damaged wiring: Repair and protect the fault before spraying nearby.
- Active running problems: An active misfire requires diagnosis, not detailing.
- Missing covers: Replace or secure them before cleaning.
- High-voltage components: Hybrid and electrified layouts require vehicle-specific precautions.
- Unclear component layout: If you cannot identify the air intake, alternator, fuse box, or ECU areas, an in-person professional assessment is safer.
Before choosing a engine bay cleaning kit, confirm that the vehicle can tolerate the process. Identify vulnerable components, check for active faults, and decide whether controlled moisture is appropriate. If you cannot make that assessment with confidence, stop before opening the kit. A mobile detailer can evaluate the bay in person and avoid the comeback work caused by a preventable no-start condition or warning light.
What a Real Engine Bay Cleaning Kit Actually Contains
A serious kit isn't just a spray bottle and a shiny dressing. It needs to support four jobs: preparation, cleaning, agitation, and finishing. The most useful setup combines a few purpose-built products with ordinary tools that are easy to replace.
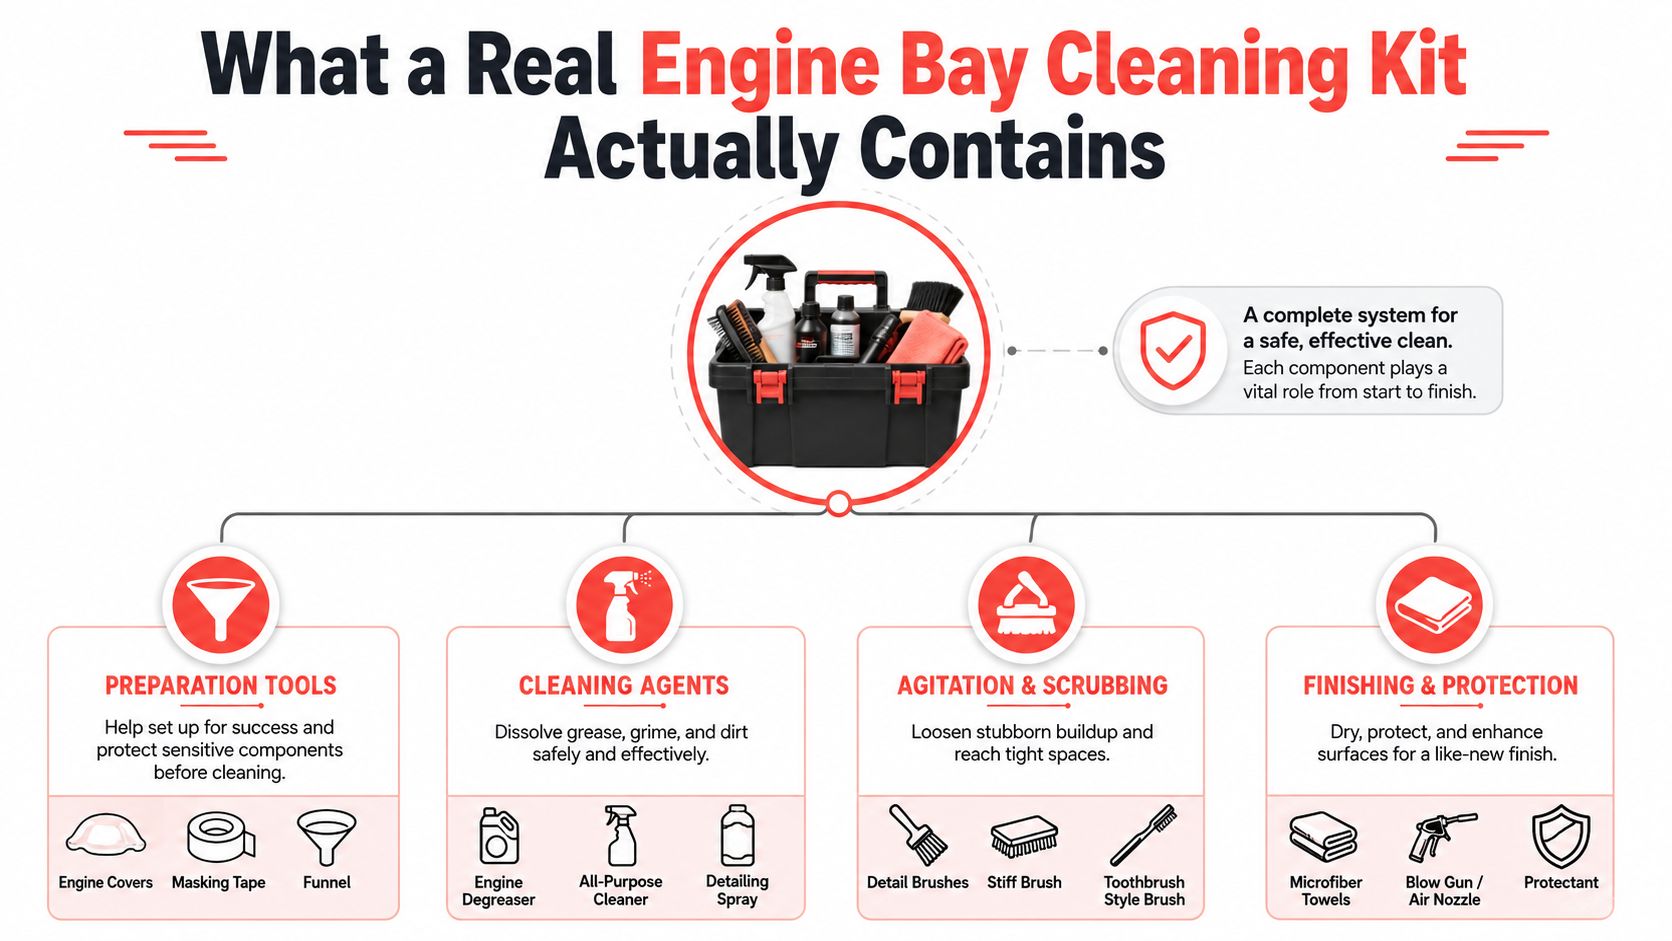
Cleaning agents
Choose a non-corrosive, engine-safe degreaser that matches the contamination. Oil film, road grime, and old dressing need chemical help, but stronger isn't automatically better. A product that dries quickly or leaves residue creates more work during rinsing and drying.
A dedicated engine cleaner is preferable to an unknown household product. For broader degreaser background, Formula 88 degreaser boat cleaning tips offers useful context on degreaser handling and product use, though you should always follow the label and confirm that a product is appropriate for the vehicle surfaces involved.
Brushes and towels
Soft detailing brushes are essential. Keep a large soft brush for broad plastic covers, a medium brush for brackets and housings, and a small detailing brush for seams, hose clamps, and tight gaps. Avoid stiff household brushes that can scratch finishes, disturb labels, or pull at fragile wiring.
Microfiber towels handle the final drying better than shop rags because they lift moisture without leaving as much lint. Add compressed air or a leaf blower for seams and connectors, plus a spray bottle for controlled re-misting.
The mobile car detailing kit guide can help you compare the broader tools a professional detailer carries beyond engine work.
Finishing products
Use a dressing formulated for under-hood rubber and plastic. The goal is a clean satin finish, not a wet, greasy shine that attracts dust. A good protectant should spread evenly and stay away from belts, pulleys, friction surfaces, and hot exhaust components.
Boxed kits can be convenient, but they often compromise on brush quality and towel quantity. A curated kit built around a reliable degreaser, soft brushes, quality microfiber, controlled air, and a suitable dressing usually performs better than a bundle packed with too many mediocre accessories.
Prep and Safety the Way a Pro Runs It
Preparation determines whether the clean stays cosmetic or creates a mechanical complaint. Start with a fully cool engine. A hot surface can make cleaner flash off too quickly, create uneven results, and increase the chance of thermal stress when water reaches warm components.
Some owners may consider disconnecting the negative battery terminal, but that choice depends on the vehicle and the owner's comfort with the consequences. Disconnecting power can affect settings or require vehicle-specific procedures, so consult the vehicle information before doing it. If you're unsure, leave the terminal connected and focus on careful protection.

Identify the kill zones
Professional protocols refer to exposed electronics, air intakes, wiring, battery terminals, alternators, fuse boxes, and ECU areas as kill zones. Cover appropriate components with plastic wrap or protective bags so moisture can't be forced into connectors or sealed housings. Secure the covering so it won't fall into belts, fans, or other moving parts.
Pay particular attention to:
- Alternator and fuse box: Keep direct spray away from these areas.
- Air intake: Prevent water from entering the intake path.
- Battery terminals: Shield them from aggressive chemistry and standing moisture.
- ECU and wiring: Cover exposed connectors and aftermarket wiring.
- Coil packs: Inspect for cracks before any cleaning begins.
The safe engine bay cleaning process follows the same controlled approach used by professional detailers.
Use controlled water, not force
High-pressure spray aimed directly at covered components remains one of the most common failure modes. The covering is a barrier, not permission to blast through it. Use a gentle, low-pressure rinse with a broad spray pattern, keeping the nozzle moving and directing water from the top down.
Pre-dampen surfaces with a light mist rather than flooding the bay. Keep your spray off exposed electrical areas, and don't allow pooled water to sit around clamps, wiring, or terminals. The small amount of extra time spent positioning the hose and protecting components is cheaper than diagnosing a moisture-related fault afterward.
The Cleaning Workflow That Actually Works
A driveway job usually starts with the hood open, the engine cool, and the bay inspected for loose parts or obvious defects. Before applying any chemical, remove dry leaves, sand, and loose dust with a leaf blower or compressed air. This keeps dry debris from turning into muddy grit once the bay gets wet.
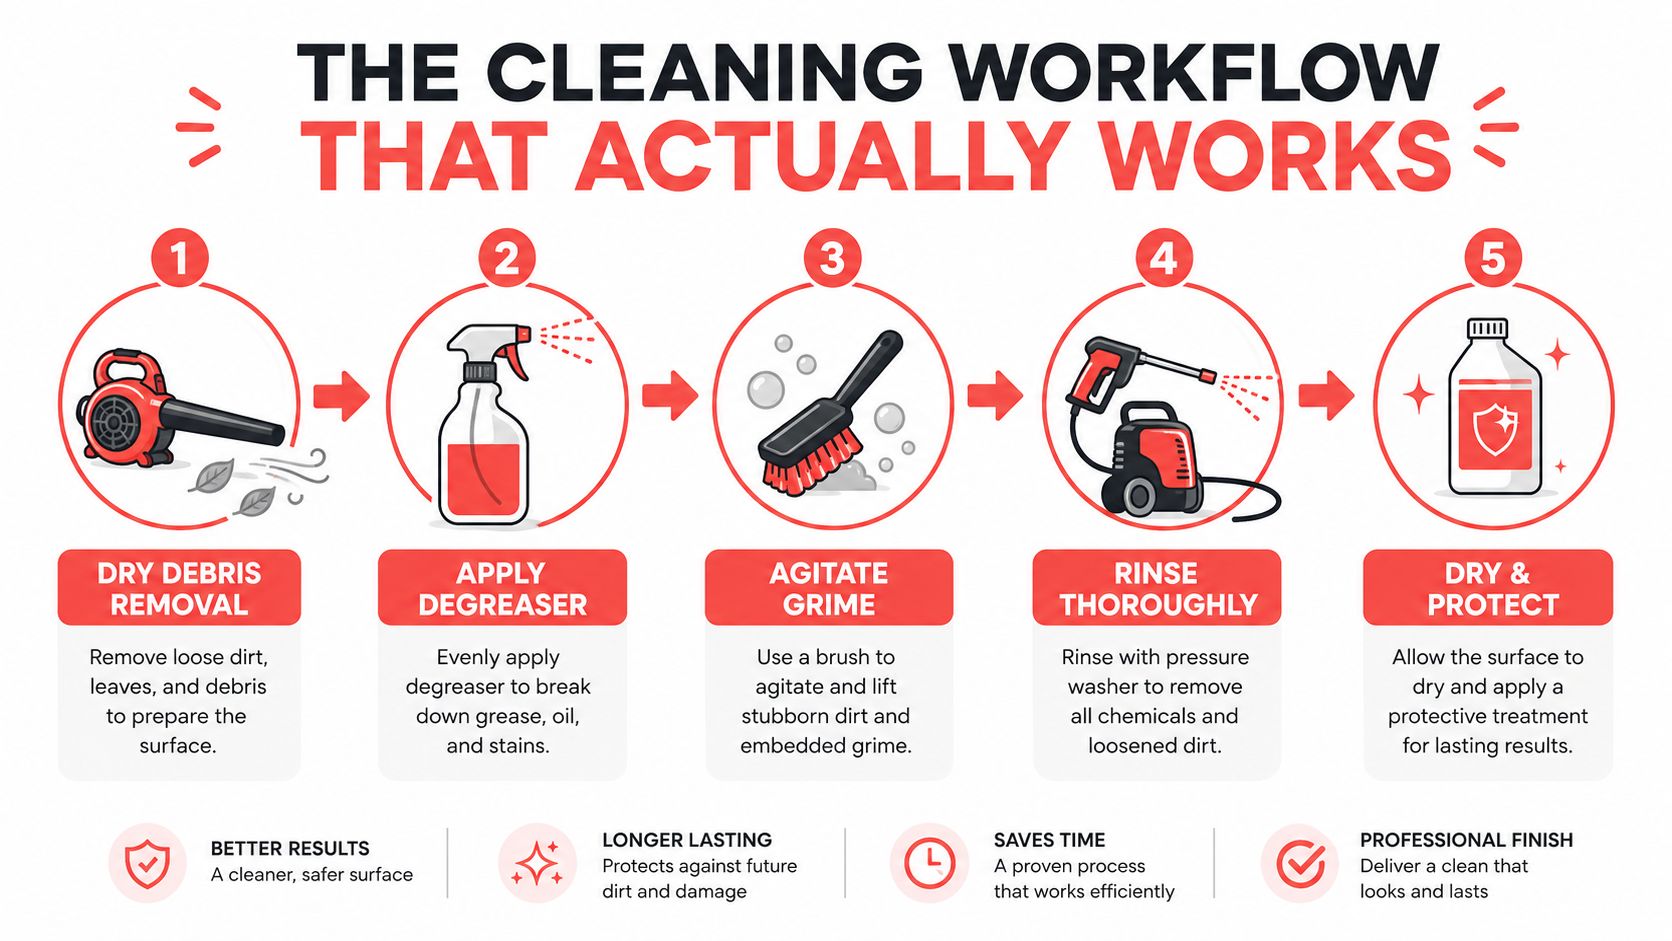
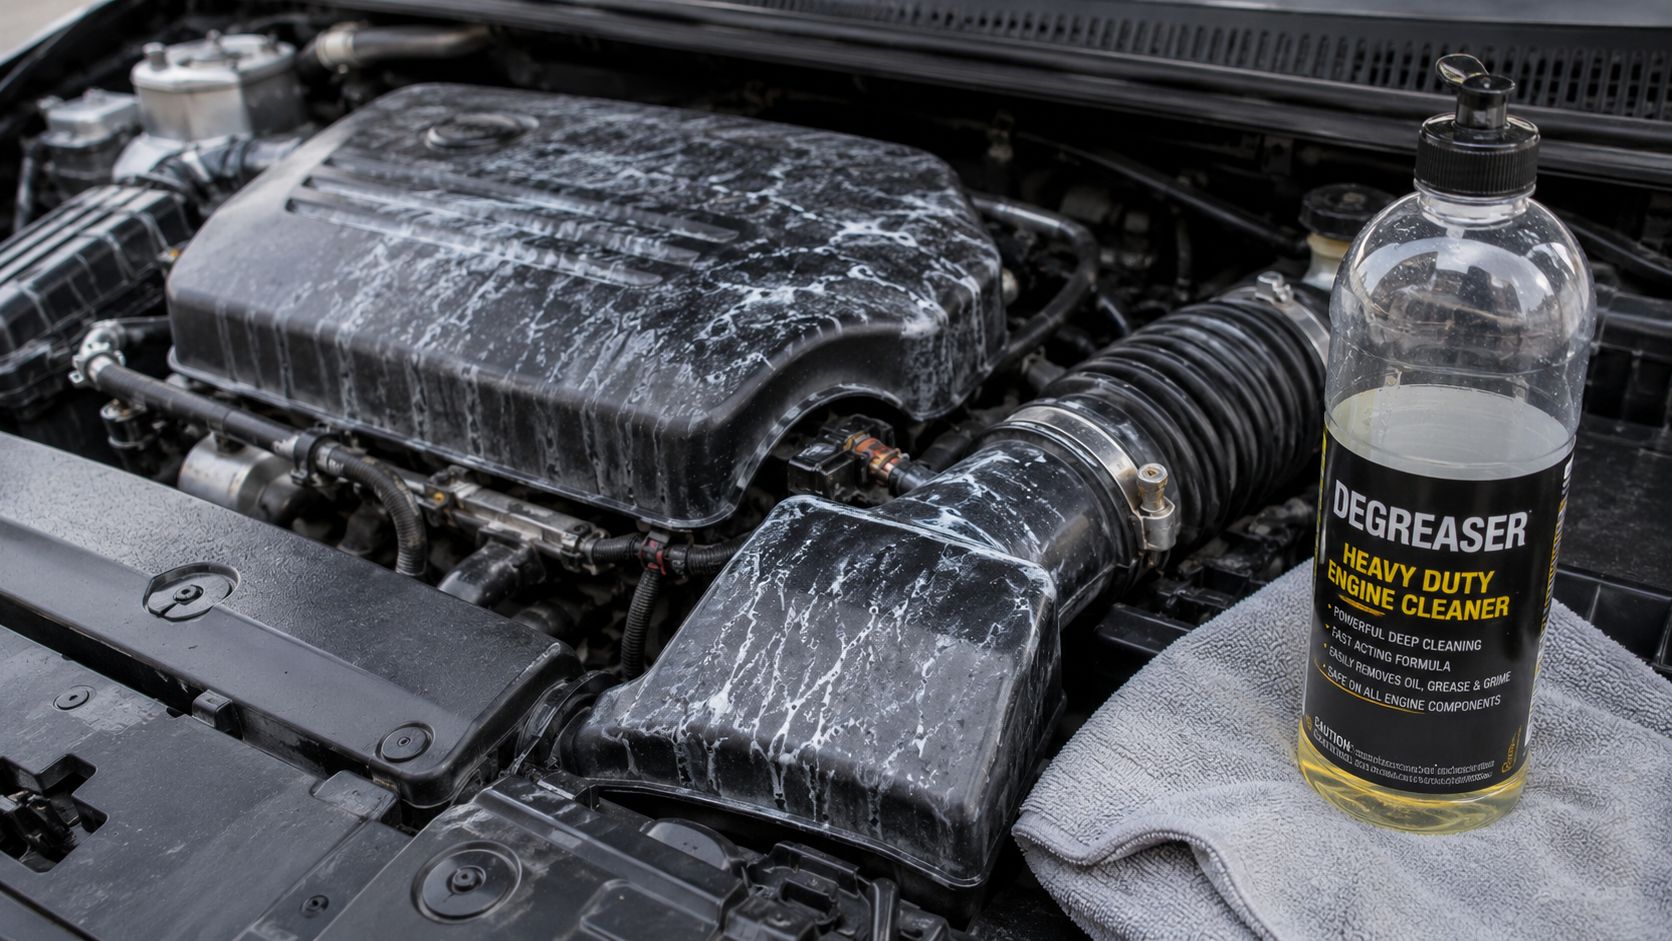
Next comes the engine-safe degreaser. Apply it to manageable areas instead of soaking the entire compartment at once. Light grime may release after a 15–30 second dwell, while heavier buildup needs several minutes and repeated re-misting so the chemical doesn't dry on the surface. Professional detailing guidance supports adjusting dwell time to the contamination rather than using one fixed timing for every vehicle.
Agitation should feel controlled, not aggressive. A soft brush loosens grime from textured plastic, brackets, and hose junctions without the scraping action of a stiff utility brush. Work from cleaner areas toward dirtier sections, rinse the brush regularly, and re-mist any product that begins to dry.
I prefer a top-down rinse with low pressure. The water should carry loosened grime downward, not drive it sideways into connectors. Keep the nozzle moving, avoid direct hits on protected components, and use a microfiber towel immediately after rinsing to remove surface water.
Drying is where many home kits fall short. Use microfiber first, then low-heat moving air from a blower or compressed-air tool to clear seams, hose clamps, wiring channels, and recessed areas. A dry bay reduces trapped moisture and leaves the dressing looking even.
The final step is a light application of plastic and rubber dressing. Wipe it on rather than flooding the compartment, then level the finish with a clean towel. The result should look refreshed and natural, not oily.
Common Mistakes and How to Avoid Them
Most comeback work traces back to one rushed decision. Someone sprays too much product, lets it dry, reaches for excessive water pressure, or assumes a plastic bag makes every electrical component safe. The next day, the owner sees residue, moisture, a warning light, or a bay that attracts dust faster than before.
The residue problem
Chalky white marks usually appear when degreaser dries on plastic, rubber, or textured surfaces. The fix isn't more dressing. Re-wet the affected area with an appropriate cleaner, agitate gently, rinse in a controlled way, and dry it fully before applying protection.
Heavy buildup needs patience. The established sequence is to cool the engine, protect electrical parts and the air intake, remove loose debris with compressed air, apply an engine-safe degreaser, allow about 10–15 minutes for heavy grime, agitate with soft brushes, rinse with low pressure, then dry with microfiber and moving air. CRC's professional engine bay cleaning guidance lays out that sequence clearly.
The moisture problem
Trapped moisture around hose clamps, wiring, and battery terminals can contribute to residue and corrosion-related return work. Drying only the visible plastic isn't enough. Air needs to reach the recesses where water hides.
A pressure washer creates a different risk. Its force can push water into connectors and modules, even when the component appears sealed. If you notice rough running, a check-engine light, or an electrical issue after cleaning, stop using the vehicle if it runs poorly and seek appropriate diagnostic help rather than continuing to spray or rewash the area.
The dressing problem
Dressing belts, pulleys, or hot surfaces is a poor trade-off. It can create sling, collect dust, or introduce a slippery film where it doesn't belong. Apply protectant sparingly to suitable rubber and plastic only, then wipe away excess.
A clean engine bay should look maintained, not lacquered. Satin protection is easier to control than a greasy shine.
When a Mobile Detailer Is the Smarter Call
DIY makes sense when the bay is structurally sound, the component layout is familiar, and you can control water, chemistry, agitation, and drying. It stops making sense when the risk assessment becomes uncertain. Older vehicles with brittle wiring, cracked covers, aftermarket electrical work, or unresolved running problems deserve more caution than a straightforward daily driver with intact protections.
Hybrids are another clear decision point. If you can't confidently identify the inverter and high-voltage areas, don't improvise. The potential cost of a mistake outweighs the convenience of using a home spray bottle.
Leased vehicles and recently purchased cars also create a practical concern. Owners may prefer a documented, careful process rather than experimenting with a pressure washer in a driveway. The same applies when the engine bay needs cleaning before a sale, inspection, repair, or show and the finish needs to look even without hiding mechanical clues.
A mobile detailer brings the work to the driveway and can evaluate the bay before selecting a method. The Mobile Buff's engine bay service includes protecting sensitive electrical components, applying degreaser, using agitation brushes, rinsing with low pressure, drying, and applying plastic and rubber dressing. You can review the company's engine bay cleaning service before deciding whether professional help fits the vehicle.
Convenience isn't the only advantage. A professional service gives you a second set of eyes on the condition of the bay before water and chemicals enter it.
The Mobile Buff serves Central Pennsylvania, including Harrisburg, Mechanicsburg, Carlisle, Newport, and surrounding areas in Dauphin and Perry counties. For any service business, clear scheduling and responsive communication matter, so it's useful to understand how systems support car repair shop call handling when you're comparing service providers. Before booking, you can also review The Mobile Buff's Google Business Profile for service details, hours, and customer feedback.
Keeping the Bay Clean Between Services
A clean bay stays presentable when you stop treating it like a once-a-year rescue project. During routine exterior washing, inspect the underside of the hood and surrounding bay areas, then use only controlled moisture where appropriate. Don't turn every wash into a full engine-bay rinse.
Look for changes while the surfaces are visible. New oil film, coolant residue, cracked covers, loose clamps, and damaged wiring deserve attention before another detailing session. A clean compartment makes those clues easier to notice, but detailing won't repair the source.
A simple upkeep checklist
- Inspect before spraying: Confirm that covers, wiring, and intake components remain intact.
- Remove dry debris first: Use gentle air movement before introducing cleaner or water.
- Control the finish: Apply rubber and plastic dressing lightly, and avoid belts, pulleys, and hot surfaces.
- Dry recessed areas: Pay attention to clamps, terminals, wiring channels, and seams.
- Stop when conditions change: New leaks, misfires, exposed wiring, or high-voltage concerns call for diagnosis or professional service.
The broader automotive appearance market reflects sustained interest in this kind of work. The global engine bay cleaning market was estimated at 2.8 billion in 2024 and is projected to reach 5.6 billion by 2033, implying an annual growth rate of 14.70% over the forecast period, according to HTF Market Insights. A separate analysis valued the global engine degreasers market at 2.1 billion in 2025 and projects 3.0 billion by 2034, with a 4.2% CAGR. That study also reports solvent-based products at 38.5% of the market and automotive use at 42.3% of revenue. MarketIntelo's engine degreasers analysis shows why dedicated products are widely available, but product demand doesn't remove the need for careful technique.
If you're researching local service options or checking how people find detailing providers, traffic insights from Expressify AI can provide broader website visibility context. For the vehicle itself, the practical checklist remains simple: inspect first, protect sensitive areas, use controlled chemistry, rinse gently, dry thoroughly, and avoid cleaning when the risk profile is unclear.
The Mobile Buff brings professional engine bay cleaning to your Central Pennsylvania driveway, with careful protection, degreasing, agitation, low-pressure rinsing, drying, and plastic and rubber dressing. If you'd rather avoid the risk and cleanup of a DIY job, visit The Mobile Buff to review the service and request an appointment.

