


You notice it on the drive home first.
A dark road, a little rain on the windshield, and headlights that used to feel normal now look weak and yellow. The lane lines seem dimmer. Road signs don't light up the way they should. You lean forward a little, even though that never really helps.
That's usually when foggy headlight restoration stops being a cosmetic question and becomes a practical one. Most cloudy headlights can be corrected, but only if the problem is diagnosed correctly and the restoration is done with real precision. The difference between a lasting repair and a short-lived improvement usually comes down to process, tools, and whether the lens gets proper UV protection at the end.
Why Your Foggy Headlights Are a Major Safety Risk
Night driving puts foggy headlights on full display. A lens can look “not that bad” in the driveway and still perform poorly once you're on a wet road with glare from oncoming traffic.
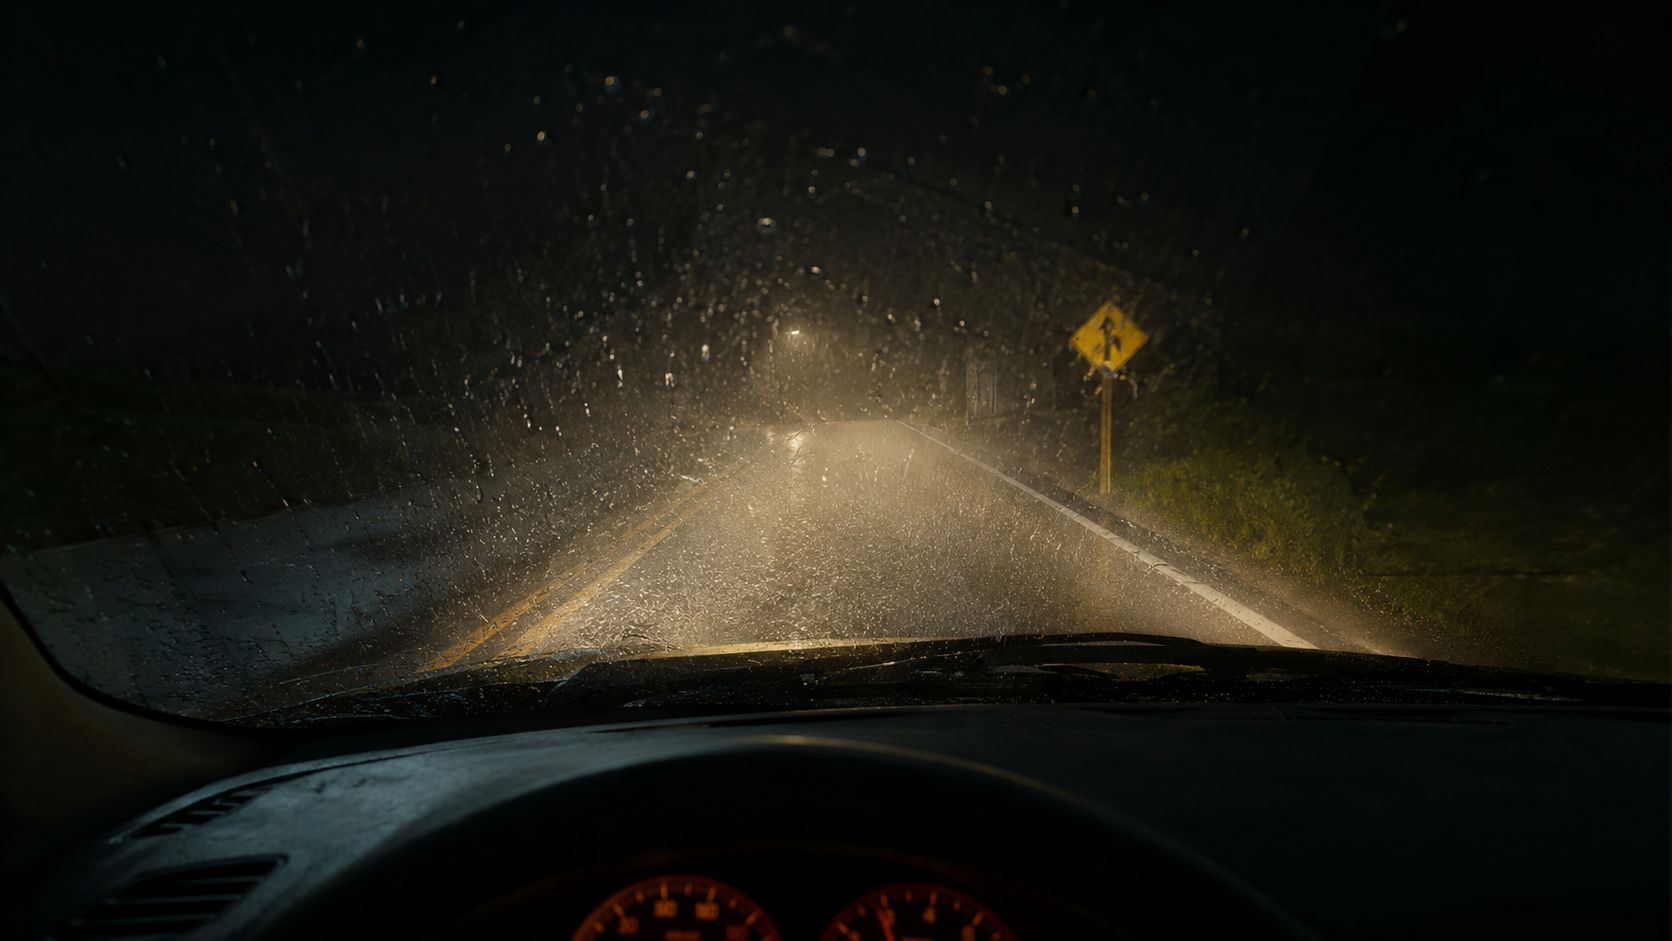
Modern headlight lenses are typically made from polycarbonate. It's durable, but the outer surface takes abuse from sun, weather, road grit, and washing over time. Once that factory protection breaks down, the lens starts to oxidize. That hazy, yellowed film scatters light instead of letting it pass cleanly through the lens.
What the driver actually experiences
The biggest problem isn't how the headlights look parked in front of the house. It's what happens when you need them most.
- Reduced road contrast: Lane markings, curbs, and debris are harder to pick up early.
- More glare in bad weather: Rain and reflective pavement expose weak beam performance fast.
- Extra eye strain: Drivers compensate by staring harder, slowing down, and second-guessing what they're seeing.
If you're trying to decide whether it's worth fixing, this guide on whether headlight restoration is worth it gives a helpful overview of the decision.
Practical rule: If your headlights look cloudy in daylight and feel weak at night, don't treat it like a minor appearance issue.
Why delaying the repair usually backfires
A lot of drivers put this off because the car still “has headlights.” But foggy lenses rarely improve on their own. Oxidation keeps building, and the longer that damaged surface sits exposed, the more work it usually takes to correct cleanly.
There are really only two sensible paths. One is a careful, professional-grade process using proper sanding progression, machine polishing, and UV protection. The other is hiring a technician who already has the tools, materials, and experience to do it without guessing.
Quick fixes tend to look decent for a short window and then fade fast. That's the part many people don't realize until they're doing the same job again.
The Professional Method for Lasting Restoration
Most lasting restorations follow the same basic logic. Remove the failed outer layer. Refine the lens until the sanding marks are gone. Then protect the fresh surface from UV exposure.
That sounds simple on paper. In practice, this is where skill matters.
Step one starts before the sanding
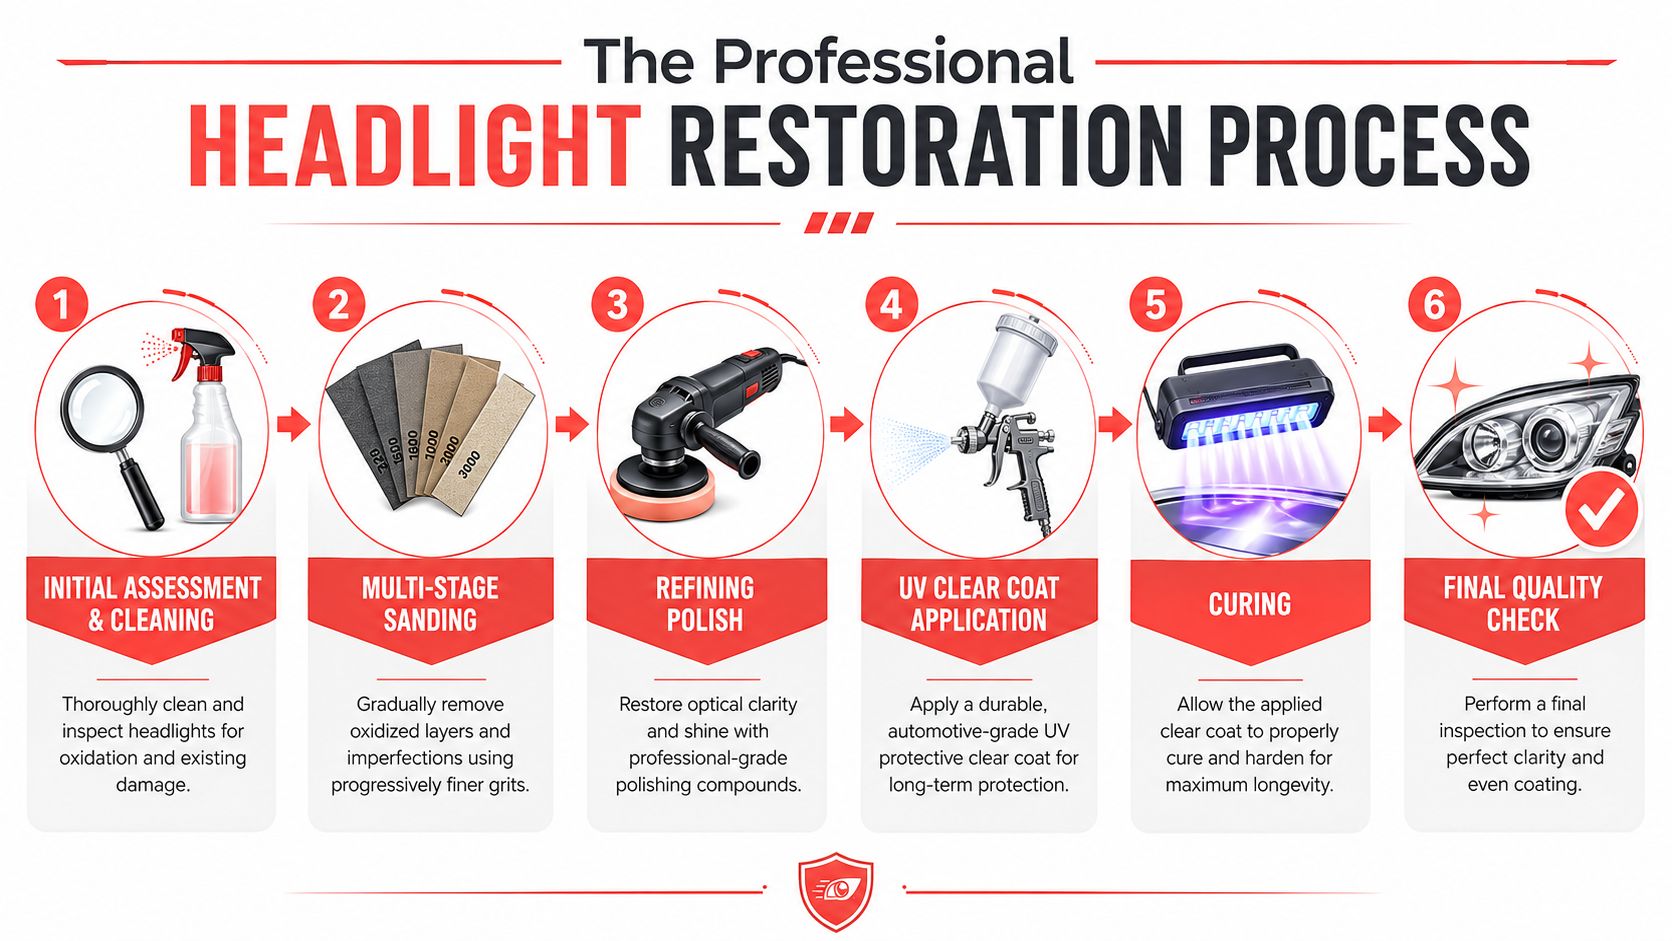
A professional foggy headlight restoration begins with cleaning and inspection, not sandpaper. The lens needs to be washed thoroughly so road film doesn't interfere with the sanding pattern. The painted edges around the light also need careful masking to protect surrounding trim and paint.
That inspection matters because not every cloudy headlight is a sanding job. Surface oxidation can usually be corrected. Internal moisture, cracking, and failed seals are a different conversation.
Wet sanding is where the real correction happens
A durable process is typically built around three stages: remove oxidation with wet sanding, refine the scratch pattern with progressively finer grits, then restore UV protection with a clear coat or UV film. Independent how-to sources generally converge on starting around 800 to 1500 grit for moderate oxidation, then stepping into finer grits such as 2000 to 3000 before machine polishing. Heavy haze may need 4+ sanding passes, and severe cases may require 400 to 500 grit before moving upward, as outlined in this headlight restoration workflow reference.
That grit progression is where a lot of amateur jobs go wrong. If the initial cut is too aggressive, the lens can be left with deeper scratches than expected. If it's too mild, oxidation stays behind and the finish never clears fully.
A good sanding process is controlled and uniform. Pressure stays even. The surface stays lubricated. Each grit fully removes the scratch pattern from the previous step before the technician moves on.
Coarse sanding marks don't disappear just because polish is added later. They have to be refined out, one stage at a time.
Here's a useful visual example of the process in motion:
Polishing restores clarity, but it doesn't finish the job
Once the scratch pattern is refined enough, machine polishing brings the lens back toward optical clarity. This is usually done with a dedicated polishing pad and compound matched to plastic lens correction.
Polishing is where the lens starts looking dramatically better, which is also why many DIY jobs stop too soon. The headlight looks clear enough, so the final protection step gets skipped or watered down.
That's a mistake.
UV protection is not optional
Bare polycarbonate re-oxidizes quickly if it isn't protected. The same restoration guidance above points to the main pitfall clearly: skipping grit stages or stopping too early leaves visible sanding marks, and leaving the lens without a UV barrier shortens the life of the repair.
That's why professional work ends with a proper UV-protective layer, not just a wipe-on shine product. Depending on the system, that may be a clear coat or UV film designed to shield the freshly corrected surface.
If you want the short version, the process is this:
- Inspect and mask carefully
- Wet sand in the correct grit progression
- Polish until the surface is optically clear
- Apply durable UV protection
- Allow proper curing time
- Inspect the finish in good light
Some mobile services, including The Mobile Buff, offer this as a dedicated headlight restoration service using a multi-step correction and protection process rather than a quick cosmetic wipe-down.
Common DIY Mistakes That Can Ruin Your Headlights
Most bad headlight restorations don't fail because the owner didn't try hard enough. They fail because the lens was treated like a simple surface cleanup instead of a controlled refinement job.
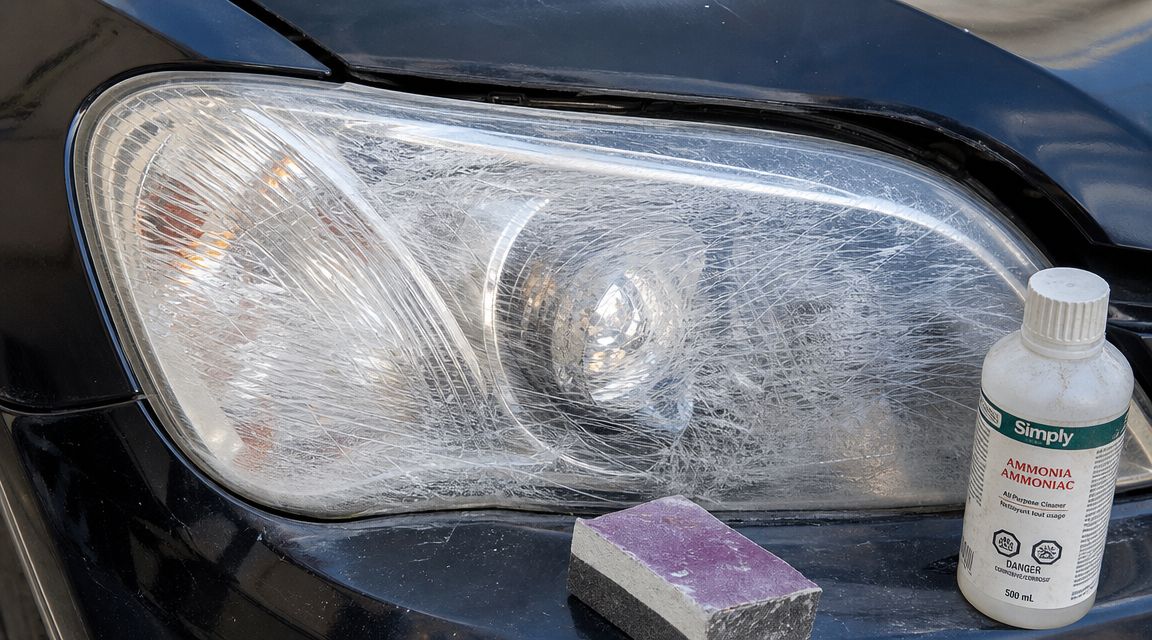
The most common ways DIY goes sideways
Some mistakes show up immediately. Others look fine at first and then become obvious a few weeks later.
- Jumping from coarse sanding to polish: This leaves a lens that looks cloudy even after a lot of effort because the sanding scratches were never properly refined.
- Uneven hand pressure: One part of the lens gets corrected, another stays hazy, and edges often end up neglected.
- Using random compounds or pads: A lens can pick up extra haze, micro-marring, or swirl marks if the polish and pad combo isn't suited to the material.
- Poor masking: It's easy to scuff trim or touch painted edges while sanding.
- Skipping the UV barrier: This is the single biggest reason a “successful” DIY job doesn't last.
What a damaged DIY finish usually looks like
You can often spot a rushed restoration by the finish pattern.
A lens may look clearer from across the parking lot but still show sanding tracers, patchy gloss, or dull corners up close. Sometimes the center clears while the upper and outer edges stay yellow because those areas were harder to reach. In other cases, the lens has a milky cast because polishing never fully removed the sanding marks underneath.
Shop-floor reality: Once a lens has been sanded poorly, the correction often takes more work than it would have taken to do it right the first time.
There's also the issue of tool control. A drill attachment sounds convenient, but inconsistent speed, edge pressure, and heat can create a finish that looks worse under sunlight than it did before the attempt.
The mistake that shortens the repair the fastest
The biggest shortcut is stopping after the lens looks clear and calling it done.
Freshly corrected plastic needs UV protection. Without it, you've exposed clean polycarbonate and removed the failed outer layer that used to shield it. The lens may look improved right away, but it won't stay that way for long if it's left unprotected.
This is why home remedies and one-step miracle products disappoint so often. They focus on visible improvement, not durability.
DIY vs Professional Restoration What Is the Real Cost
DIY can make sense for someone who already has the right tools, understands sanding refinement, and is comfortable working close to painted panels. For most drivers, the real cost isn't just supplies. It's time, risk, and the chance of having to redo the work.
If you're researching specific vehicle examples before deciding, this DIY Honda Accord headlight repair guide is useful for seeing how model-specific access and parts layout can affect the job.
Side-by-side comparison
| Factor | DIY Restoration | Professional Service (The Mobile Buff) |
|---|---|---|
| Materials | You'll need multiple sanding grits, polishing products, masking supplies, and a real UV protection step | Materials are included as part of the service |
| Tools | Better results usually require more than a basic kit, especially for polishing | Professional tools are already part of the process |
| Time | First-timers often spend a large part of a day between prep, sanding, polishing, cleanup, and curing | One appointment handles the full process |
| Risk | Easy to leave sanding marks, miss edges, or stop before proper protection | Lower risk when done by someone who performs the process regularly |
| Diagnosis | Surface haze and internal lens issues are easy to confuse | The service starts with identifying whether restoration is appropriate |
| Finish quality | Results depend heavily on patience and technique | More consistent finish when the process is controlled end to end |
| Convenience | You buy supplies, set aside time, and manage cleanup | Mobile service comes to your location |
| Outcome | Can work well if done correctly, but mistakes are costly | Straightforward option for drivers who want the job handled properly |
What people usually underestimate
DIY kits are often judged against the price of a service, but that comparison misses a lot.
The proper version of DIY means buying more than a single package from the parts store. It also means knowing how to read the lens at each stage. Is the oxidation fully removed? Did the current grit erase the previous scratch pattern? Is the lens ready for polish, or are you about to lock defects under a coating?
That learning curve matters. So does the possibility of doing the work twice.
If you're weighing methods more closely, this breakdown of the best headlight restoration method helps explain why some approaches last and others don't. For busy vehicle owners, professional restoration often ends up being the simpler value because the materials, labor, diagnosis, and finish quality are bundled into one decision.
Is It Fog or Something Worse
Not every cloudy headlight should be restored. Some should be replaced or resealed instead.
That distinction saves people a lot of wasted effort.
Signs the problem is on the outside
External oxidation usually looks like a dull, chalky, yellowed, or uniformly hazy surface. When you run a hand across the lens, it may feel rough or dry. In direct light, the cloudiness appears to sit on the outer face of the plastic.
That kind of damage is what foggy headlight restoration is designed to address.
Signs the problem is inside the housing
A more important question is whether the haze is internal. Guidance on foggy headlights notes that cloudiness can come from cracked seals that allow moisture inside the lens, and in that situation polishing the outside won't solve the issue. The headlight may need resealing or full replacement instead, as explained in this foggy headlight diagnosis guide.
Look for these clues:
- Water droplets inside the lens
- Persistent internal fogging
- Cloudiness that doesn't change when the outer surface is cleaned
- Visible internal cracking or damage
If moisture is trapped inside the housing, sanding the exterior is fixing the wrong problem.
A quick way to think about it
If the defect is on the surface, restoration may help. If the defect is inside the assembly, restoration won't reach it.
That's one reason honest inspection matters before any sanding begins. A good technician should tell you when the smarter move is resealing or replacement rather than selling you a process that can't address the underlying issue.
Get Crystal Clear Headlights Today in Central PA
If your headlights are cloudy, yellowed, or hard to trust at night, the main question isn't whether they can look better. It's whether they'll be corrected with the right process and protected so the result lasts.
Professional foggy headlight restoration gives you a cleaner answer. The lens is inspected first, the oxidation is removed through a controlled sanding progression, the finish is polished properly, and the surface gets the UV protection it needs. That's what keeps the repair from turning into another temporary fix.
For drivers in Central Pennsylvania, The Mobile Buff headlight restoration service brings that process to your driveway or workplace. It's a practical option if you don't want to spend your weekend buying materials, testing your technique, and hoping you don't create more work for yourself.
You can also check local feedback through The Mobile Buff Google Business Profile if you want to see how people in the area describe the service experience.
If your lenses are only oxidized on the outside, they may be good candidates for restoration. If they have internal moisture or structural damage, it's better to know that before any sanding starts.
Clear headlights make night driving easier, improve how your vehicle looks, and remove the guesswork from every rainy commute. If you're in Central PA and want the job handled correctly, book with The Mobile Buff and get a professional headlight restoration that comes to you.

