
You see it on a bright afternoon after a quick wash. The paint looks sharp, then the door opens and the interior gives the whole car away. Seats look flat, the bolsters feel sticky, and there's a stale smell in the fabric that no vent clip can hide. That buildup comes from daily use. Coffee drips, body oils, wet clothes, pet hair, food crumbs, and fine grit all settle into the upholstery a little deeper than most owners realize.
A proper upholstery deep clean follows a set order because each step affects the result. Dry soil has to come out before moisture goes in. The cleaner has to match the fabric. Moisture has to be controlled, or you trade visible dirt for wick-back, stiff fibers, water rings, and odors that show up again two days later. DIY kits usually skip those details, which is why a seat can look cleaner at first and still not be completely clean.
That gap between surface improvement and a full reset usually comes down to tools, technique, and time. Even for basic prep work, the right vacuum makes a noticeable difference in seams and tight edges. A compact unit like the Simplicity Flash Handheld Vacuum can help with quick interior cleanup, and a guide to choosing the right vacuum for car detailing shows why suction, attachments, and reach matter more than people expect.
Professional detailing is not magic. It's process, judgment, and knowing where the risks are before they become expensive mistakes. That matters most with upholstery, because the wrong approach can leave a seat looking worse than it did when you started.
Gathering Your Professional Detailing Toolkit
The biggest gap between a quick DIY cleanup and a real upholstery deep clean is the equipment. If your plan starts with a spray bottle, a sponge, and a household towel, you're set up for a surface improvement, not a deep result.
The tools that actually matter
A professional setup usually starts with strong dry extraction. Before any liquid touches the seat, loose debris has to come out of seams, under rails, along piping, and deep in the weave. For tight interior work, a compact tool like the Simplicity Flash Handheld Vacuum is useful for quick pickups and narrow spaces, though a full detailing setup normally includes more suction and more attachments for deeper vehicle interiors.
The next essential is a hot water extractor. This is what separates deep cleaning from scrubbing dirt around. An extractor flushes suspended soil and cleaning solution out of the fabric instead of leaving it behind. Consumer spot cleaners can help with minor messes, but they usually don't deliver the same heat, recovery, or consistency you need when seats are heavily soiled.
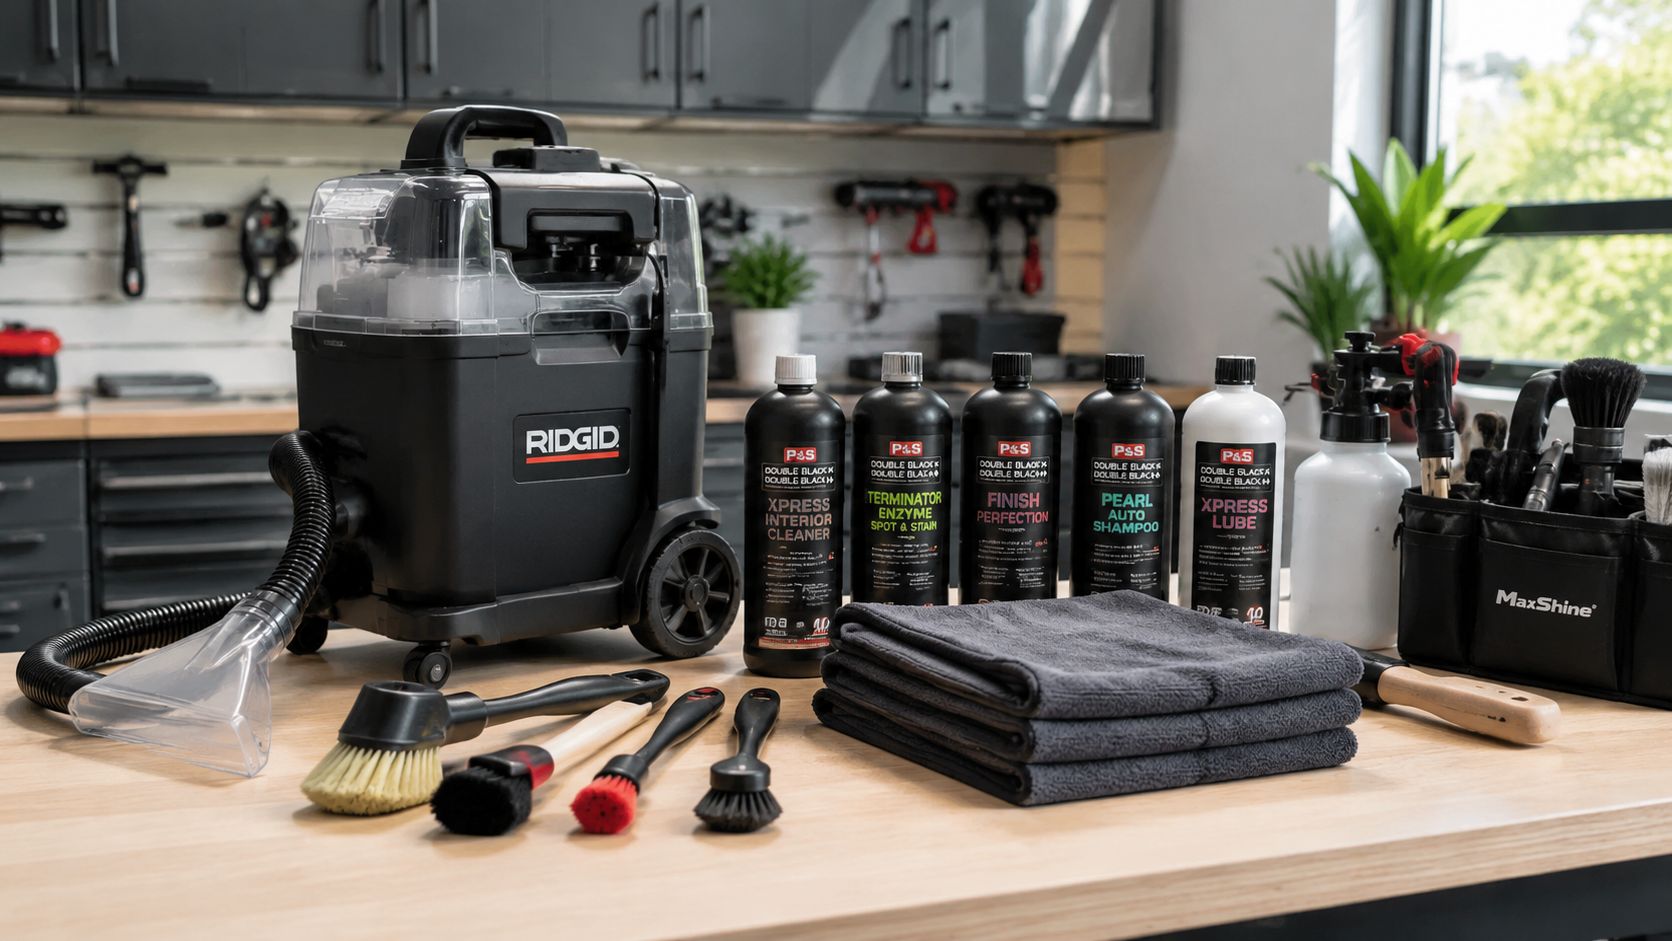
A steamer can also be valuable, but only in trained hands and only on suitable surfaces. It helps loosen grime in seams, cupholder edges, and textured trim. It isn't a shortcut for soaking seats, and it shouldn't be used indiscriminately on every material.
Other essentials include:
- Brush variety: Soft brushes for delicate fabrics and leather-adjacent areas, stiffer options for durable carpet or stubborn buildup.
- Fabric-safe cleaners: Low-residue, pH-appropriate products matter because sticky residue attracts new soil.
- Microfiber towels: White or light-colored towels make it easy to see whether you're still pulling contamination.
- Compressed air: Useful for blasting out dry debris before vacuuming and for helping with controlled drying afterward.
Why the upfront investment changes the DIY equation
It's often underestimated how specialized this work is. Good results come from pairing the right chemical with the right agitation, then fully removing both. That takes more than one gadget.
Practical rule: If you can't remove the loosened soil and product from the fabric, you haven't finished cleaning it.
If you're comparing machines before deciding whether to tackle this yourself, this guide to choosing the best vacuum for car detailing gives a good baseline for what matters in automotive interiors. Suction, attachments, maneuverability, and access matter more than flashy marketing claims.
The first hurdle in DIY isn't technique. It's having equipment capable of doing the job without creating a new problem.
Meticulous Preparation for a Flawless Clean
The dirtiest mistake in upholstery cleaning is getting the seats wet too early. Once dry dirt turns to mud, every step gets harder.
Start with a completely dry interior
A professional prep starts by clearing the vehicle out fully. Floor mats, child-seat accessories, bottles, wrappers, charging cords, loose change, paper under seats. Everything comes out. Small debris doesn't stay in one place during cleaning. It migrates, and once moisture gets involved, it starts sticking where you don't want it.
Compressed air comes next in the areas often overlooked. Seat tracks, stitching channels, seatbelt buckles, cushion gaps, the junction between seat base and backrest. Blowing out those spots before vacuuming pulls hidden grit into reach instead of letting it stay buried.
The multi-stage vacuuming most people rush
One pass with a shop vac isn't preparation. It's a preview.
A better process looks like this:
- Open-surface vacuuming first to remove loose crumbs, dust, and top-layer grit from broad seat panels.
- Crevice work second to target seams, piping, hardware edges, and tight channels.
- Brush-assisted vacuuming last to lift embedded hair, sand, and compacted debris the first passes missed.
Pet hair is where this really shows. Hair tangles into upholstery fibers and catches around stitching. A vacuum alone often skims over it. That's why pros combine suction with agitation tools rather than relying on airflow by itself.
The seat should look cleaner before any cleaner is sprayed. If it doesn't, prep wasn't thorough enough.
There's another piece most pages ignore. Capital Carpet Cleaning's upholstery guidance notes that a frequently underserved question is how often upholstery deep cleaning should be done for different use cases. That matters in vehicles because a commuter sedan, a family SUV, and a dog-hauling crossover don't build soil the same way. Some interiors need intervention sooner. Others just need maintenance vacuuming and spot treatment.
Preparation decides the final result
This is the stage that reveals whether a stain is really a stain, or just compacted dirt. It also protects the wet stage from becoming a slurry of loose debris and detergent.
A properly prepared seat lets your pre-treatment contact the fibers evenly. It also reduces how much liquid and agitation you need later, which lowers risk. Less overworking. Less residue. Less drying time.
Skipping prep doesn't save time. It only pushes the mess deeper into the job.
Deep Cleaning Different Upholstery Materials
Car interiors don't reward one-size-fits-all cleaning. Fabric, leather, vinyl, and suede-like materials react differently to moisture, heat, and agitation. The safest process is always material-specific.
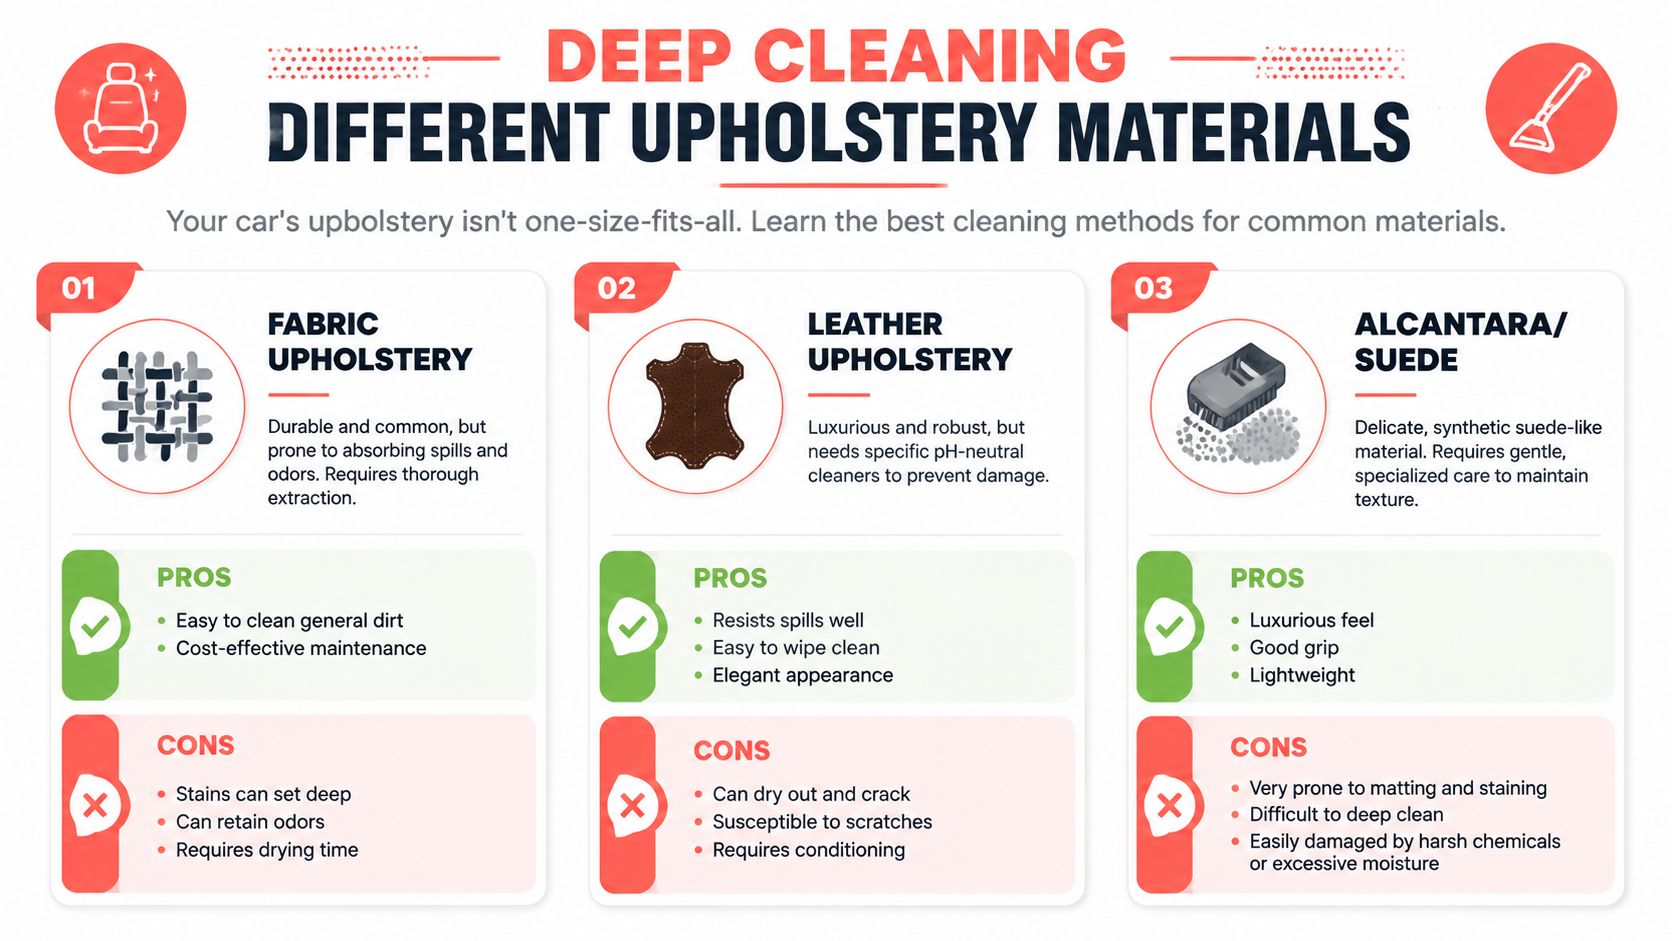
Fabric upholstery
Fabric seats usually hold the most hidden contamination because they absorb spills, body oils, and airborne dust instead of shedding them. Consequently, extraction matters most.
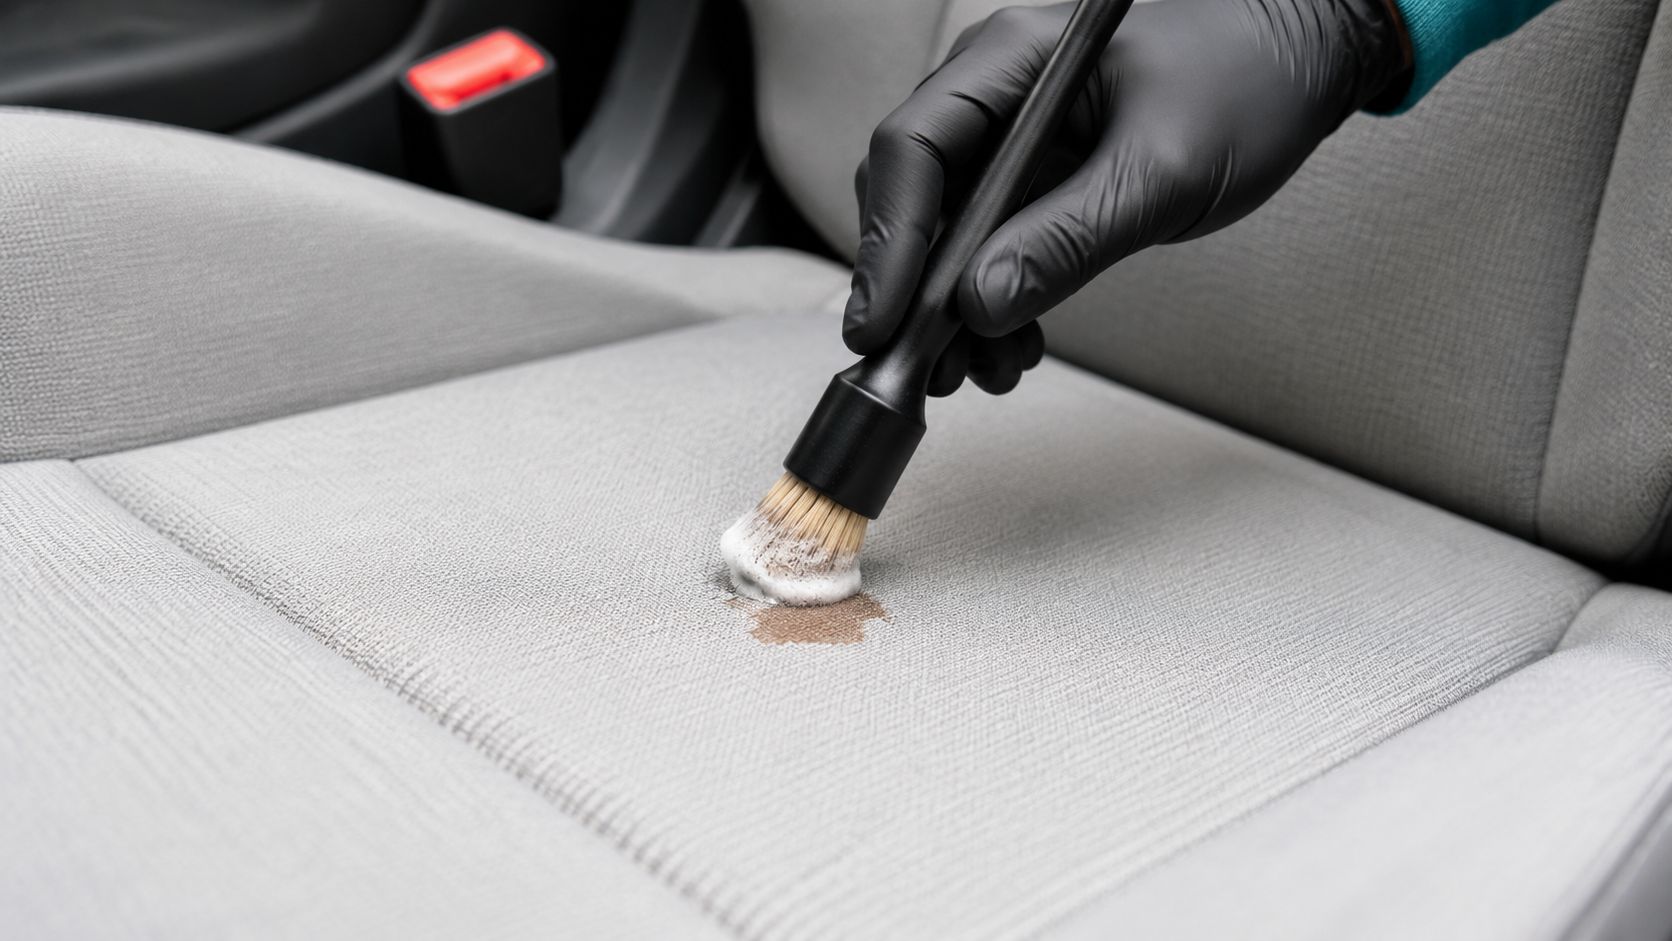
A strong professional sequence is consistent: dry vacuuming first, then a fabric-safe pre-treatment, controlled agitation, and repeated extraction passes until the towel or extraction stream stops pulling visible soil, as demonstrated in this professional microfiber cleaning demo. That last part is important. One pass often isn't enough. Seats can look improved well before they're thoroughly rinsed clean.
Common DIY failure points on fabric include over-saturating the foam, using too much chemical, and scrubbing aggressively in one small area. That can distort the nap, push stains outward, and leave lingering moisture in the cushion beneath the visible fabric.
Leather upholstery
Leather needs restraint more than force. It doesn't benefit from the same wet process used on cloth. Harsh degreasers, all-purpose cleaners, and excessive heat can dry the finish, alter the feel, or leave it looking patchy.
The safer method is a pH-neutral leather cleaner, light agitation with a soft brush where needed, careful wipe-off, and then conditioning if the product system calls for it. The goal is to clean the surface and pores without stripping the material.
If your interior includes coated automotive leather and you want a more focused walkthrough, this leather seat cleaning guide for car interiors is worth reading before experimenting with stronger products.
Vinyl and synthetic trim
Vinyl is more forgiving than leather, but that doesn't mean it's immune to damage. Strong solvents can discolor it, and overly stiff brushes can leave fine scratches, especially on darker panels or softer trim finishes.
A professional approach uses an interior-safe cleaner, moderate agitation, and towel removal rather than flooding the surface. On textured vinyl, the trick is getting into the grain without grinding dirt across the finish.
Here's the quick comparison:
| Material | Best professional approach | What often goes wrong |
|---|---|---|
| Fabric | Pre-treat, controlled agitation, full extraction, careful drying | Too much water, too much soap, incomplete rinse |
| Leather | pH-neutral leather cleaner, soft brush, wipe clean, condition as needed | Harsh cleaners, overscrubbing, heat misuse |
| Vinyl | Interior-safe cleaner, moderate brush work, towel removal | Solvent damage, discoloration, abrasive scrubbing |
Alcantara and suede-like materials
These are the easiest to make worse. Alcantara and similar microfiber suede materials can mat down, darken unevenly, or lose their texture if they're saturated or scrubbed too aggressively.
For owners with high-end upholstered furniture or delicate textiles at home, this expert guide for luxury homeowners in Atlanta gives a useful mindset that also applies in vehicles: delicate fibers need low aggression, material awareness, and patience. That same principle holds for premium automotive inserts and suede-like trim.
Clean for the material you have, not the mess you hate. The mess doesn't get to choose the chemistry.
The right cleaner isn't the “strongest” one. It's the one that solves the problem without changing the material you paid for.
Conquering Stubborn Stains and Odors
General grime is one thing. Isolated coffee spots, oily headrest shadows, pet hair woven into seat seams, and mystery odors are where upholstery work gets technical fast.
Stain removal without making the stain bigger
Different stains need different chemistry. Protein, oil, dye transfer, coffee, and ink don't respond the same way, so a single off-the-shelf spray usually ends in partial improvement and a lot of rubbing.
A professional spot treatment approach usually follows a few rules:
- Identify before treating: If you don't know whether it's oil-based or water-based, don't guess with a harsh chemical.
- Work from the outside inward: That helps prevent rings and spreading.
- Blot and extract, don't just scrub: Agitation helps, but removal is the finish line.
- Test in a discreet area first: Especially on delicate or dyed materials.
One of the most common technical mistakes is residue. Bissell's upholstery care guidance notes that overusing cleaner or failing to extract it fully can leave residue that re-attracts soil and causes stains to reappear. That's why low-moisture application and full removal matter more than how dramatic the foam looks during the scrub.
If you're dealing with a specific spill type, this guide to choosing a car upholstery stain remover can help you think through product fit before you reach for the wrong bottle.
Pet hair and embedded contamination
Pet hair can be tougher than many actual stains. It hooks into woven fibers and wraps around seams where vacuums struggle to grip it. Rubber tools, specialty brushes, compressed air, and repeated directional passes usually work better than suction alone.
The same areas that trap hair also trap odor-carrying material. Dander, saliva, and tracked-in organic residue don't disappear because the seat looks cleaner.
A short visual demo helps show why process beats random scrubbing:
Odor removal has to target the source
Sprays and hanging fresheners only layer scent over the problem. If the odor comes from spilled milk, pet accidents, mildew from old moisture, or organic grime deep in the fibers, masking won't fix it.
Professional odor work usually starts with source identification. Organic contamination often responds best to enzymatic treatment because the chemistry targets the residue causing the smell. For larger cabin-wide odor issues, professional detailers may use a treatment such as a Bio-Bomb to address odor-causing contamination throughout the vehicle interior, not just on the visible surface.
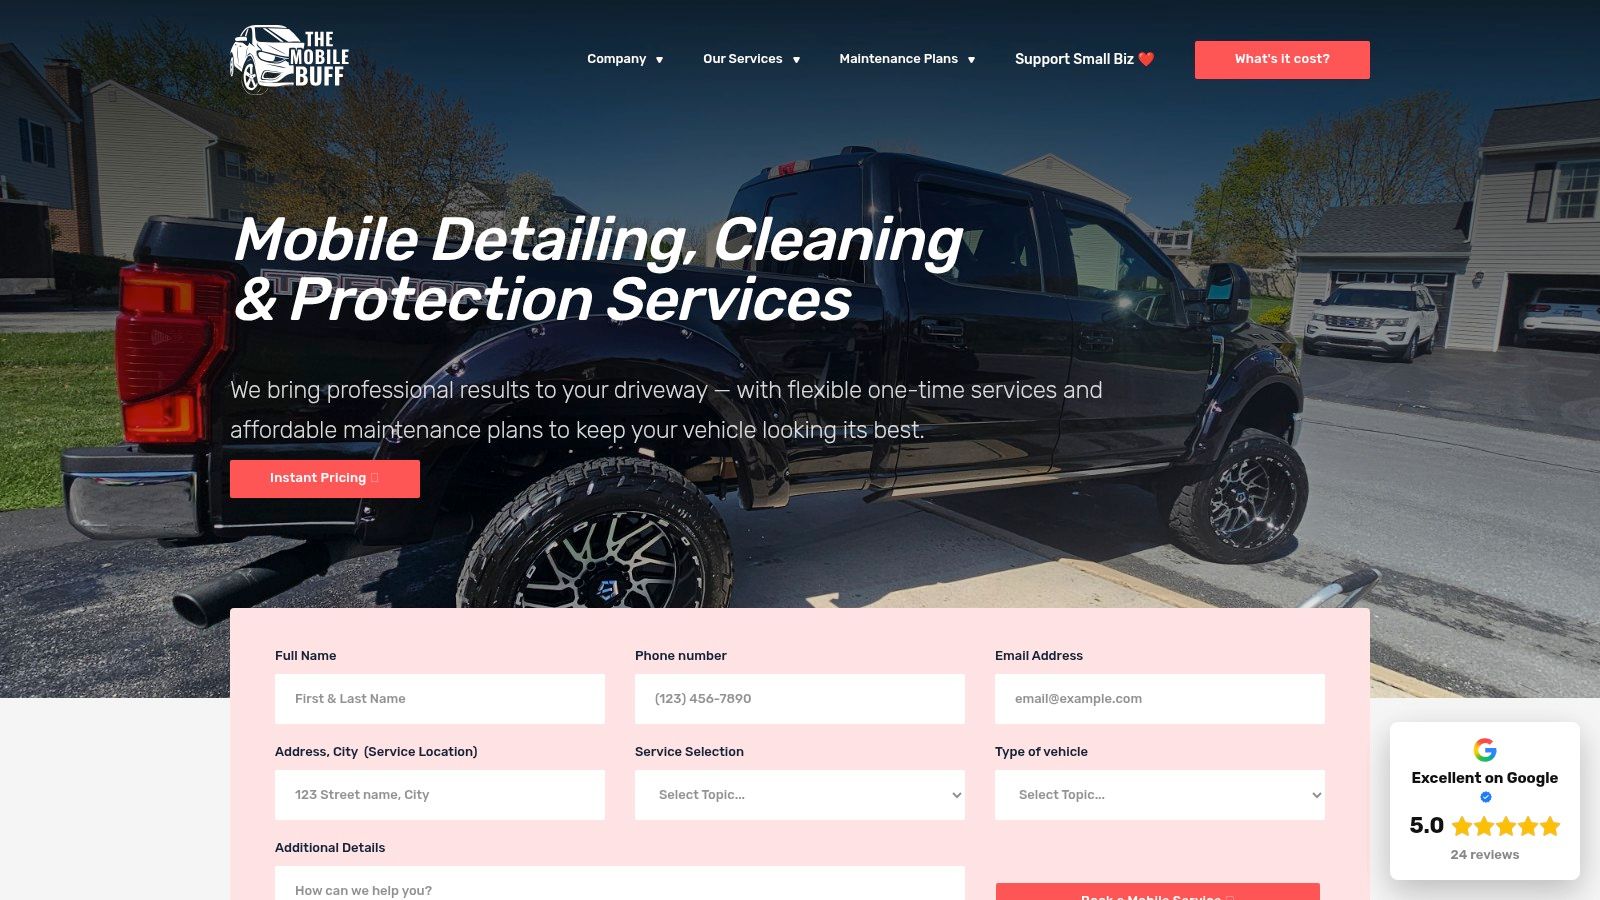
The Mobile Buff offers odor elimination and deep-cleaning shampoo treatment for seats, carpets, and fabric surfaces as part of its interior detailing services, including Bio-Bomb treatment when the odor issue calls for it. That kind of service is useful when the smell has moved beyond one stain and into the cabin as a whole.
If the odor comes back after the seat dries, the source was never removed. It was only covered up.
Finishing Touches for a Lasting Clean
A seat can look clean and still be unfinished. The final phase decides whether the result lasts or whether the interior starts smelling sour again a day later.
Drying is part of cleaning
Damp upholstery is risky. Moisture trapped in cushion foam or under the fabric can lead to musty smells, and once that smell sets in, the interior feels dirty no matter how much you cleaned it.
Professionals speed drying with airflow, open-door ventilation when conditions allow, and careful moisture control during the cleaning itself. Fast drying starts earlier than is commonly assumed. It begins with not over-wetting the seat in the first place.
For households thinking more broadly about allergen management, Purified Air Duct Cleaning's dust mite guide is a useful reminder that soft surfaces hold more than visible dirt. In vehicles, the same practical lesson applies. Fabric maintenance matters because contaminants settle into fibers long before they become obvious.
Protect the surface you just restored
Once the material is clean and dry, protection makes maintenance easier. Fabric guard can help reduce how quickly future spills soak in. Leather conditioners and protectants help preserve feel and reduce drying from heat and sunlight, assuming the product matches the material.
A good finishing routine includes:
- Light final grooming: Reset the nap on fabric or suede-like inserts so the finish looks even.
- Surface protection: Apply a suitable fabric or leather protectant after the material is fully dry.
- Post-clean inspection: Check seams, seat edges, and lower bolsters where residue often hides.
- Maintenance habits: Quick vacuuming and fast spot cleanup keep small issues from becoming extraction jobs.
Industry guidance commonly recommends upholstered furniture be deep cleaned every 3 to 6 months for heavily used fabrics, while lower-use pieces may be cleaned annually or bi-annually, and homes with pets or children may need more frequent service, according to Duocare's upholstery cleaning frequency guidance. Vehicle interiors aren't living-room sofas, but the maintenance logic carries over well. High-use seats need more attention than occasional-use ones.
The clean lasts longer when the routine is realistic
Most owners don't need constant full extraction. They need a practical maintenance cycle. Vacuum regularly, address spills immediately, and don't wait until body oils, dust, and food residue have bonded into the fibers.
That's how a deep clean stays a reset instead of becoming a rescue.
DIY Deep Clean vs Professional Detailing
Saturday morning starts with good intentions. By early afternoon, the seats are still damp, the stain near the seatbelt anchor looks bigger than it did before, and the car smells like cleaner instead of clean. That gap between a basic refresh and a proper upholstery deep clean is where DIY usually gets expensive in time, effort, or mistakes.
Routine interior care is absolutely worth doing yourself. Vacuuming, wiping plastics, and catching fresh spills early save a lot of trouble later. A true deep clean is different. It asks for the right machine, the right chemistry, and the judgment to know how far to push each material.
What DIY really asks of you
The shopping list is longer than many owners expect. A solid vacuum helps, but it is only the start. You also need fabric-safe cleaners, brushes with the right stiffness, absorbent towels that will not bleed dye, and extraction equipment that can flush contamination out and recover moisture instead of pushing dirty solution deeper into the foam.
Technique matters just as much as tools. Agitate too hard and delicate fibers fuzz or distort. Use too much product and residue dries sticky, which pulls in new soil fast. Add too much water and the seat can stay wet far longer than expected, especially in dense foam or poorly ventilated areas.
That is the part DIY kits rarely explain.
A professional is not only cleaning what is visible on the surface. The job also involves reading the material, controlling moisture, managing dry time, and spotting the difference between a stain that is removed and one that is about to wick back as the fabric dries.
Why owners hand this job to a pro
As noted earlier, demand for carpet and upholstery cleaning services has grown. That tracks with what detailers see every week. Vehicle owners are treating interior restoration as maintenance, not a once-a-year cosmetic extra.
A skilled detailer brings pattern recognition that is hard to fake. Coffee, protein-based spills, dye transfer, body oil buildup, pet contamination, and mildew risk do not all get treated the same way. Some fabrics can handle thorough extraction. Some need lower moisture and slower, more controlled cleaning. Leather and suede-like materials raise the stakes even more.
Here is the practical comparison:
| Option | What you handle | Main trade-off |
|---|---|---|
| DIY deep clean | Tool buying, product selection, stain identification, extraction, and dry-down monitoring | Lower upfront cost if you already own equipment, higher time commitment and more room for error |
| Professional detailing | Booking the service and giving access to the vehicle | Higher service cost, but better tools, faster workflow, and a more predictable result |
The overlooked value of convenience
Convenience is not a small factor. It is part of the value. A full DIY upholstery job can take up most of a day once you count setup, testing products, repeated cleaning passes, towel work, and waiting for the interior to dry enough to use the car again.
Hiring a detailer makes more sense when the seats are heavily soiled, the odor has settled in, the stain source is unclear, or the material is easy to damage. In those cases, you are paying for more than labor. You are paying for controlled results and a lower chance of turning a dirty seat into a wet, streaky, sour-smelling one.
If you are in Central Pennsylvania and want a factual look at local service feedback, you can review The Mobile Buff's Google Business Profile. For interiors that need more than surface cleanup, professional detailing usually saves a lot of trial and error and delivers a cleaner, drier finish.
